Introduction
For the fuselage of my latest glider I build a mold including the tail boom.
However I never got the mold to work satisfactory.
I didn't manage to get a combination of layup and inflatable bladder that worked well.
I tried a lot of things.
Different inflation bladders, different layups, different ways of holding the pressure, different ways of getting the fabric inside the mold.
I got some results, but never a usable one.
So I tried rolling tail booms myself using the information I found online as a starting point:
- Make Your own Booms by Dave Hill
- SuperGee II boom
- Carbon-Tailboom-Construction
- Carbon sticking while rolling boom
- Make your own tail boom
- DLG boom cheaply made
On this page I want to show my slightly modified process and give some hints of rolling your own tail boom.
Mandrel
If you want to roll your own tail boom you need a positive model to wrap your fabric around.
A steel mandrel is perfect as you can polish and wax it for easy release.
Also you can heat-cure and when the mandrel cools down later it will shrink, releasing your tube.
However I don't have such a mandrel.
I also don't have the equipment to turn my own mandrel.
What I have is a 3D printer.
So I tried printing my own mandrel and glued the pieces on a 5mm steel rod.
The resulting core worked fairly well for me.
The drawbacks of the PLA mandrel are:
- Not self-releasing as the mandrel will not expand and shrink when heat is applied.
- No heat curing, as PLA gets mushy when heated. Don't even leave it laying in the sun. It will distort.
- No heat shrink wrap. I tried it. Even careful application of a heat gun left impressions on the mandrel.
On the positive side you can print a mandrel that includes most of your pod.
This means that there is no weakness between the boom and the pod.
It's all one piece.
Also you don't need to have a round mandrel or one with a straight taper.
As long as the mandrel has a taper you can slide the finished boom off.
I even used a mandrel that got smaller again at the front.
You will need to make a cut and use a little force but I was able to slide the fuselage off the mandrel.
Weights
In planes it's all about weight. Especially with f3k planes with their long tails. One grams of weight at the rear might as well mean three Grammy's of ballast at the front. There are some weights from different sources as reference:
- 16.0g boom plus 13g fuse (SuperGee II plans)
- 50g fuselage (Blaster III technical reference)
- 40g fuselage (Vortex 3 info page)
Whatever layout you are thinking about, test it first. I made a couple of short test pieces with different layouts just to see buckling strengths and weights. Usable layouts always have a weight between 0.025g/cm to 0.035g/cm. With these figures you can easily calculate the total weight of your boom before even starting.
3D printed mandrel
I sanded my first positive model out of wood. This works, but since I have my 3D printer I am printing the mandrel. The drawback of course is that I can't hot-cure the boom while it's still on the mandrel.
I constructed the body in Blender. It's fairly easy even for beginners. You just create a circle and then extrude it a couple of times while scaling it. For a straight taper two circles are sufficient. Since I also constructed the pod I spend a little bit more time. And then I had to do it all over again because the first version of my pod was a little bit cramped for normal sized servos.
The mandrel has to be printed in pieces since my printer has a print area of 21x21cm. So I ended up printing around eight halves which where then glued onto a 5mm steel rod. You should use a solid core since you might need to apply a little force when separating the mandrel from the finished boom. The pieces were glued with 5m epoxy and then filled and sanded. You won't need a 100% smooth surface, but you shouldn't have any cavities that would impede the release process.
For your reference I am adding the files that I used:
Releasing
In the forums I have read about using Vaseline and a wrap for releasing. This didn't work for me. The Vaseline sticks too much to the mandrel and I couldn't slip it off.

I also used spiral wrapping it with tape. This worked quite well for the straight taper parts of the mandrel but not for the curved ones. When I tried to shrink the tape it didn't shrink uniformly and I distorted the mandrel. Remember: no heat.
Gluing a foil around the mandrel with sticky tape worked, but it gave me wrinkles for the curved sections of my mandrel.
The best method for me was wrapping it with Saran wrap with an inch overlap and no tacky tape.
Saran wrap is the thin, clingy foil used to cover food.
You might have a roll of it already in your kitchen.
If you want, you can also use some talcum between the mandrel and the foil, however I didn't notice any improvement.
When you want to release the boom from the mandrel you hammer forcefully at the rear part.
My mandrel has a stub of the steel rod sticking out at the end.
When I want to release the finished boom I put on some gloves (in case of sharp edges) and hammer it forcefully and as straight as possible on a stone brick.
In the one case where this didn't work, I put the mandrel inside my fridge for an hour.
Afterwards I was able to get it released with another couple of wacks.
The Saran wrap needs to be peeled from the inside of the boom. A rod with some sanding paper glued around the end helps. Since the weight of the foil is negligible you could also just leave it in.
Testing stuff
Before proceeding to the full boom it makes sense to run a set of tests. There are a couple of things that you might want to test first. You can use the length of the mandrel and try out different things at once instead of making a whole boom and later on notice that something didn't work out as well as expected.
- Test if releasing works. Boom to mandrel and boom to mylar.
- Test wrapping the boom.
- Test wrapping non-straight parts of the boom
- Test different layouts
- Test hoop stiffness
- Test weights
Preparation
As a preparation you should make a pattern of the mandrel. This is useful for cutting the fabric to size and also for cutting the foil that we will use to create a smooth skin. I just put tape around the mandrel and then cut it open at one side and place it on a piece of cardboard. On this pattern I mark the start of the pod (from that point on I want to use Kevlar or glass). You can also mark the location of the wing in case you want to add extra reinforcement for the wing attachment.
Now you can prepare the foil used for the surface
It's similar to bagging a wing, just that the Mylar has to be thinner because of the tighter radius around the boom.
I use a .3mm foil that I had laying around.
For a straight taper you can use one large piece.
Cut that piece a little bit larger than the patter.
You don't want too much overlap or else you end up rolling the Mylar twice around the boom and you can't apply enough pressure.
For the areas without a straight taper my method is to use two pieces of Mylar, top and bottom.
They conform much better against the curves and provided you wrap them tight enough you won't get wrinkles.
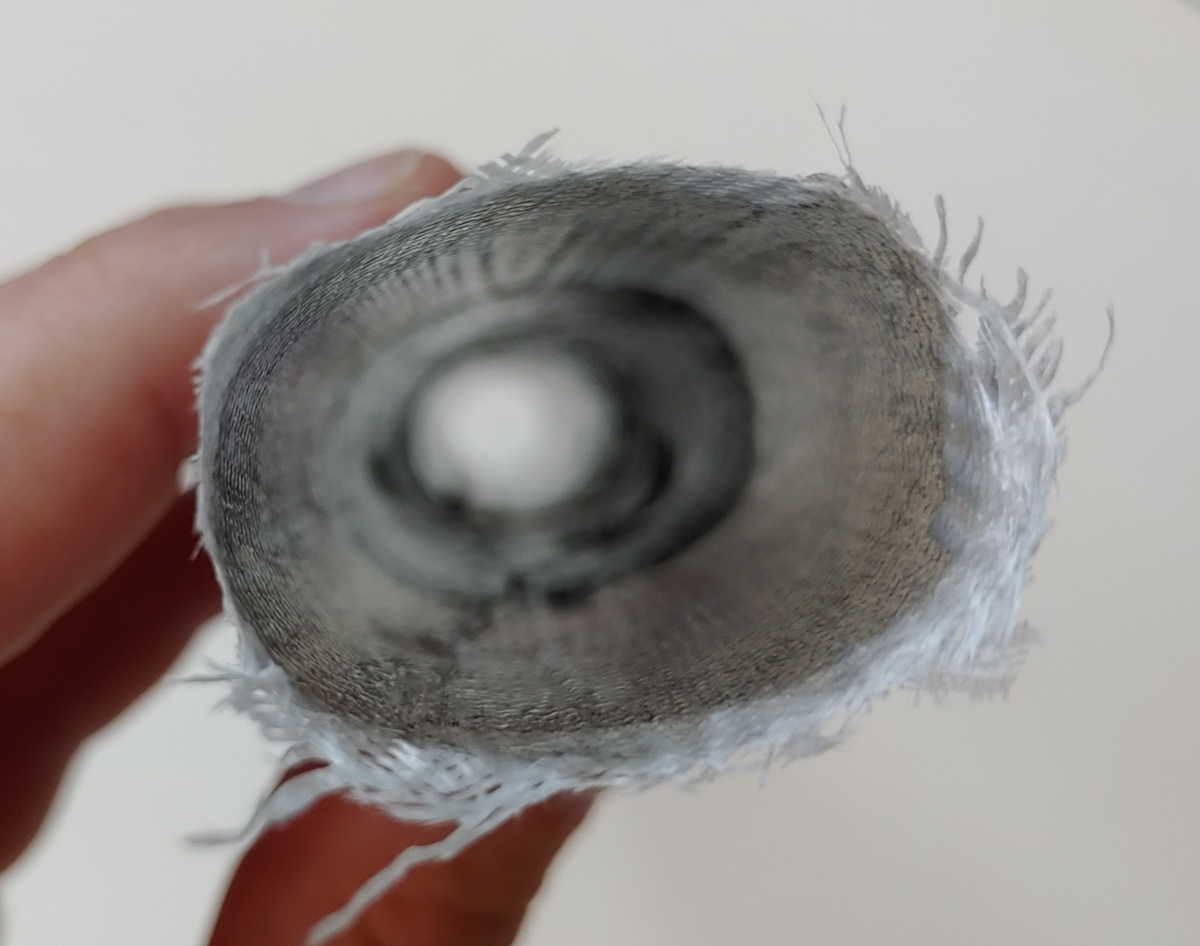
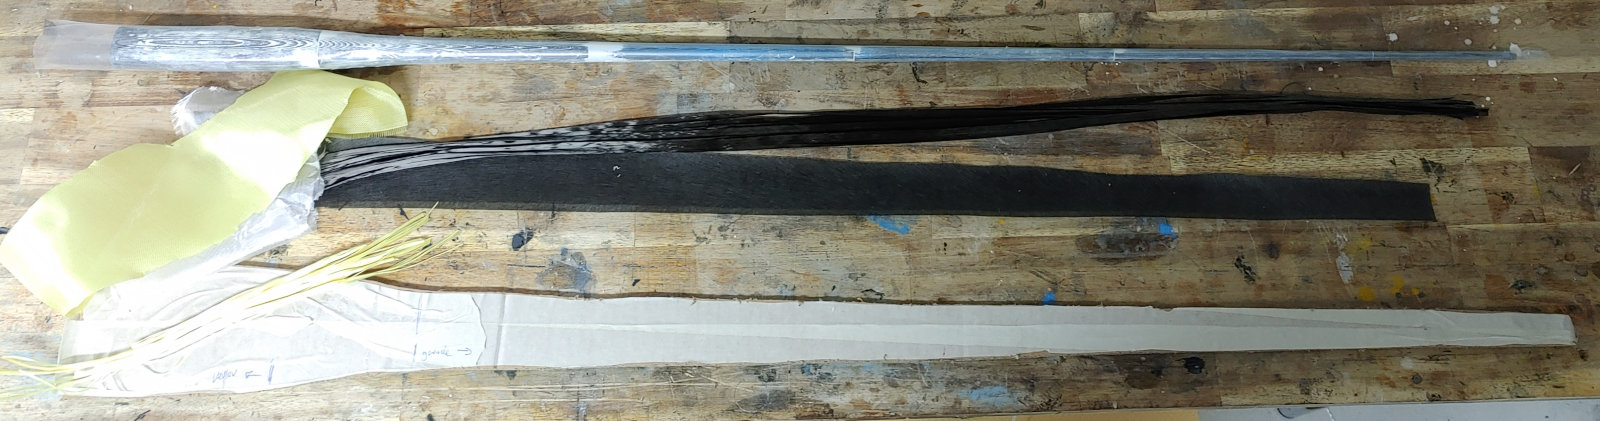
Then you need to prepare your fabric.
- Back: four layers of 80g unidirectional carbon plus 25g glass
- Middle: one layers of 80g unidirectional carbon plus 25g glass plus two layers 80g carbon fleece for loop resistance
- Front: two layers of 80g glass plus 25g glass
Of course you have to be able to warp your fabric around the mandrel. Some of the layups can be quite stiff and thus really tricky to wrap. The easiest is the light glass fabric, followed by unidirectional carbon. Having an outer layer of light galas always helped me when wrapping. Whatever you choose, I was able to wrangle all the layups in place after some sweat and swearing.
Finally you need to get your ribbon. I use the thin cheap stuff from the 1€ shop. It's fairly strong, has one smooth side and doesn't shrink when heated. I don't care about the smooth side and the non shrinking. I use it because it's strong enough so that I can wrap it tight. Other people have used VCR tape or you can also buy a tape from R&G. Both these tapes are rather wide so they don't work that well if you don't have a straight taper.
Wetting it out
Once everything is prepared you can start wetting the fabric out. I do that outer layer first. That means, the layer that is supposed to be on the outside of the boom is the lowest one. So I usually start with the 25g glass fabric. It works best when placing the glass on a foil already wetted out with a thin layer of epoxy. Then I continue placing all the pieces on top, wetting each one out with a foam roller. It's better to use too much epoxy at this stage than not enough.
As the next stage I remove excessive epoxy with pieces of news paper. You can also use toilet paper, but wet news paper gets dark and thus it's easier to see if you still have places with too much epoxy. I've read about quite elaborate schemes to remove most of the epoxy from the fabric. However it doesn't seem to make much difference for me and I like the shiny surface my method gives me. So I press down fresh pieces of paper with my hands until I removed most of the excessive epoxy.
Placing the fabric
This is the frustrating part. The fabric will have wrinkles and try to separate from the mandrel. In the forum I've read about a lot of tricks, but they only work with a straight taper. In my case I just somehow wrapped the whole mess around and tried to straighten it somewhat.
Here are some tips to help you:
- Use 25g glass as the outer layer and cut it over size. This layer helps enormous since it's clingy and not stiff at all.
- Practice with the test pieces.
- Spiral wrap a thin black thread around the fabric and the mandrel to keep everything in place.
Wrapping it up
Now that the fabric is somewhat wrapped around the mandrel it's time to squeeze it in place. The first layer is the Mylar. Tape the Mylar round the layup at the pre-planned places with some sticky tape. This is just a first, rough positioning, but already make sure that the Mylar wrapped as tight as possible.
Now start wrapping the whole thing tightly with the ribbon. Starting from the front and wrap it in the same direction as the Mylar overlap. This is important as it allows for a tighter compression around the mandrel. You also need to cut the tape used to hold the Mylar initially. If you don't do that then the tape might impede the compression.
Starting is easy. You just tape the ribbon in place and start wrapping. Wrap it as tight as possible. People have been using some kind of wrapping machine, either using a cordless screwdriver or lathe. I found hand wrapping giving me the best results. It's trying and it takes around half an hour but you have the best control.
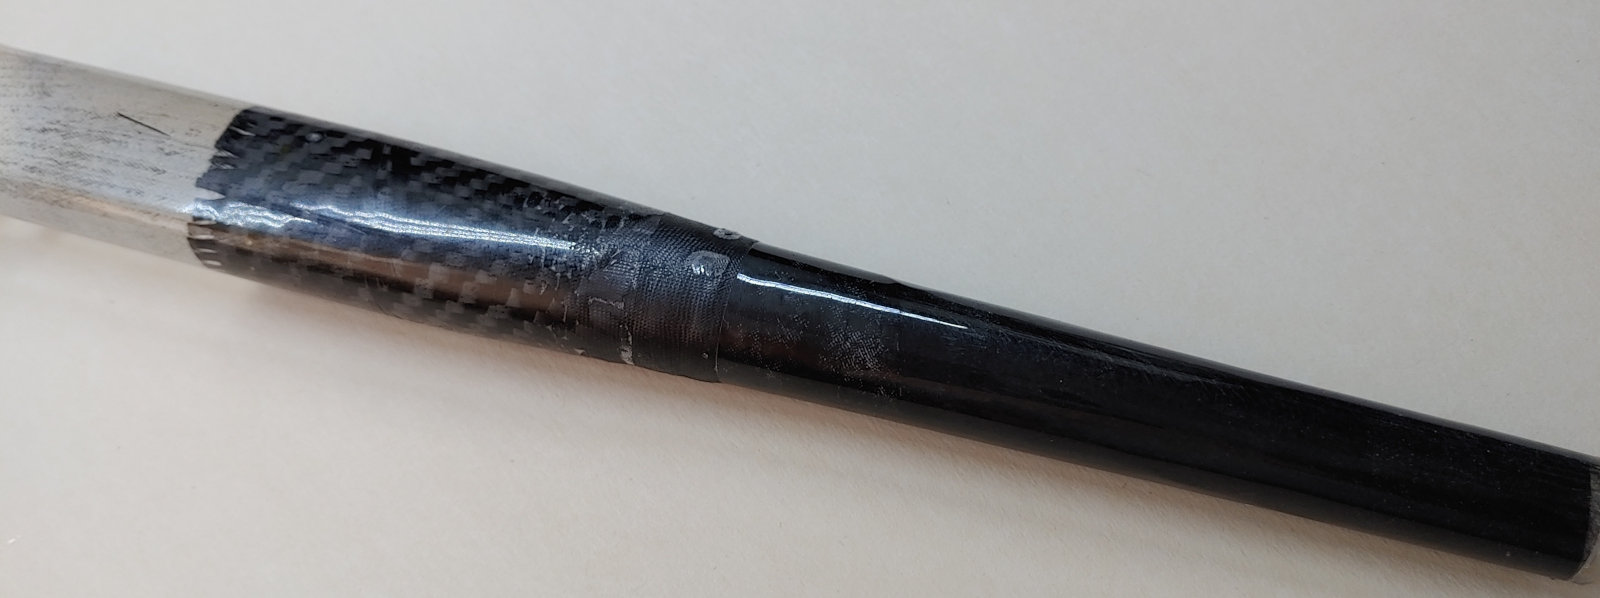
Removing the boom
Removing the wrapping and the foil should be easy. You just unwrap the whole thing. The finish should be pretty shiny with some ridges where the foil ended. In some cases there might be some wrinkles in areas where the taper was not straight. That's just bad luck and you can sand it down and repair it.
If you did everything right, then releasing the finished boom will take some force but should be possible.
Never did the boom slide just off for me.
Usually I need to hold it tight and hammer the back side a couple of times on a hard floor or use a hammer.
This is why you have the solid core for the mandrel that extends over the end.
Twisting the mandrel or bending it never worked for me and might open gaps in the mandrel.
If everything fails then you have to cut the boom open and try again. If you want to save the boom but not the mandrel then you can also try to heat the whole package until the mandrel gets soft and then try to remove it. Epoxy can cope with temperatures up to 90degC but the PLA gets soft way before that.
Curing

After your released the boom from the mandrel it's still a little bit soft. The resin will reach it's final strength only after some curing. The 24h epoxy that I am using reaches it's final strength after a couple of days at room temperature. However the recommended curing process is 70deg.C for an hour and then 80deg.C for another couple of hours. At home such temperatures are hard to reproduce. Instead I put my finished booms in my hot car, in the sun for three days. That seemed to do the trick. At least in the summer.