Das Bi-Resin Modell vorbereiten
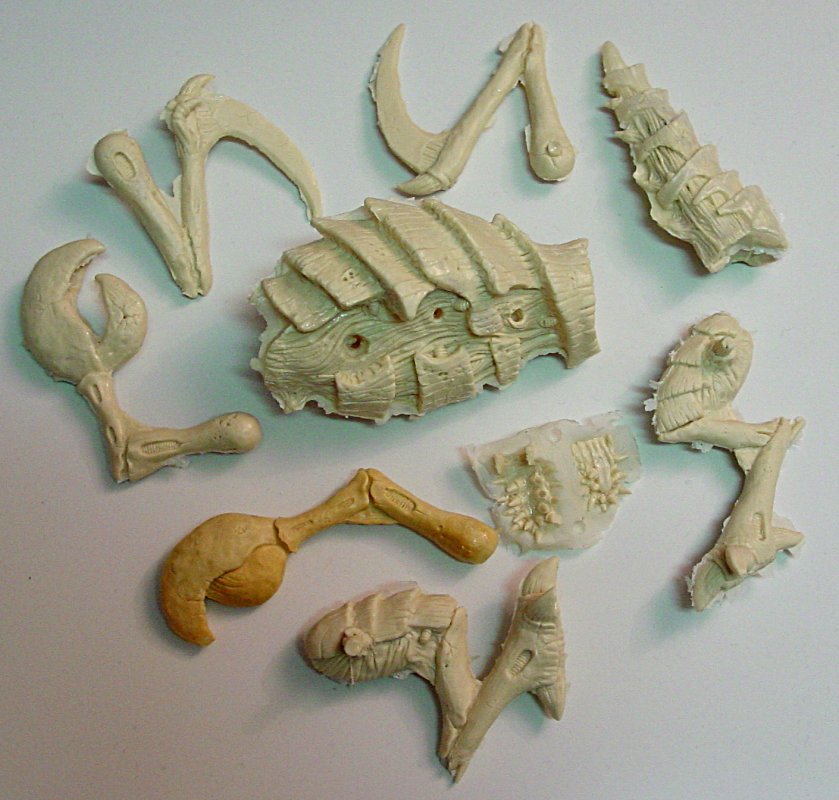
Die Resin Teile |
The model is made out of bi-resin a quite hard plastic.
It can be filed, sawed and drilled.
However bi-resin dust can be toxic.
When working with bi-resin please wear a mask or work outside.
Preferably both.
The casting process leaves some marks which should be cleaned up beforehand.
The flash-lines can easily filed away.
Small holes can be filled with glue or green stuff.
Biggers holes can only be filled with green stuff (or milliput if you can't get your hands on green stuff).
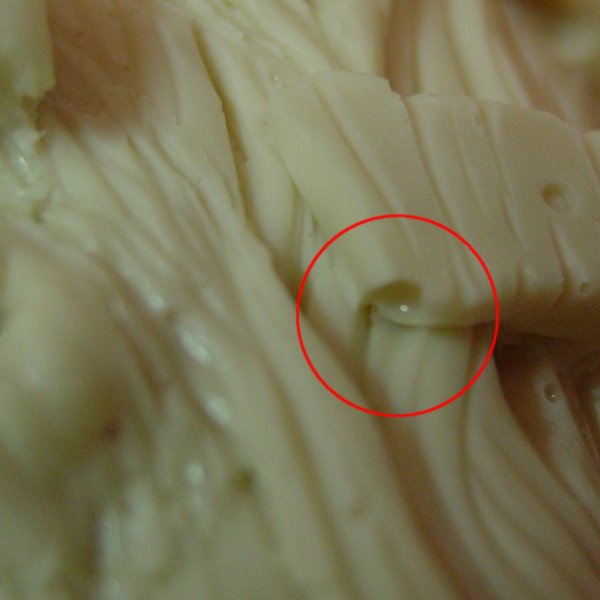
Air bubbles left by the casting process |
Bigger air bubble and flash lines. This bubble looks quite severe but it is at the underside of the foot and can easily be repaired. |
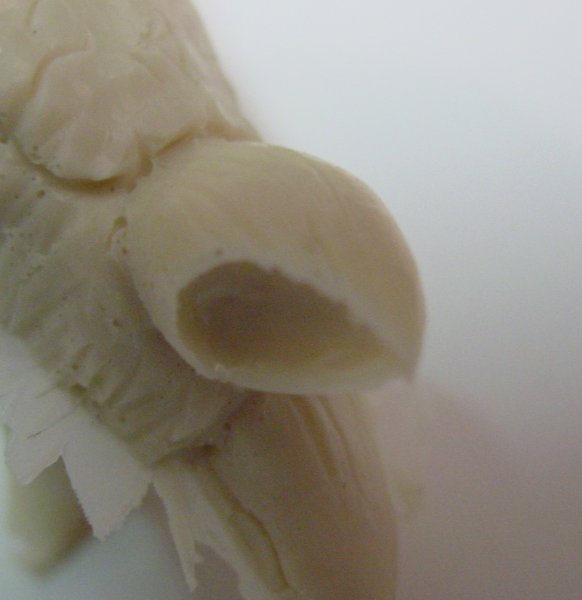
Sometimes the end of a horn or claw is not present. In such a case I propose to reconstruct the tip with green stuff or file the end so that it looks as if the tip was damaged in combat.
Assembling the model
Pose
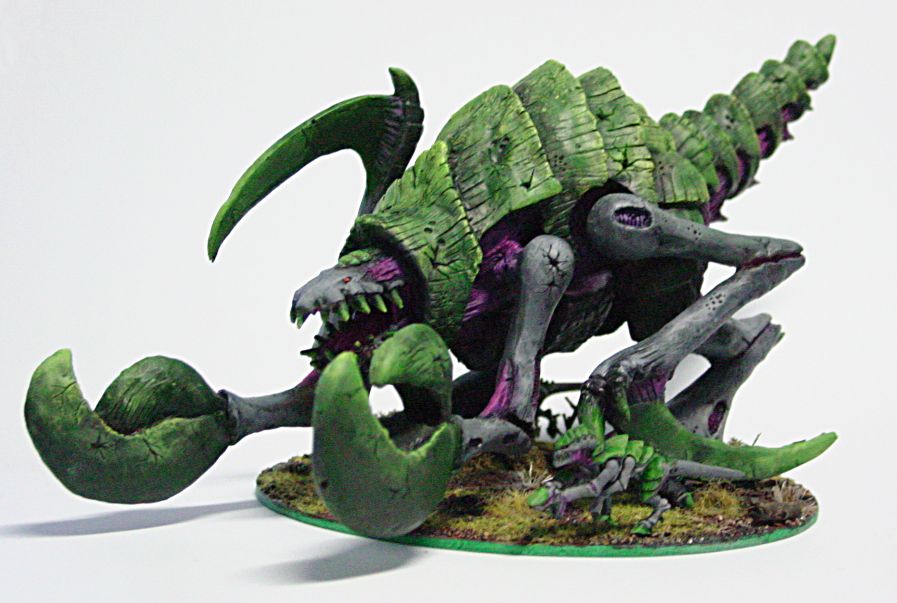
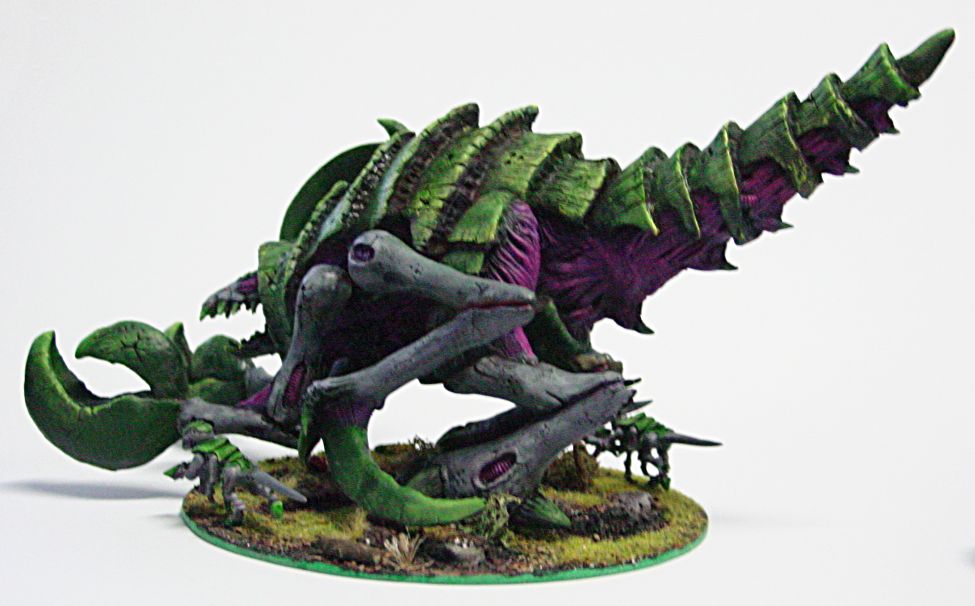
The Monster. |
Before assembling the model think about the pose. Will it stretch the limbs in all directions or will it rather keep to the ground. Regardless of what you decide, it should look like it is currently moving. This is most easily archieved if the whole model is out of balance. So standing on one food is a good idea, or at least leaning forward.
Before continuing the model check if all the parts fit together.
Sometimes you need to enlarge one of the holes.
It also doesn't hurt to pin some of the parts.
Expecially the arms are easier to glue if you have a steel wire to hold them in place.
Then you should check for gaps.
The body and the tail part sometimes don't fit together to well.
Just file away until it fits.
The remaining gap can be filled with PVA glue or better with green stuff.
You also should wash the model with warm water and soap.
The basecoat will hold better and you will wash away remaining dust from the filing.
As a glue you could use Cyaneacrylate or better a five minutes epoxy glue. Please read the instructions for your glue.
Painting
The back side. |
In general you do the same steps as you did with all your smaller models.
First wash it, then basecoat, then paint.
I used a black basecoat.
The basecoat should be done with a spray-paint.
This gives you a nice even base for your further paint job.
It could happen that the paint does not dry completly because of a chemical reaction.
I did not have problems with my cheap car-paint but if you are in doubt check it first with a small piece.
Then I continued with the color.
I recomend starting with a big brush for the first layer or else it will take ages.
For my monster I chose the colors gray, purple and green.
All flesh is painted black and highlighted with purple and magenta.
The normal plates are painted with gray.
The thick armour plates and claws teeth are painted with "Darkangles Green" and highlighted with "Gobo Green" and yellow.
At the end I used my big brush to splatter small yellow dots all over the armour plates.
The base
The base is a circle of hard foam core and has a diameter of 8cm. I glued some small rocks of balsa-wood on top and after that a layer of sand. I wanted a contrast to the monster and so did a happy and friendly base with bushes and grass. To achieve this I painted the sand in a lighter brown and highlighted with "Bleached Bone". After that I glued green static grass, lichen bushes and some small branches on top.
Finishing touches

Termagants crawl around their big brother. |
Most big models really cry out for some finishing touches. They turn a nice model in to a diorama which not only looks good on the battlefield but also in your vitrine.
I placed two termagants in the shadow of this hulk, painted in the same colors of course.
Maybe next time I place some more. Have you seen "Starship troopers"?
Then I looked into my bit's box for some more parts and found a spacemarine helmet and a bolter.
They were painted and also placed on the base.
As a afterthought I could have used some hot-glue to make slime.
My next variant will be a lot more slimy for sure.
Wow. Finished. Ready to rip some tanks apart.
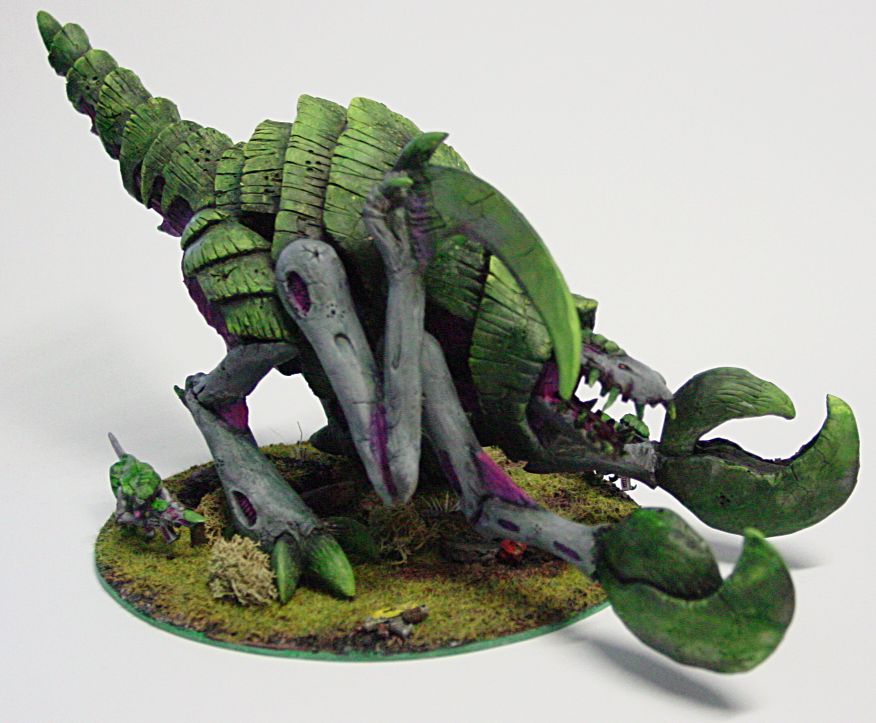
The Monster from the side. |
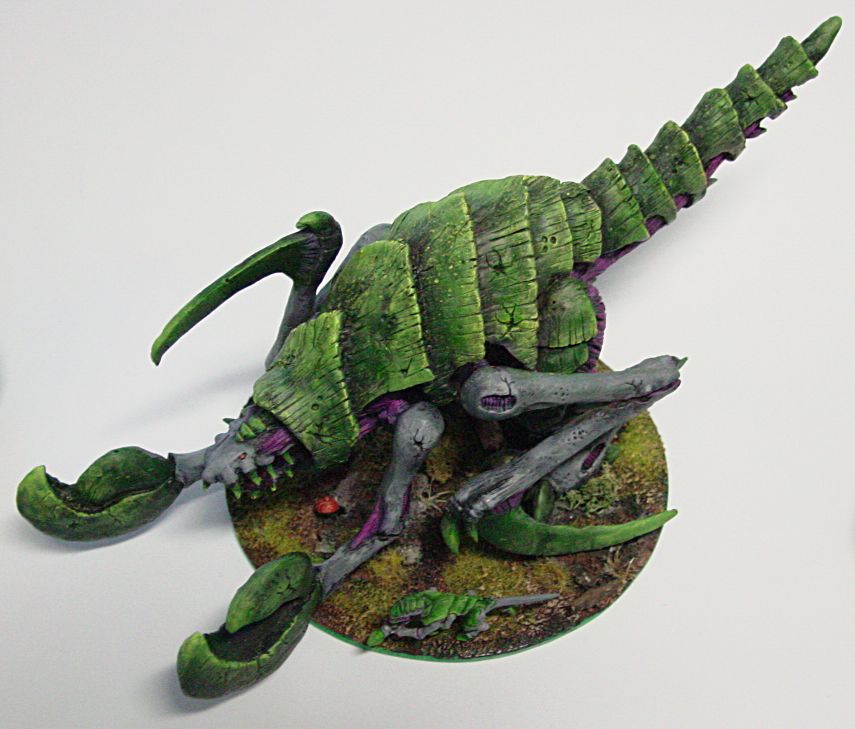
The Monster from the top. More pictures are on the picture page. |
Playing
The good thing with such big monsters is that they can eat quite a lot of damage. When we played a big game, giving them "subterran" worked quite well. They appeared near the tanks and could start eating them in the next round.