Building a monster
It all started with the Forgeworld catalogue. A lot of really nice models but all a little bit over buget. "I bet I can do my own special monster" I thought. Couldn't be so hard. That was the beginning.
The planning stage
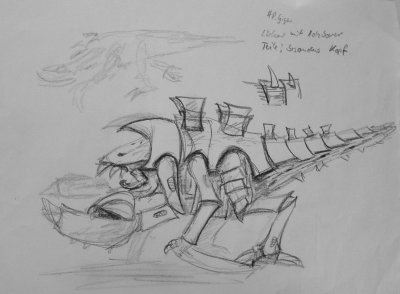
First concept drawing |
From my other modelling projects (see my Tyrannodon project) I knew that good planning saves you a lot of trouble in the long run.
So I need a plan for a bio monster.
First, how should it look like?
Being a real bio monster it should have two feet, four arms, a lot of armour plates and of course teeth.
Many teeth.
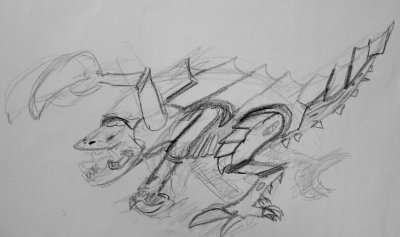
Second concept drawing |
As a next step I made some concept sketches.
In fact I did a lot of those. Very soon I got an overall feeling that it should look like a giant cockroach with a pair of claws and a pair of scythe arms.
I drawed some thick armour plates and a lot of horns and claws.
The armour should protect most of the monster excpecially the upper surfaces.
Plain surfaces look boring so the plates should have cracks and bullet holes.
As a special feature the armour grows around the tail and the body, encirceling them.
Most of the arms and legs are also protected, but this time by thinner and smoother armour.
This armour also has cracks and holes where you can see the flesh underneath.
The claws look a little bit like a hummer, which fits good because the whole monster has something of a hummer.
The flesh looks like something that Giger could have drawn.
It is both bloated and muscular.
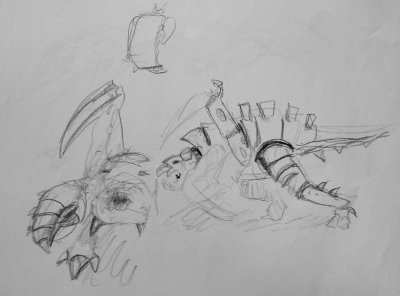
Another concept sketch |
The head is broad and mostly teeth with a small eye that looks hatefull on the world.
The final concept sketch was made in 1:1 ratio and directly from the side. It is very important to have a good design and also important to be able to build the model after this plan.
I skipped a drawing from the front which made some problems later on. More about this below.
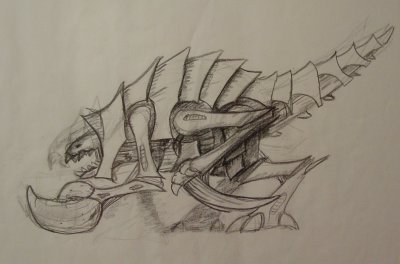
Final concept drawing in 1:1 ratio. |
Building the monster
Ready to saw. |
Next we need a skeleton for the monster.
A skeleton for your modeling work is very important, expecially because it is going to be such a big monster. The final model weights around one pound and stands on only two small legs. To hold this you need a skeleton which is strong enough and also don't go weak after a time.
Thin wire is not sufficient for this.
I have a big dragon which dropped lower and lower after the years.
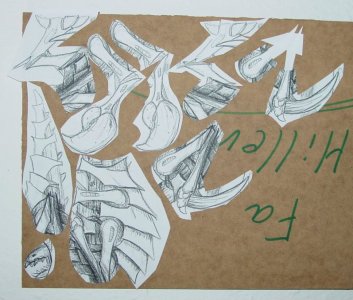
First the concept sketch was copied and then glued onto 3mm thick wood and sawed out.
In places I glued some scrap pieces of wood on the parts to save some modelling material.
Now back to the sketch. Place all the parts on the picture and compare them.
Do they really have the right size? Do they fit? In all three dimensions?
I hope so because now we start the modeling.
Modeling
In principle you could use green-stuff for the modeling. It would only cost you a fortune but green stuff is clearly the best solution if you want quality and durability. For a cheaper solution use clay or Fimo. I used Fimo for the bigger parts and green-stuff for the details. Here are some modeling rules:
- always keep you tools moist and clean them after work
- work on one small part at a time
- finished parts should not be touched until hard

All the parts, ready to be assembled |
Modelling after the sketch is quite easy. You just have to lay the part on the sketch and work till it looks exactly as the sketch. Again, remember rule two and three.
Most important is the surface. Naturally this is the only thing you can see.
I used a bigger knife-like tool for the cracks, a thick round pin for the holes and a bigger round tool for the flesh.
I advice you to get a big supply of tools that you can try out. You even can make your own tools out of wood.
One thing that works for you is the size of the monster.
The features are also quite big and you have big parts to work with.
Only exception is the head and this is where my trouble started.
Naturally the skeleton of the head couldn't be made out of thick wood and so I decided to make it out of a metal sheet.
The first head was a mess.
It was much to big and looked bloated.
Definitly not like a sleek killer.
So I started from the scratch, used a tinner sheet and now it got better.
For the head I used mostly green stuff.
The head is made in two parts to make casting easier afterwards.