Overview
In 2020 I was looking for a project to do while sitting in my home office and listening to all those boring telcos.
I always needed to do something with my hands, even in school.
After some consideration I decided to scratch build a Warhammer 40k Gorkanaut.
Even at the beginning I was fairly certain that it's not really worth it in the money side.
The price for the Gorkanaut is not in the "painfull" section as with other GW models.
On the other hand such a project might take a lot of time and give not a perfect result.
As material I was using stuff that I had laying around.
- A lot of old gift and club member cards that I collected over the years.
- GW plastic sprues.
- Some left over model parts.
- Different types of wire. I found a nice aluminium wire once that was very usefull.
- Some wood
- A couple of screws
- Insect screen
Preparation
As a preparation I downloaded images for the Gorkanaut sprues from the Games Workshop page and scaled them in the right factor (which I had to guess from the size of the Orc body parts). I printed them out and used them as templates for some of the bigger pieces.
Very fast I noticed that something was off. The pieces didn't seem to fit together at all. I forgot about the thickness of the original parts. They have to be 3mm thick where my own parts are made out of old credit cards and have under 1mm thickness. Those 2mm difference are quite noticable and I tried to compensate from that on.
Building

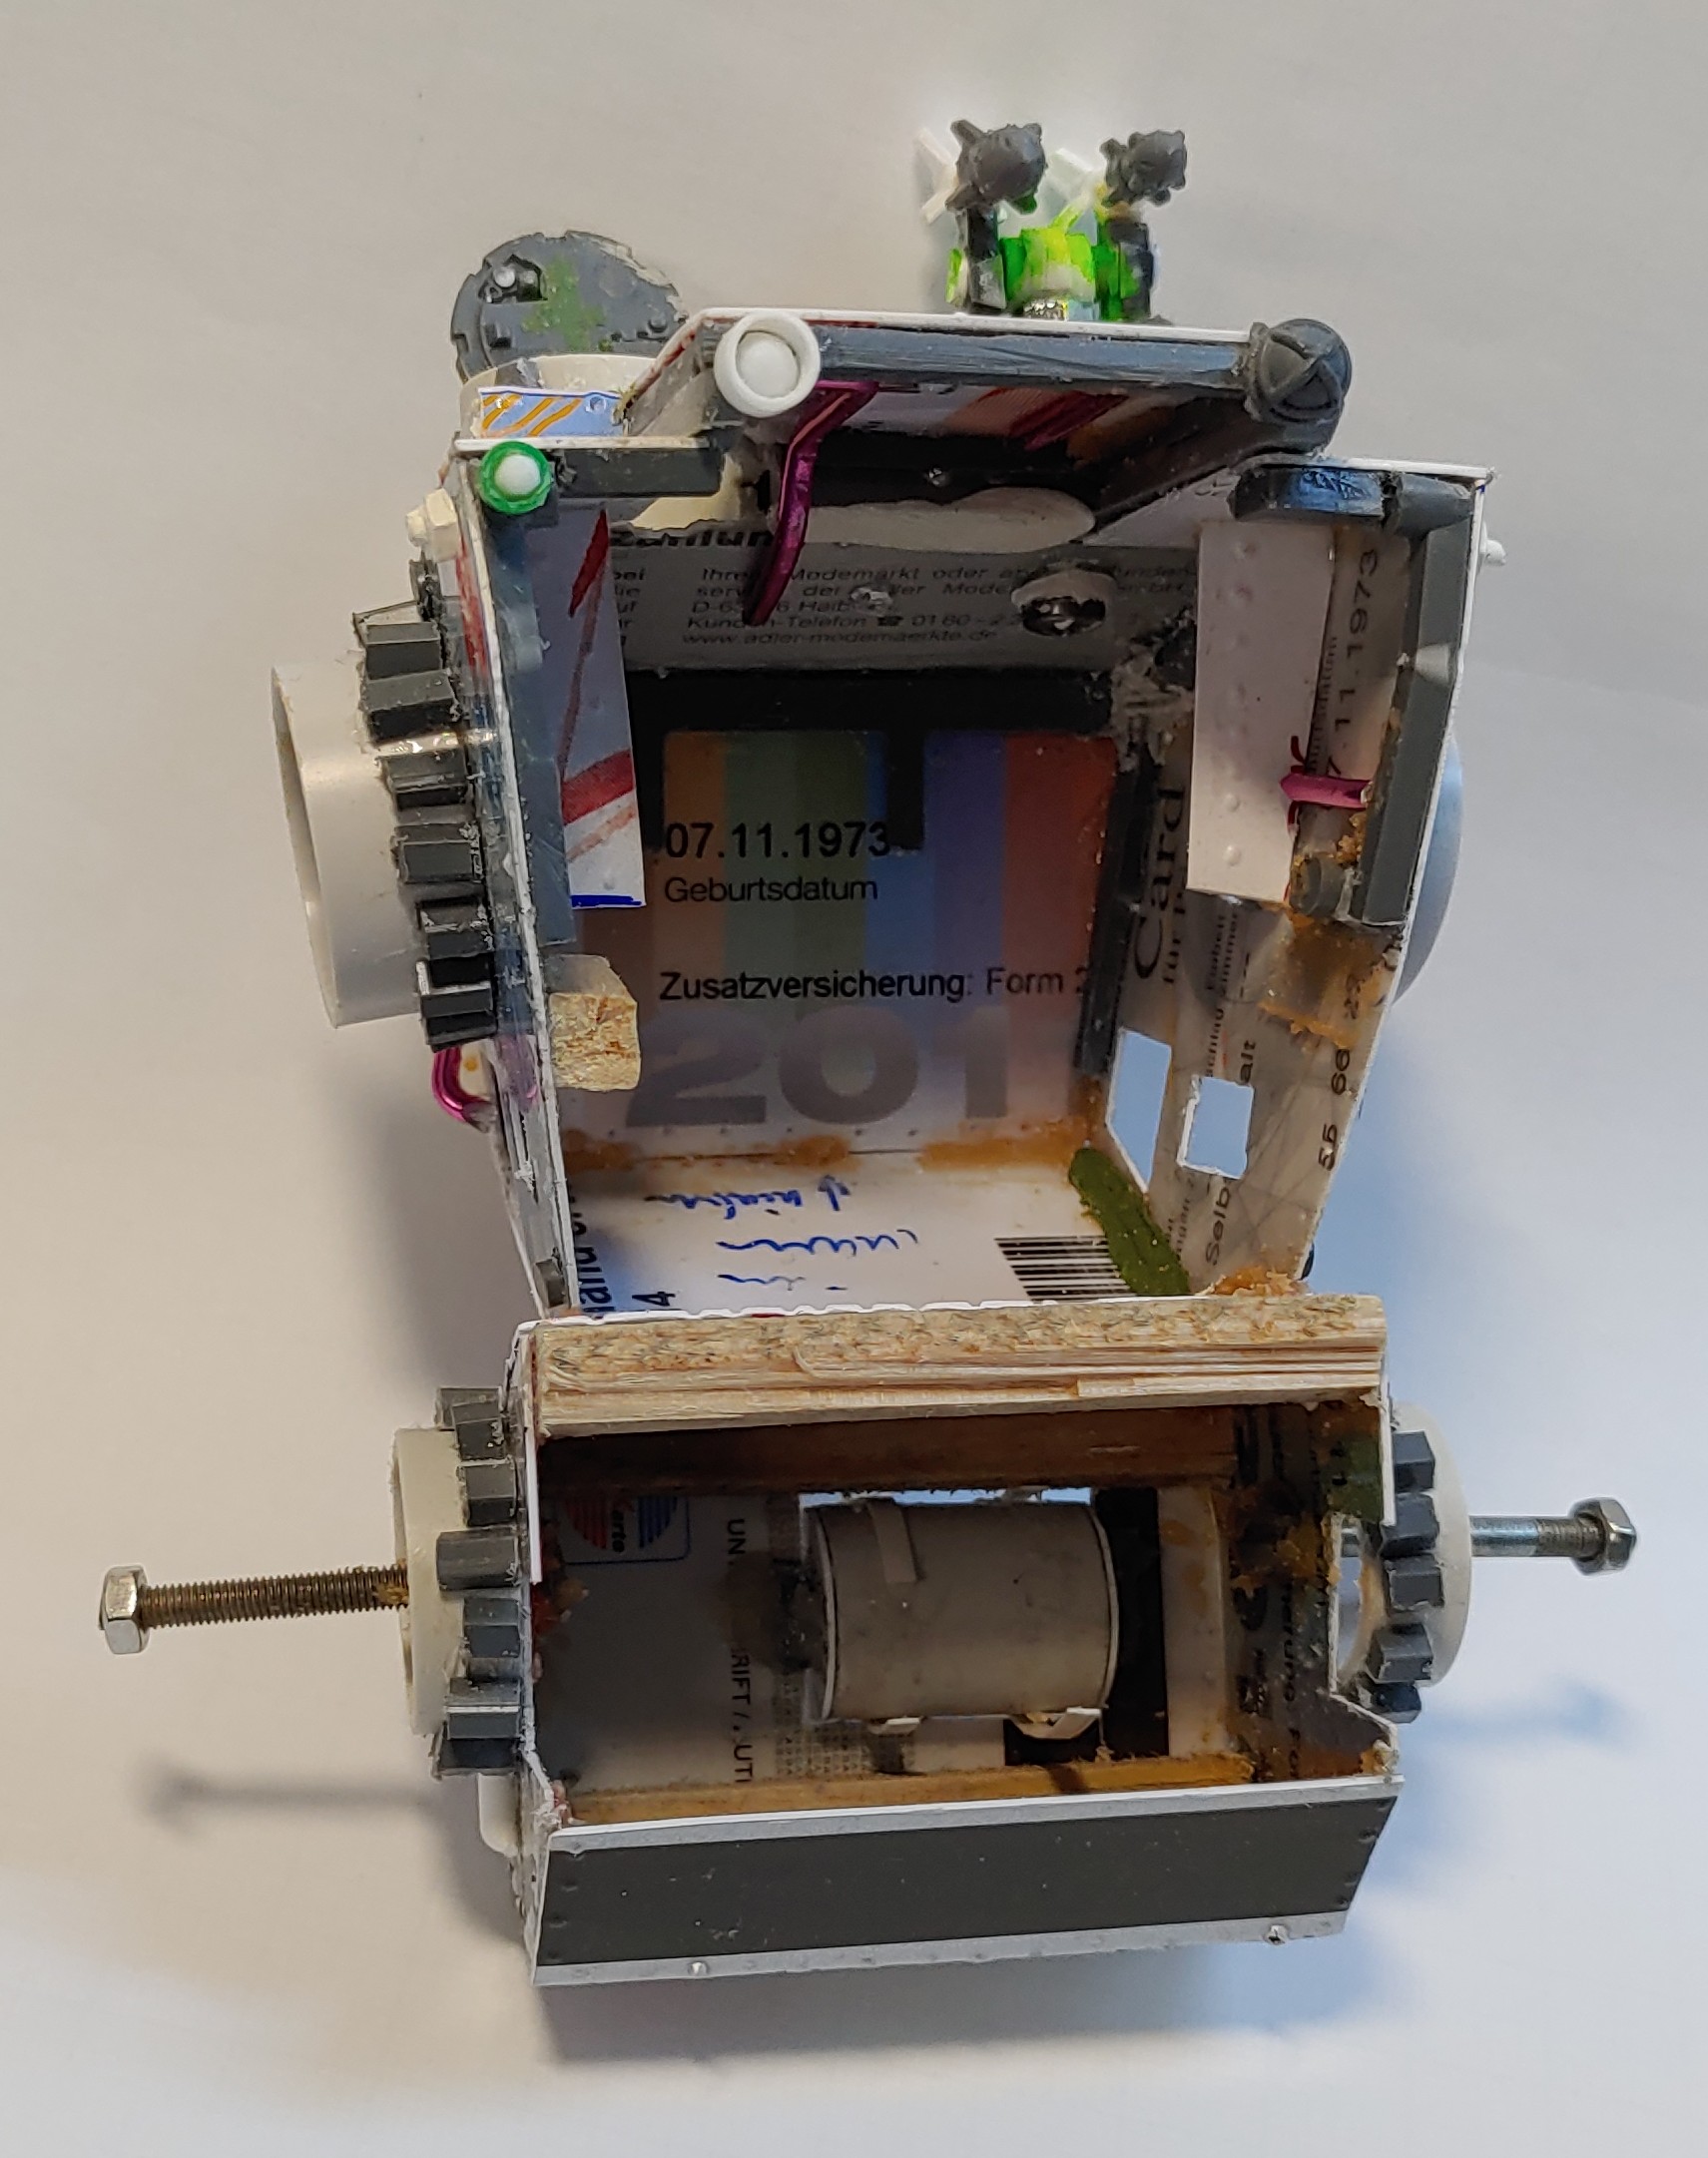
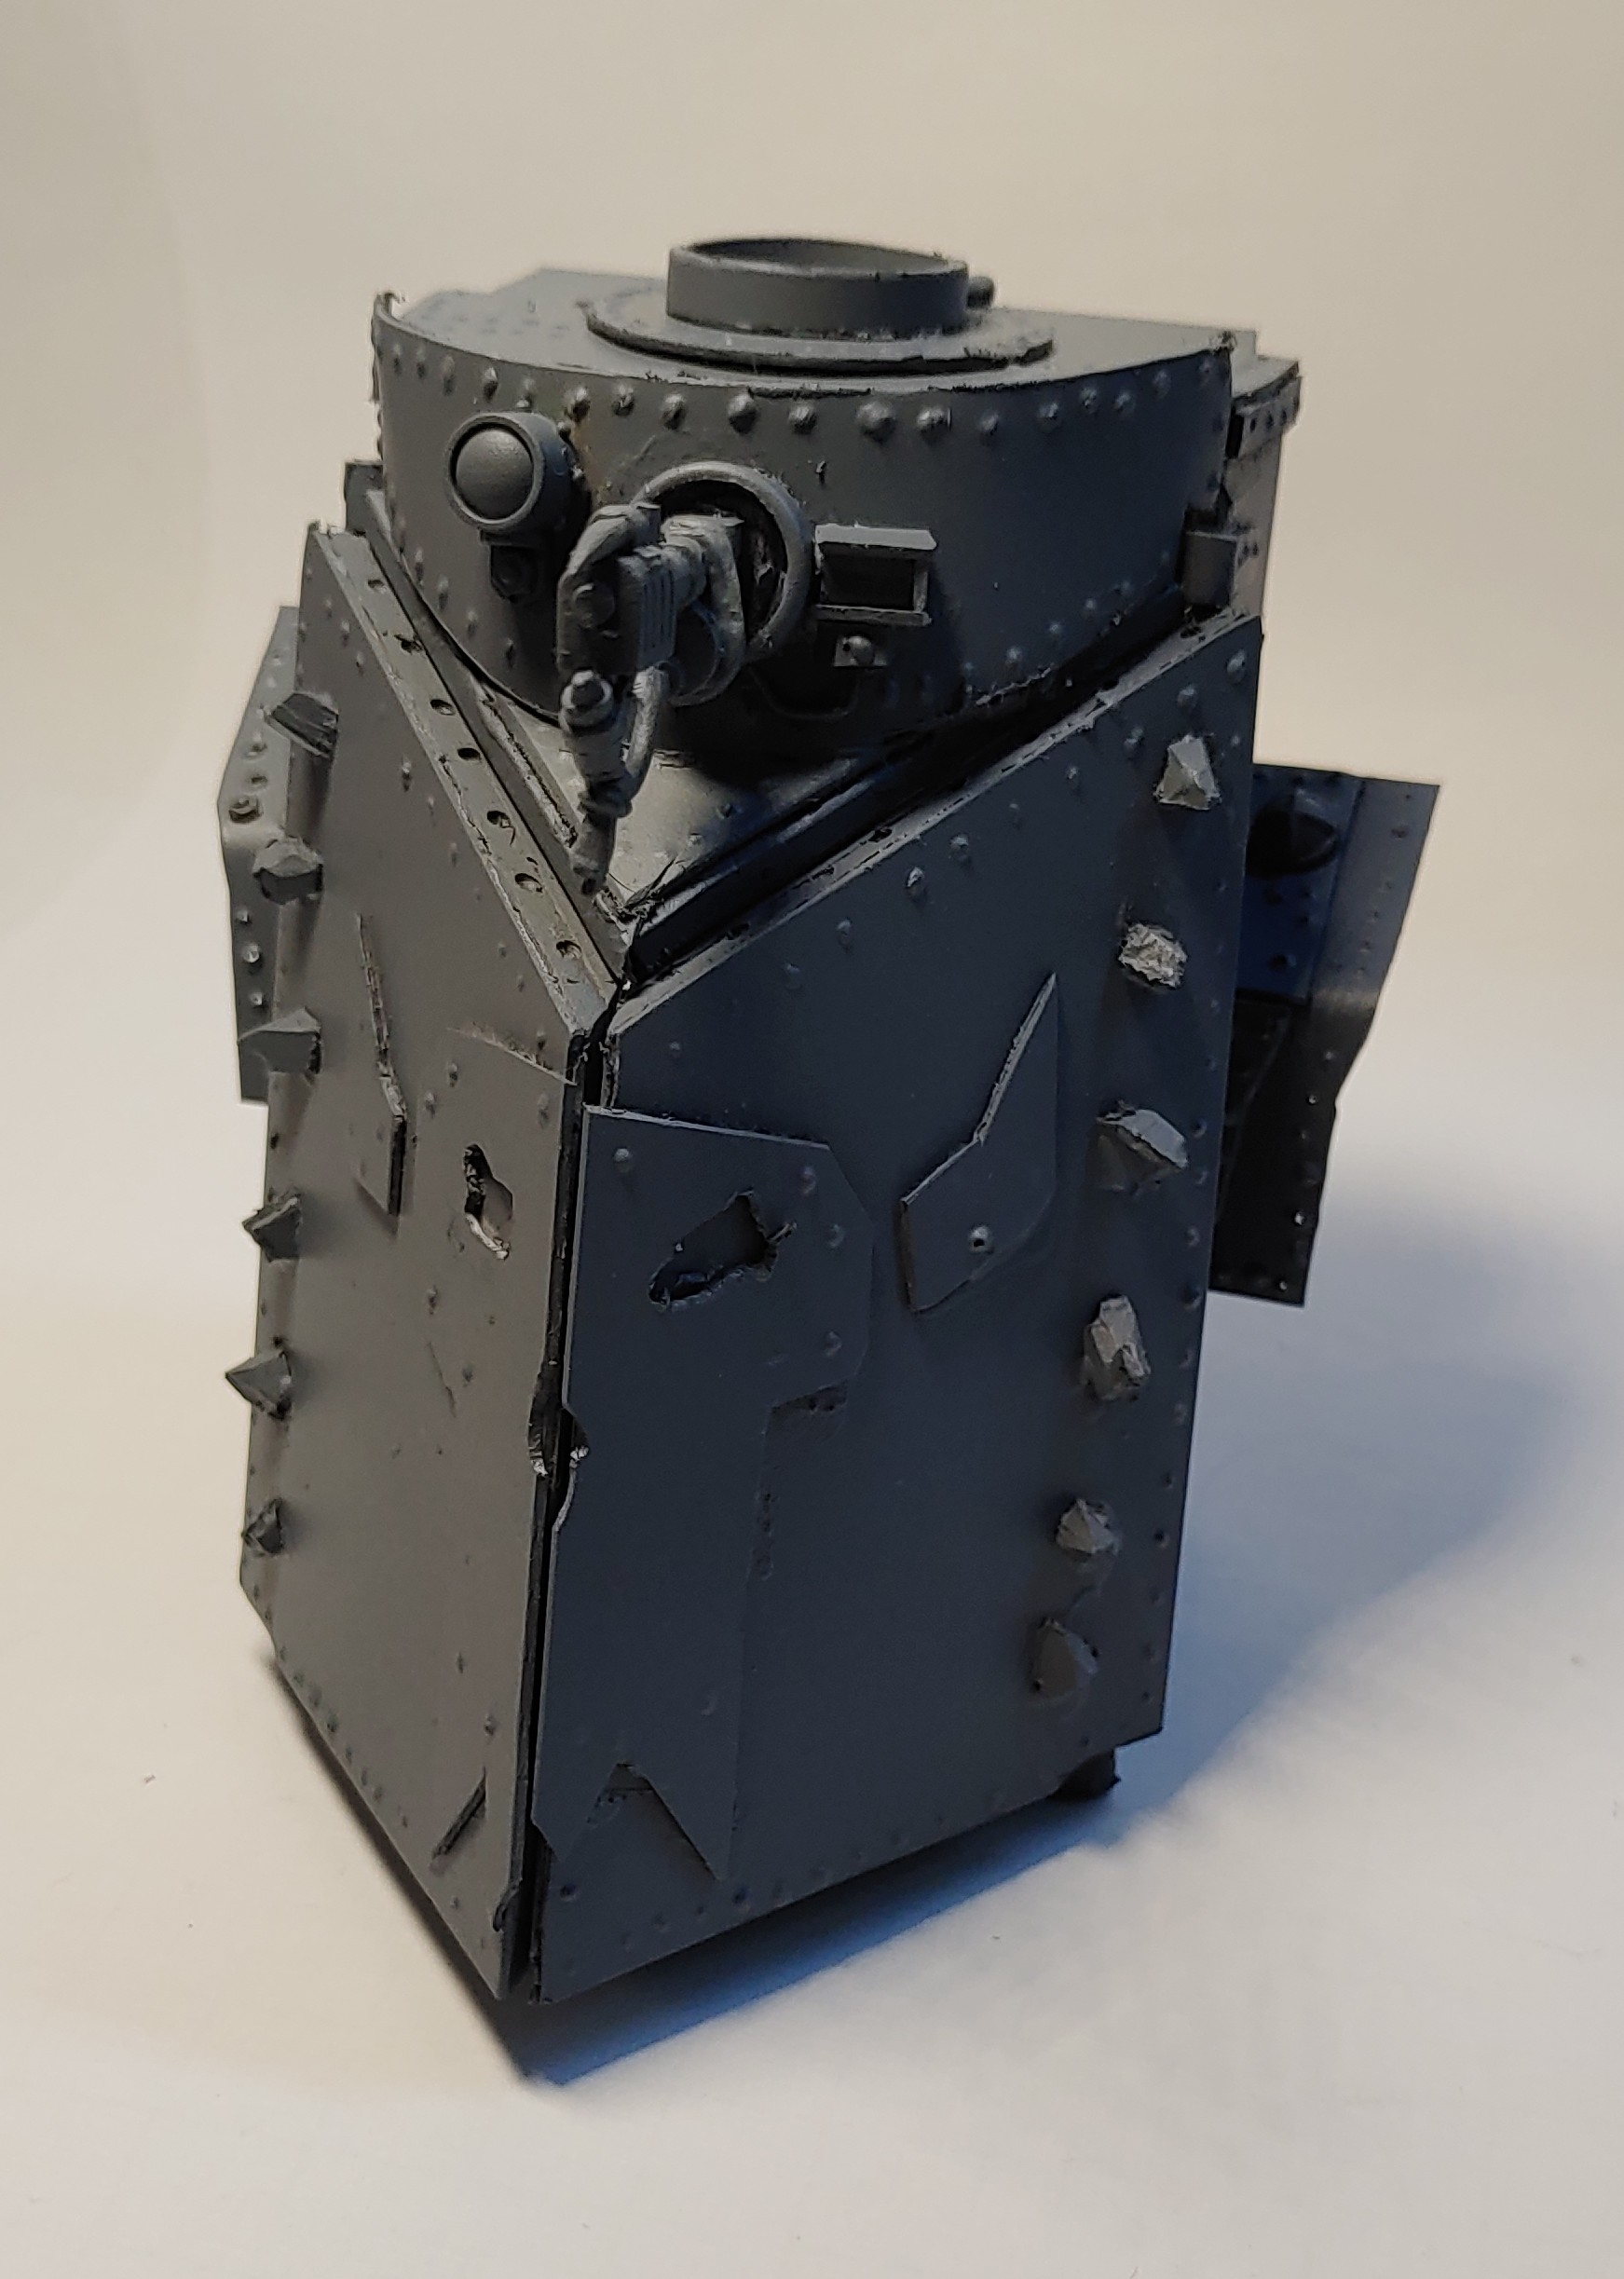
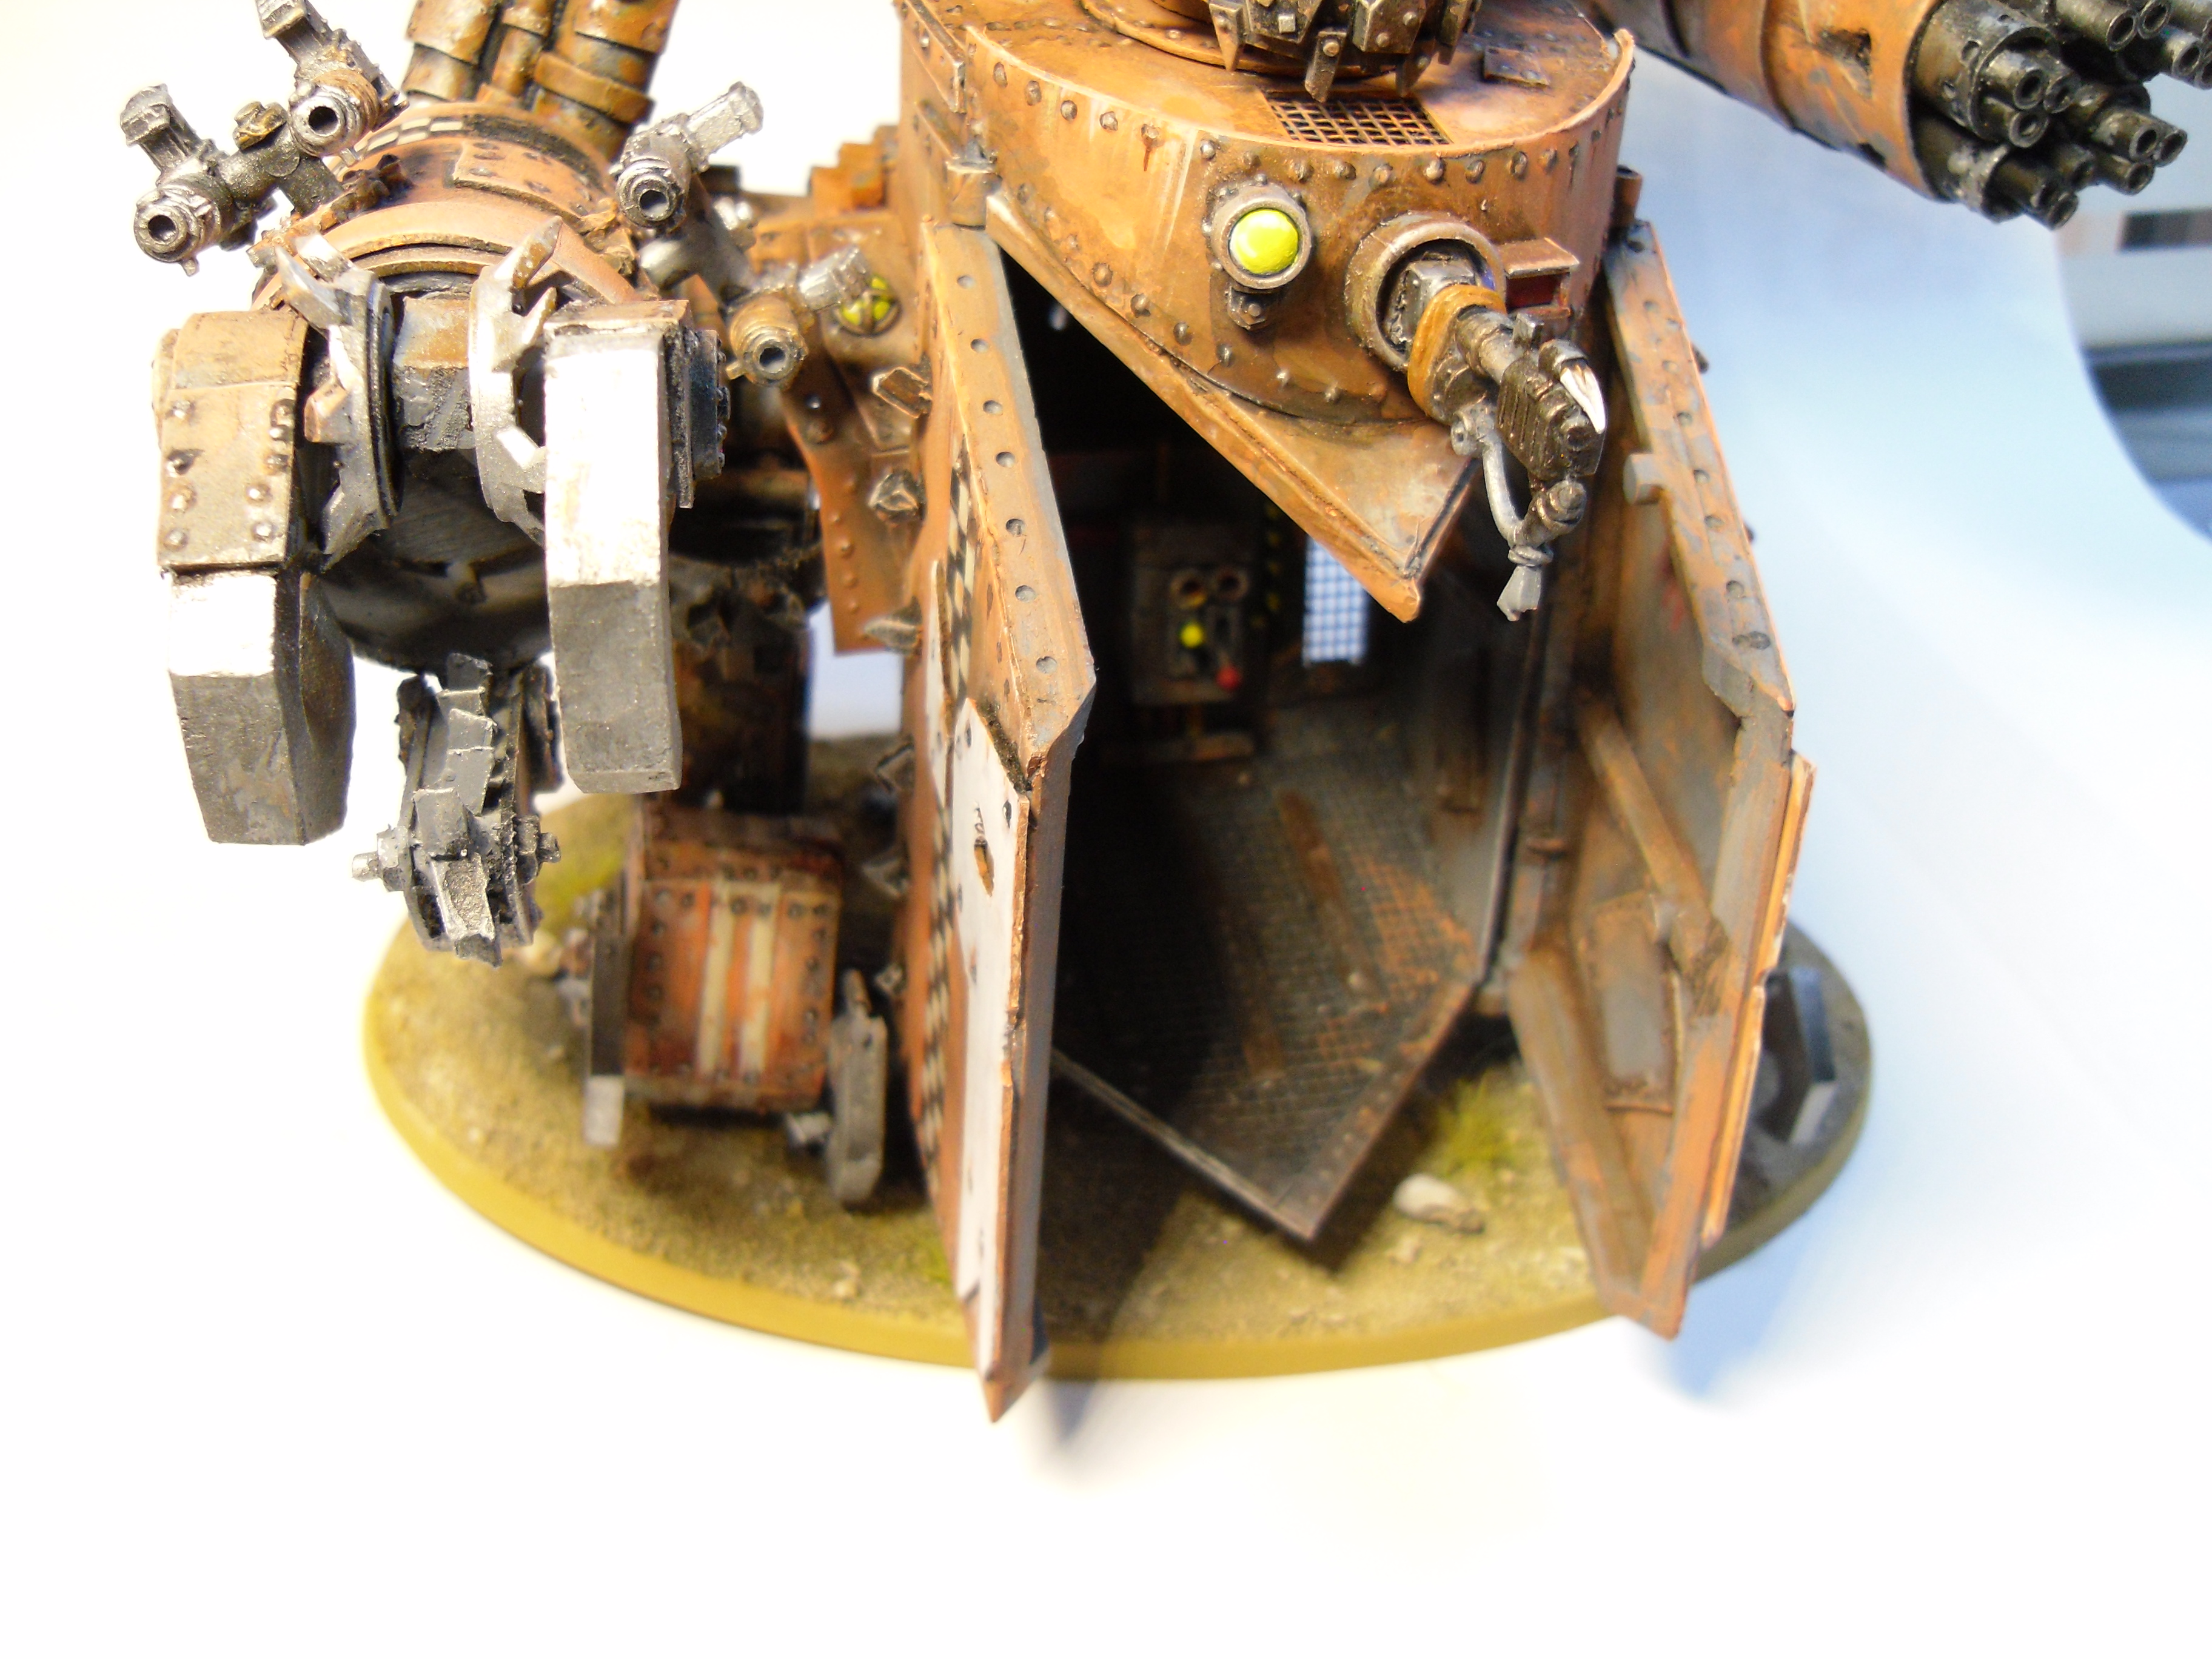
This is an image of the transport bay, which I did first. It's mostly plasti card and some kit-bash pieces. The spikes at the side of the doors are pieces from GW sprues that I cut roughly with pliers. The rest is mainly copied from the pictures of the original Gorkanaut pieces.
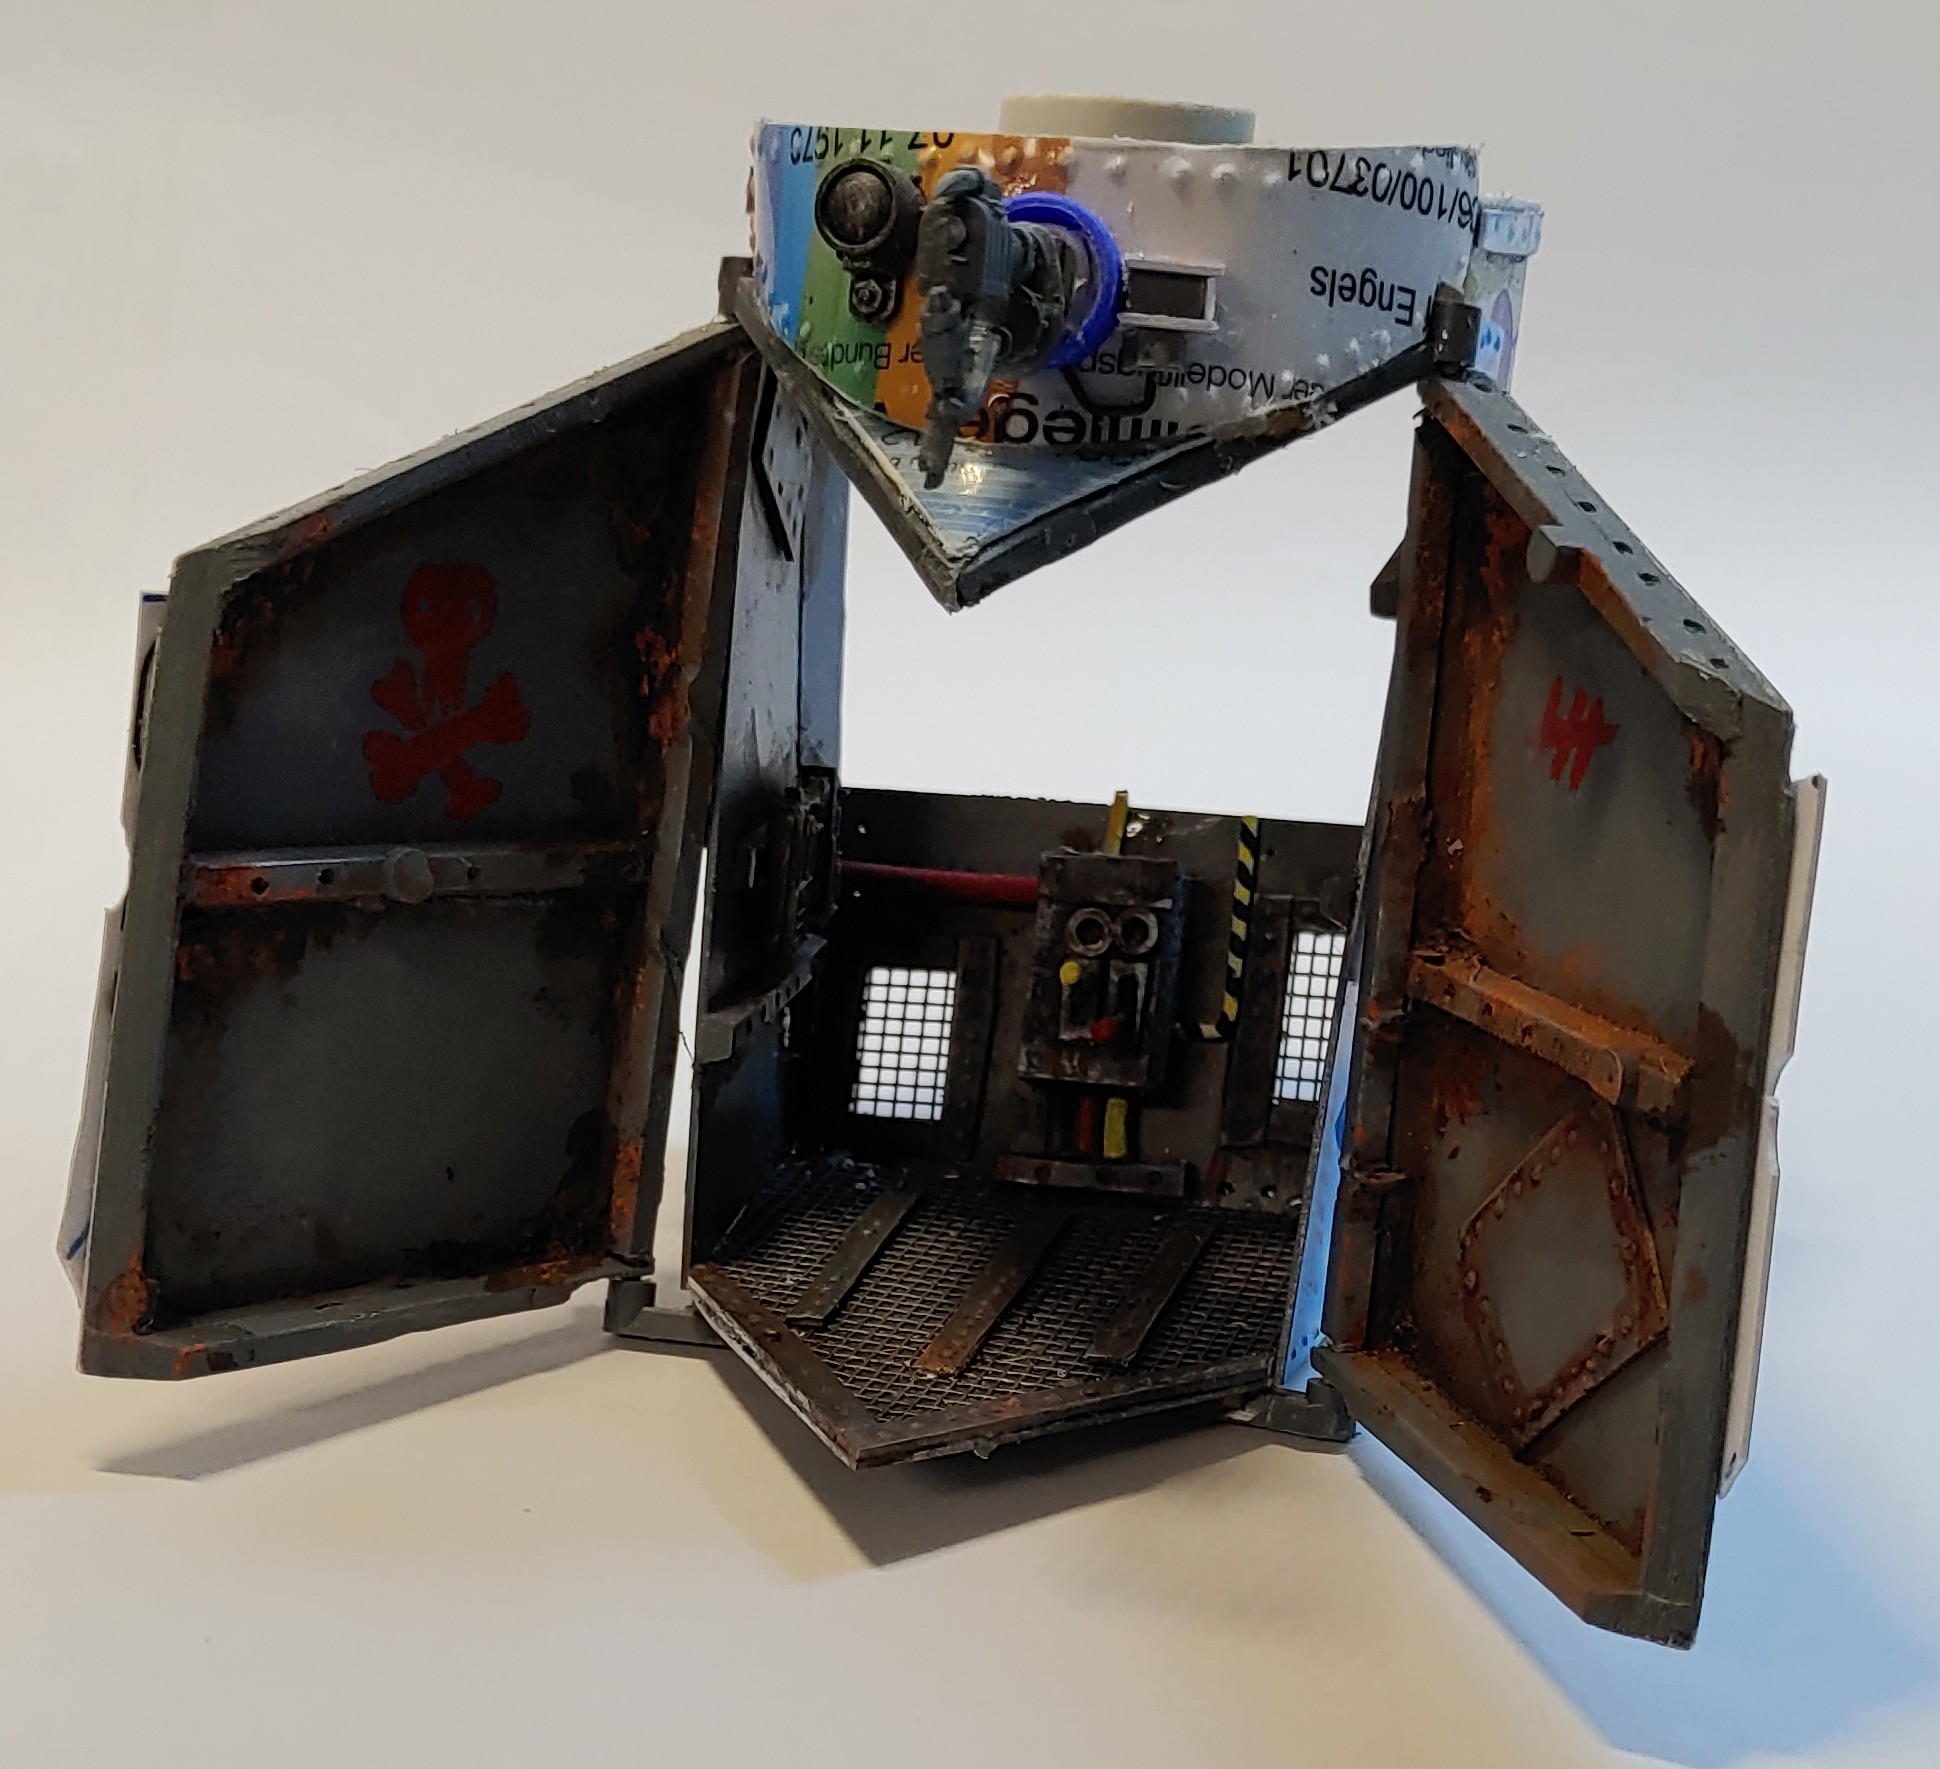
The original has a lot of rivets visible. I did the rivets by pressing with a pointy tool from the back. I even build my own rivet tool out of an old screw and a wooden handle since it takes quite some strength to make so many rivets.
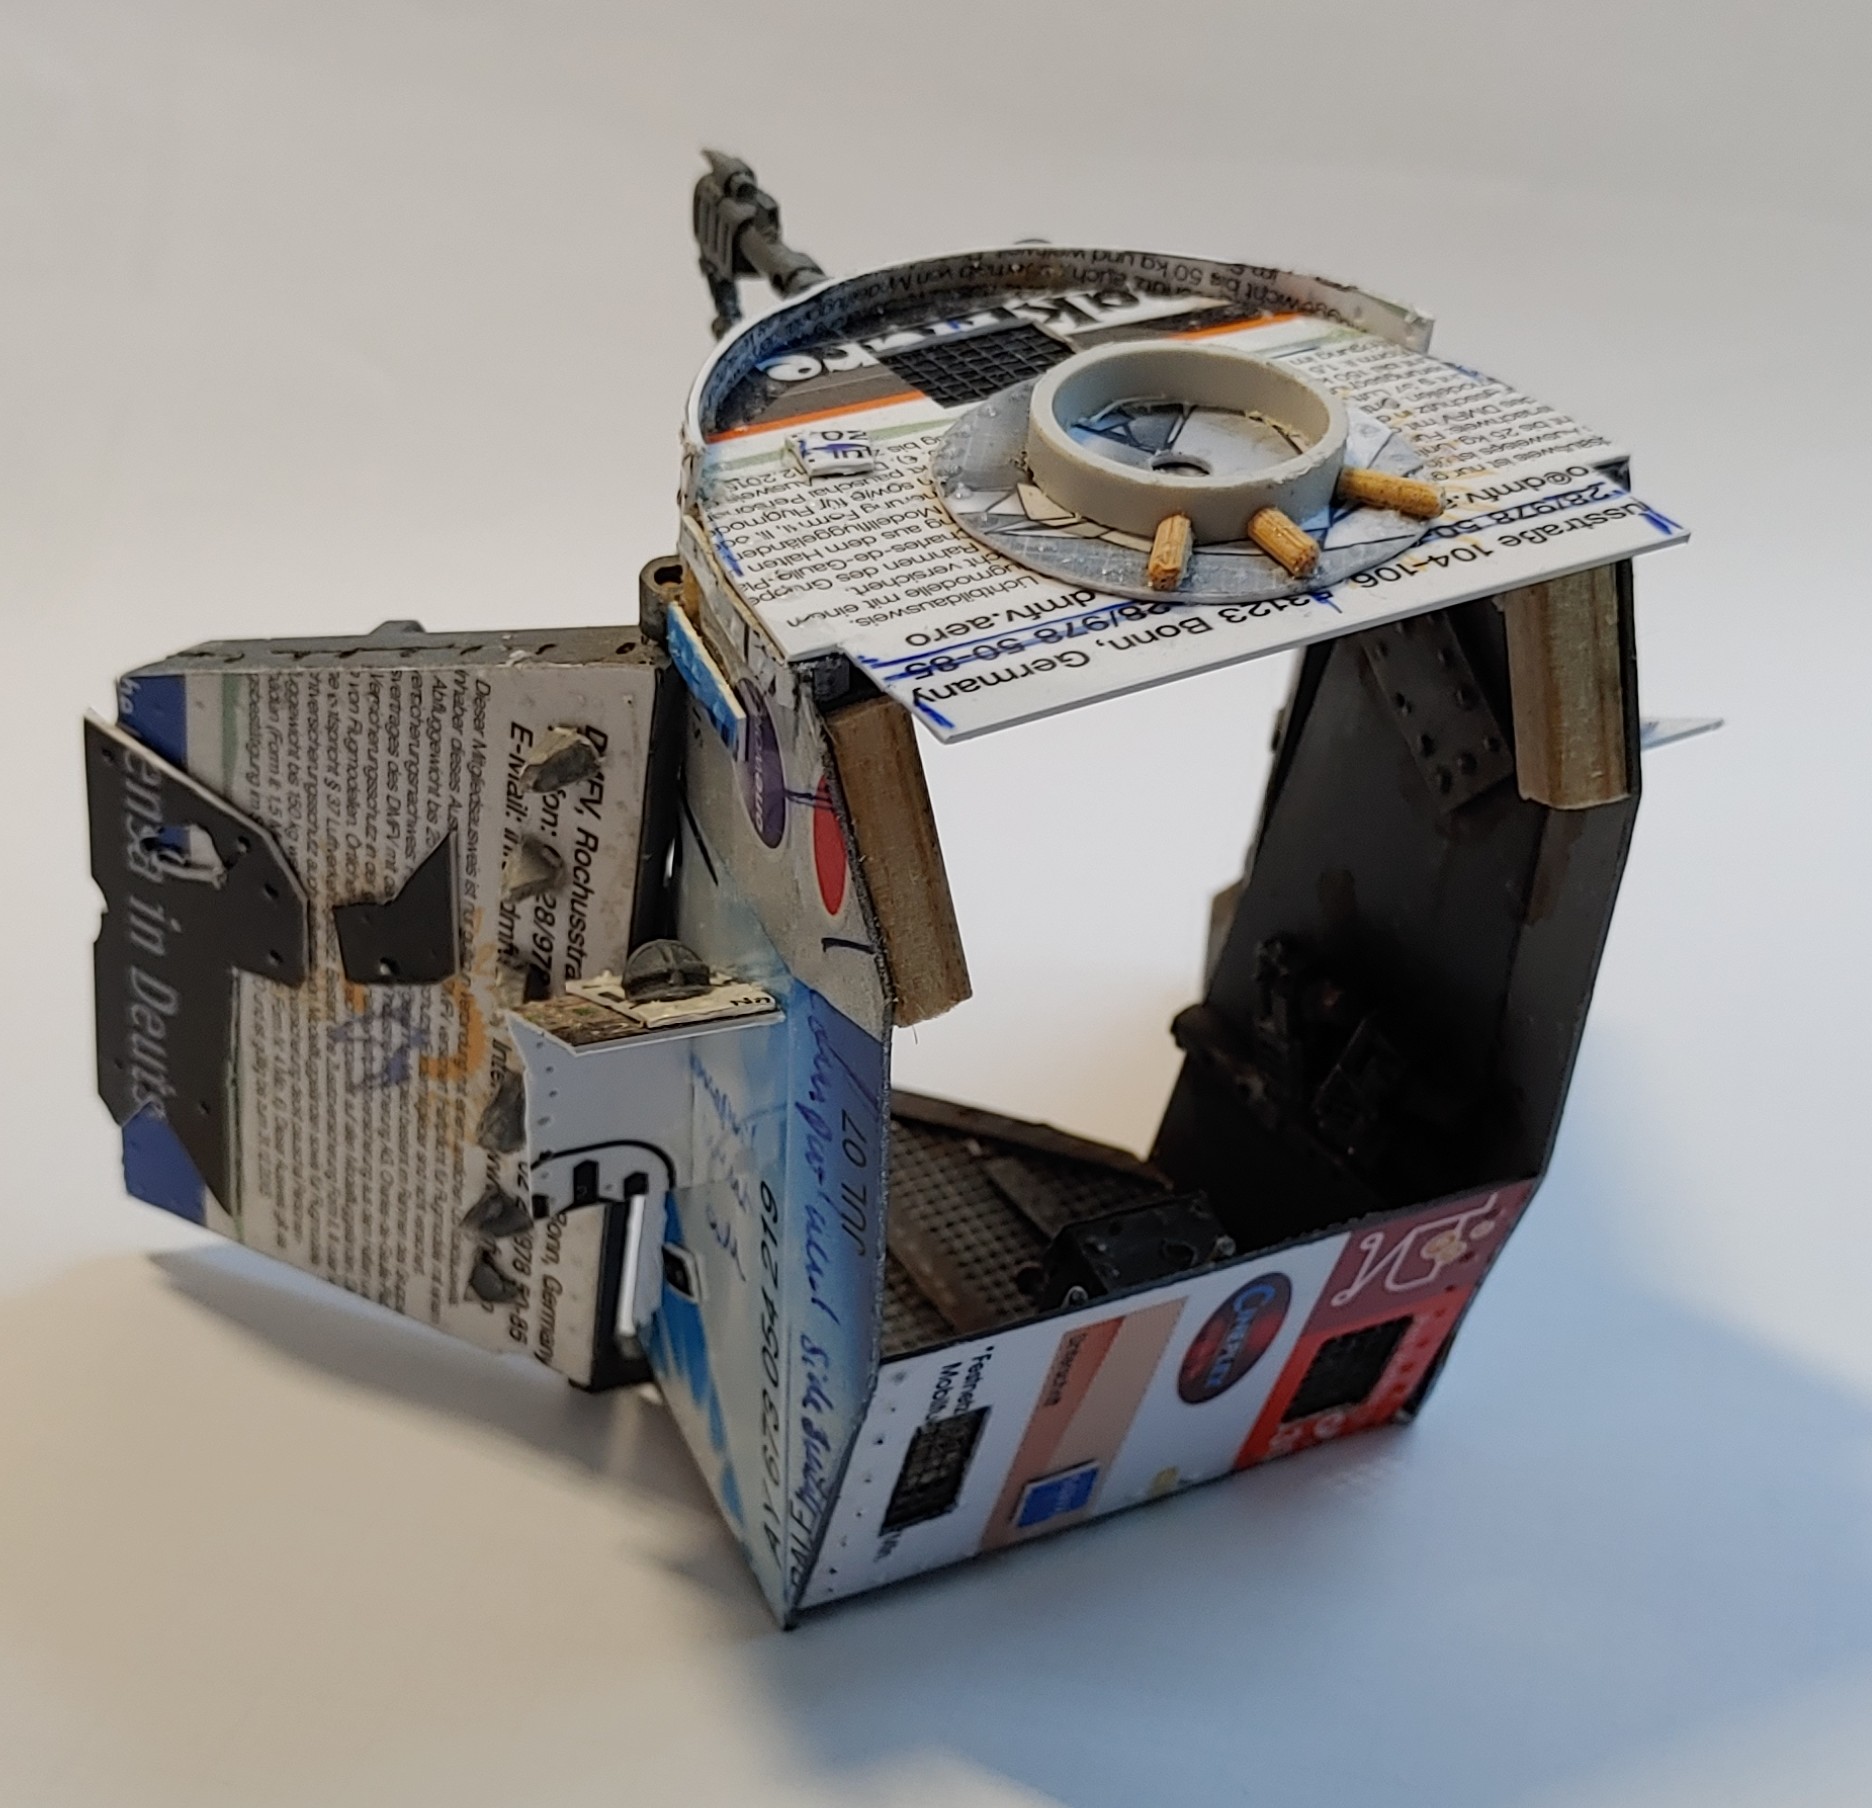
The transport bay did get some details and I also tried to hide the fact that the walls of my Gorkanaut are much thinner. I painted the inside first because later on I couldn't get to it any more.
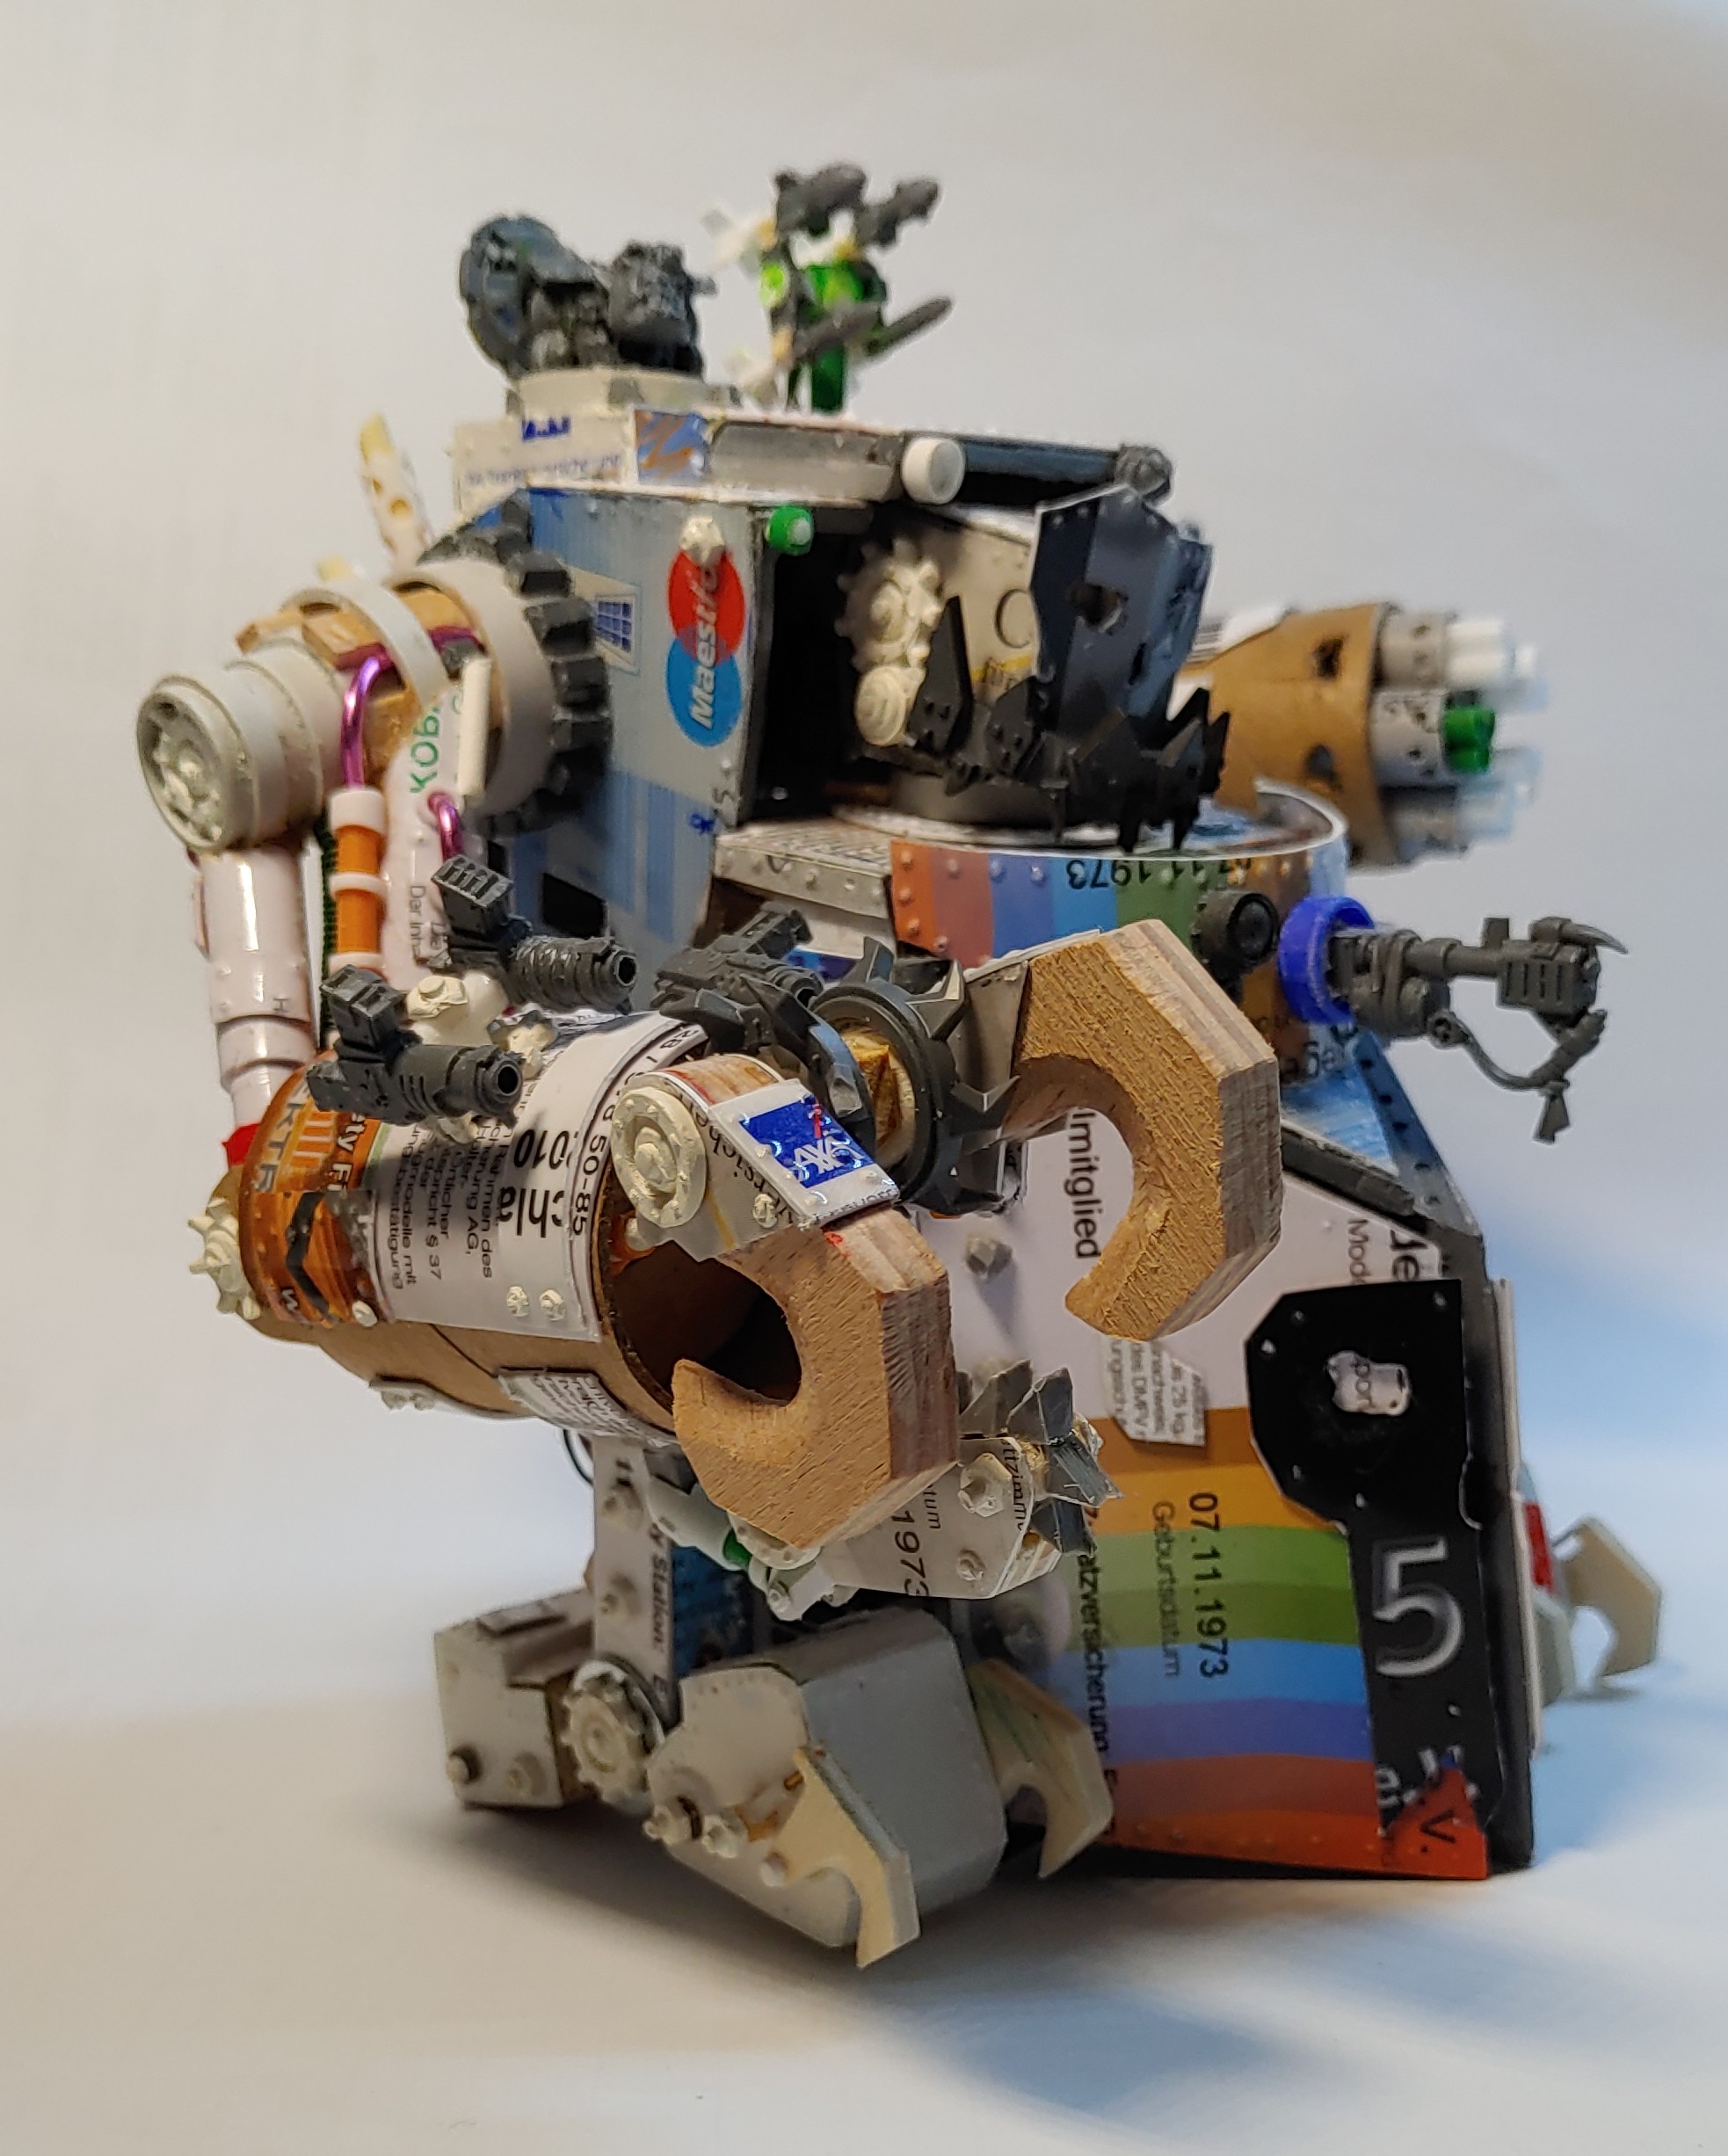
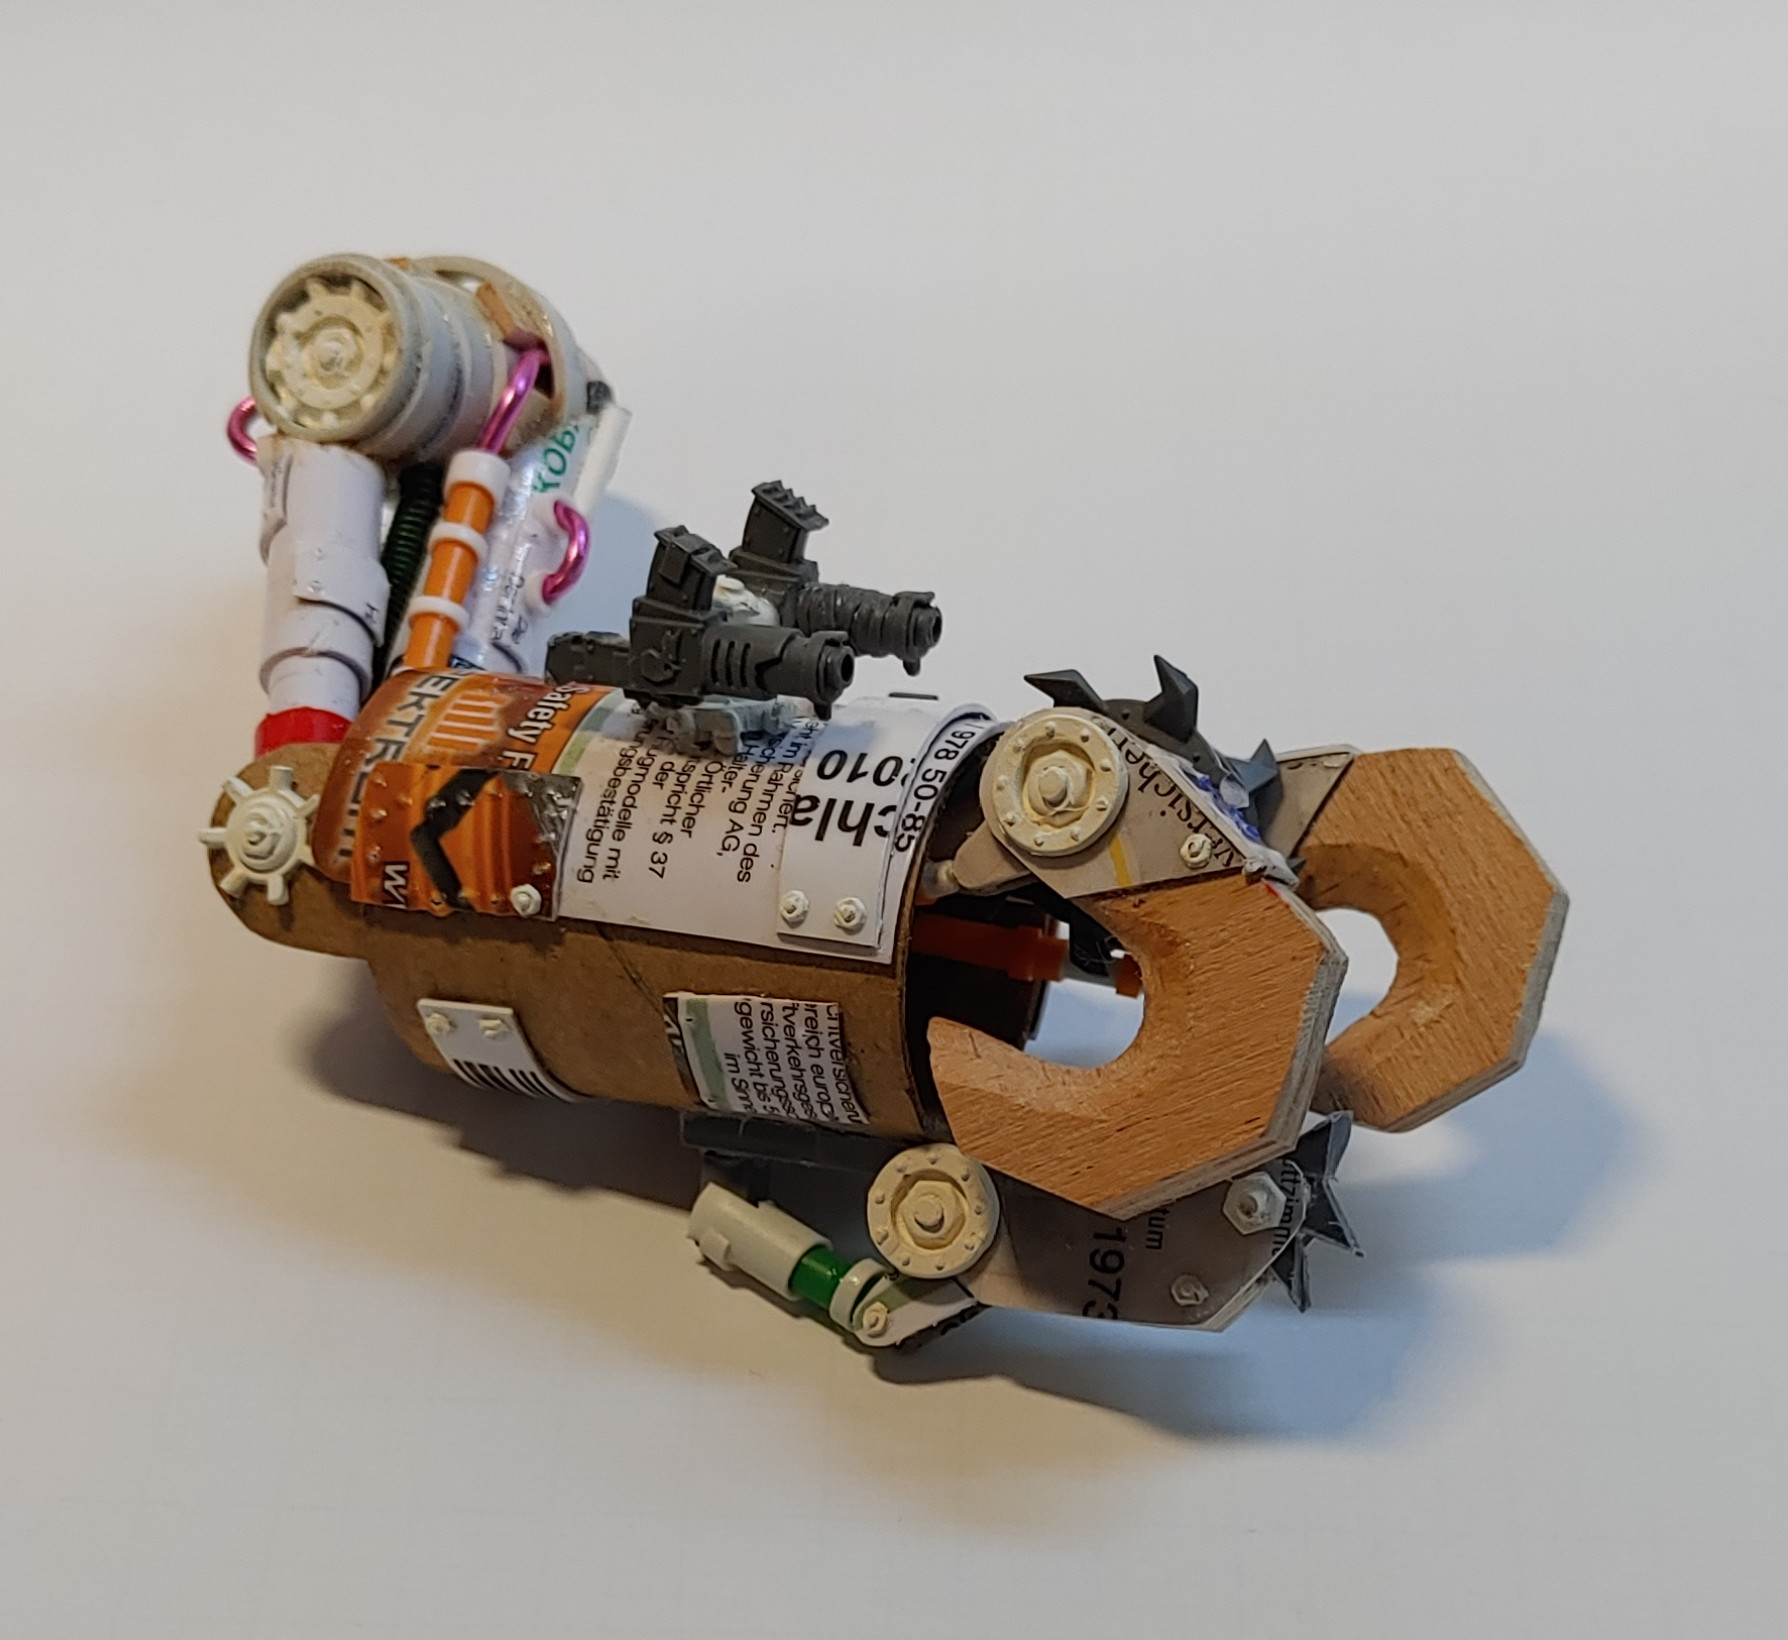
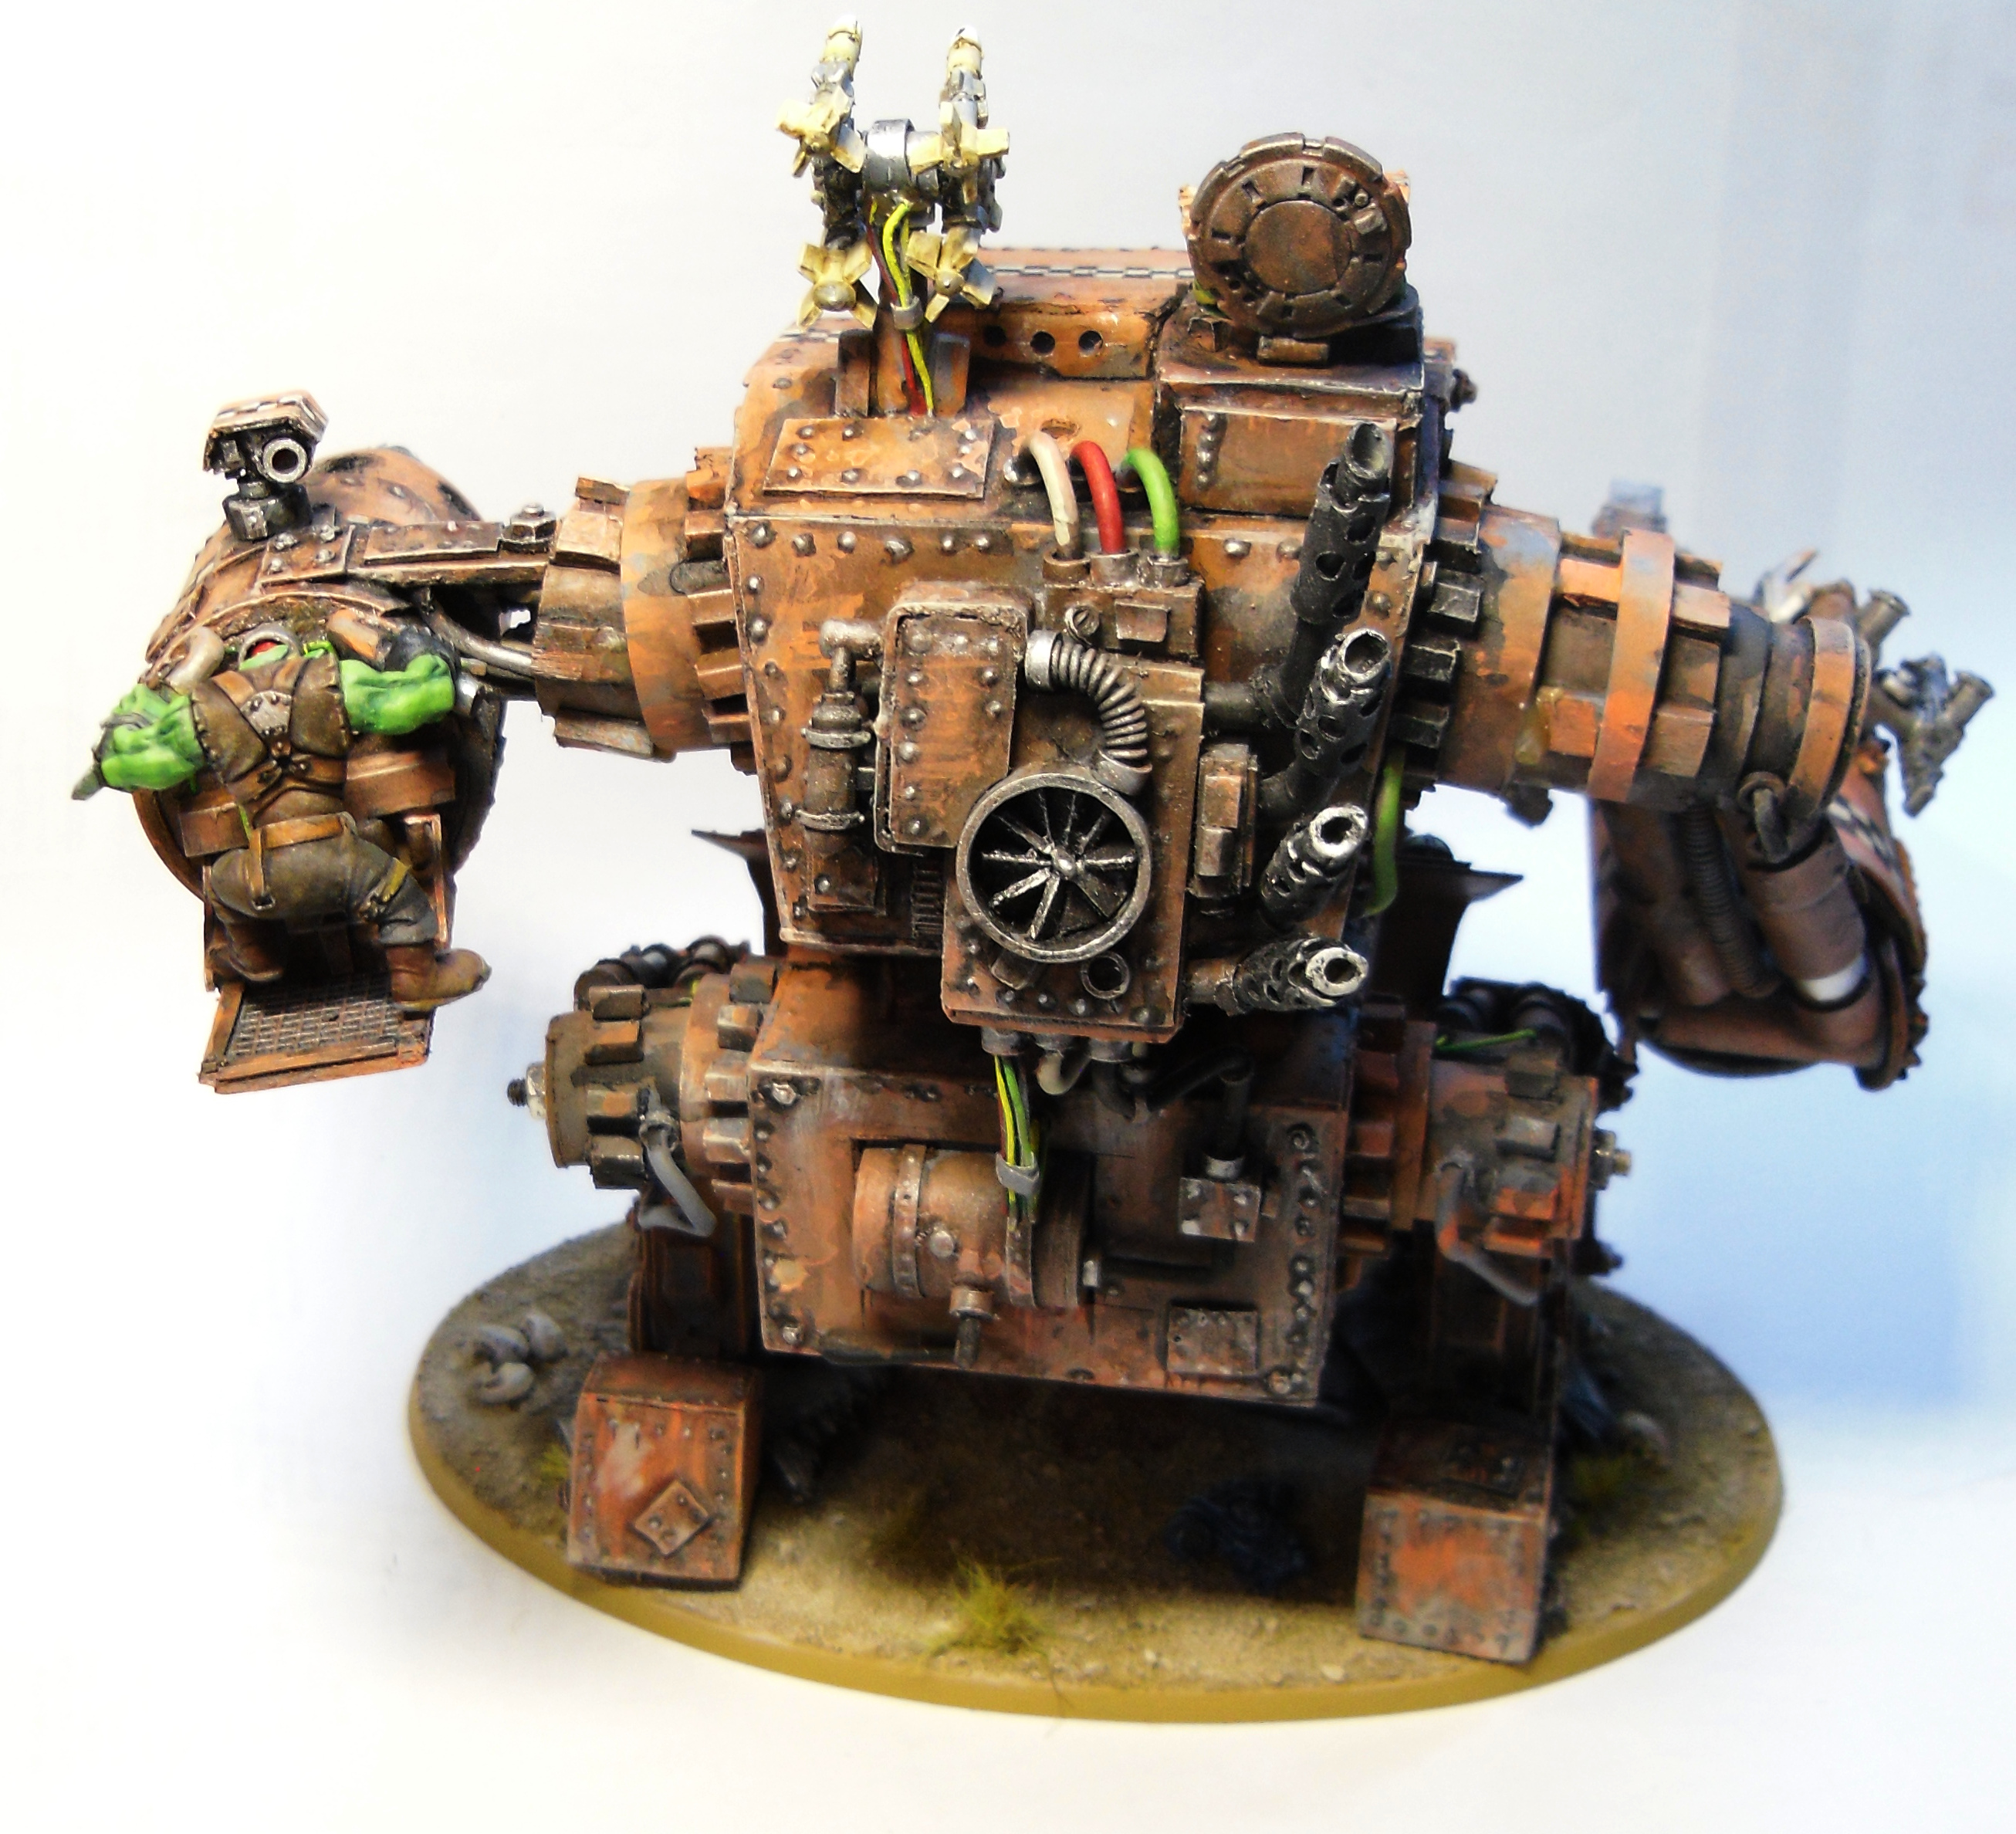
The back is where you see a lot of different materials used.
I used pvc pipes in different sizes for the fuel barrel and the fan housing.
I used smaller plastic tubes all over the place.
The pink metallic wire is the aluminium wire I mentioned before (from a flower bouquet).
The exaust stacks are from round plastic sprues (not the GW ones which are kind of rectangular. Some other models.)
They were bend over a candle flame.
I had some thinner plastic stock for the exausts where I drilled some holes in before rolling them around the pipes.
The blue gear wheel is from a ball pen.
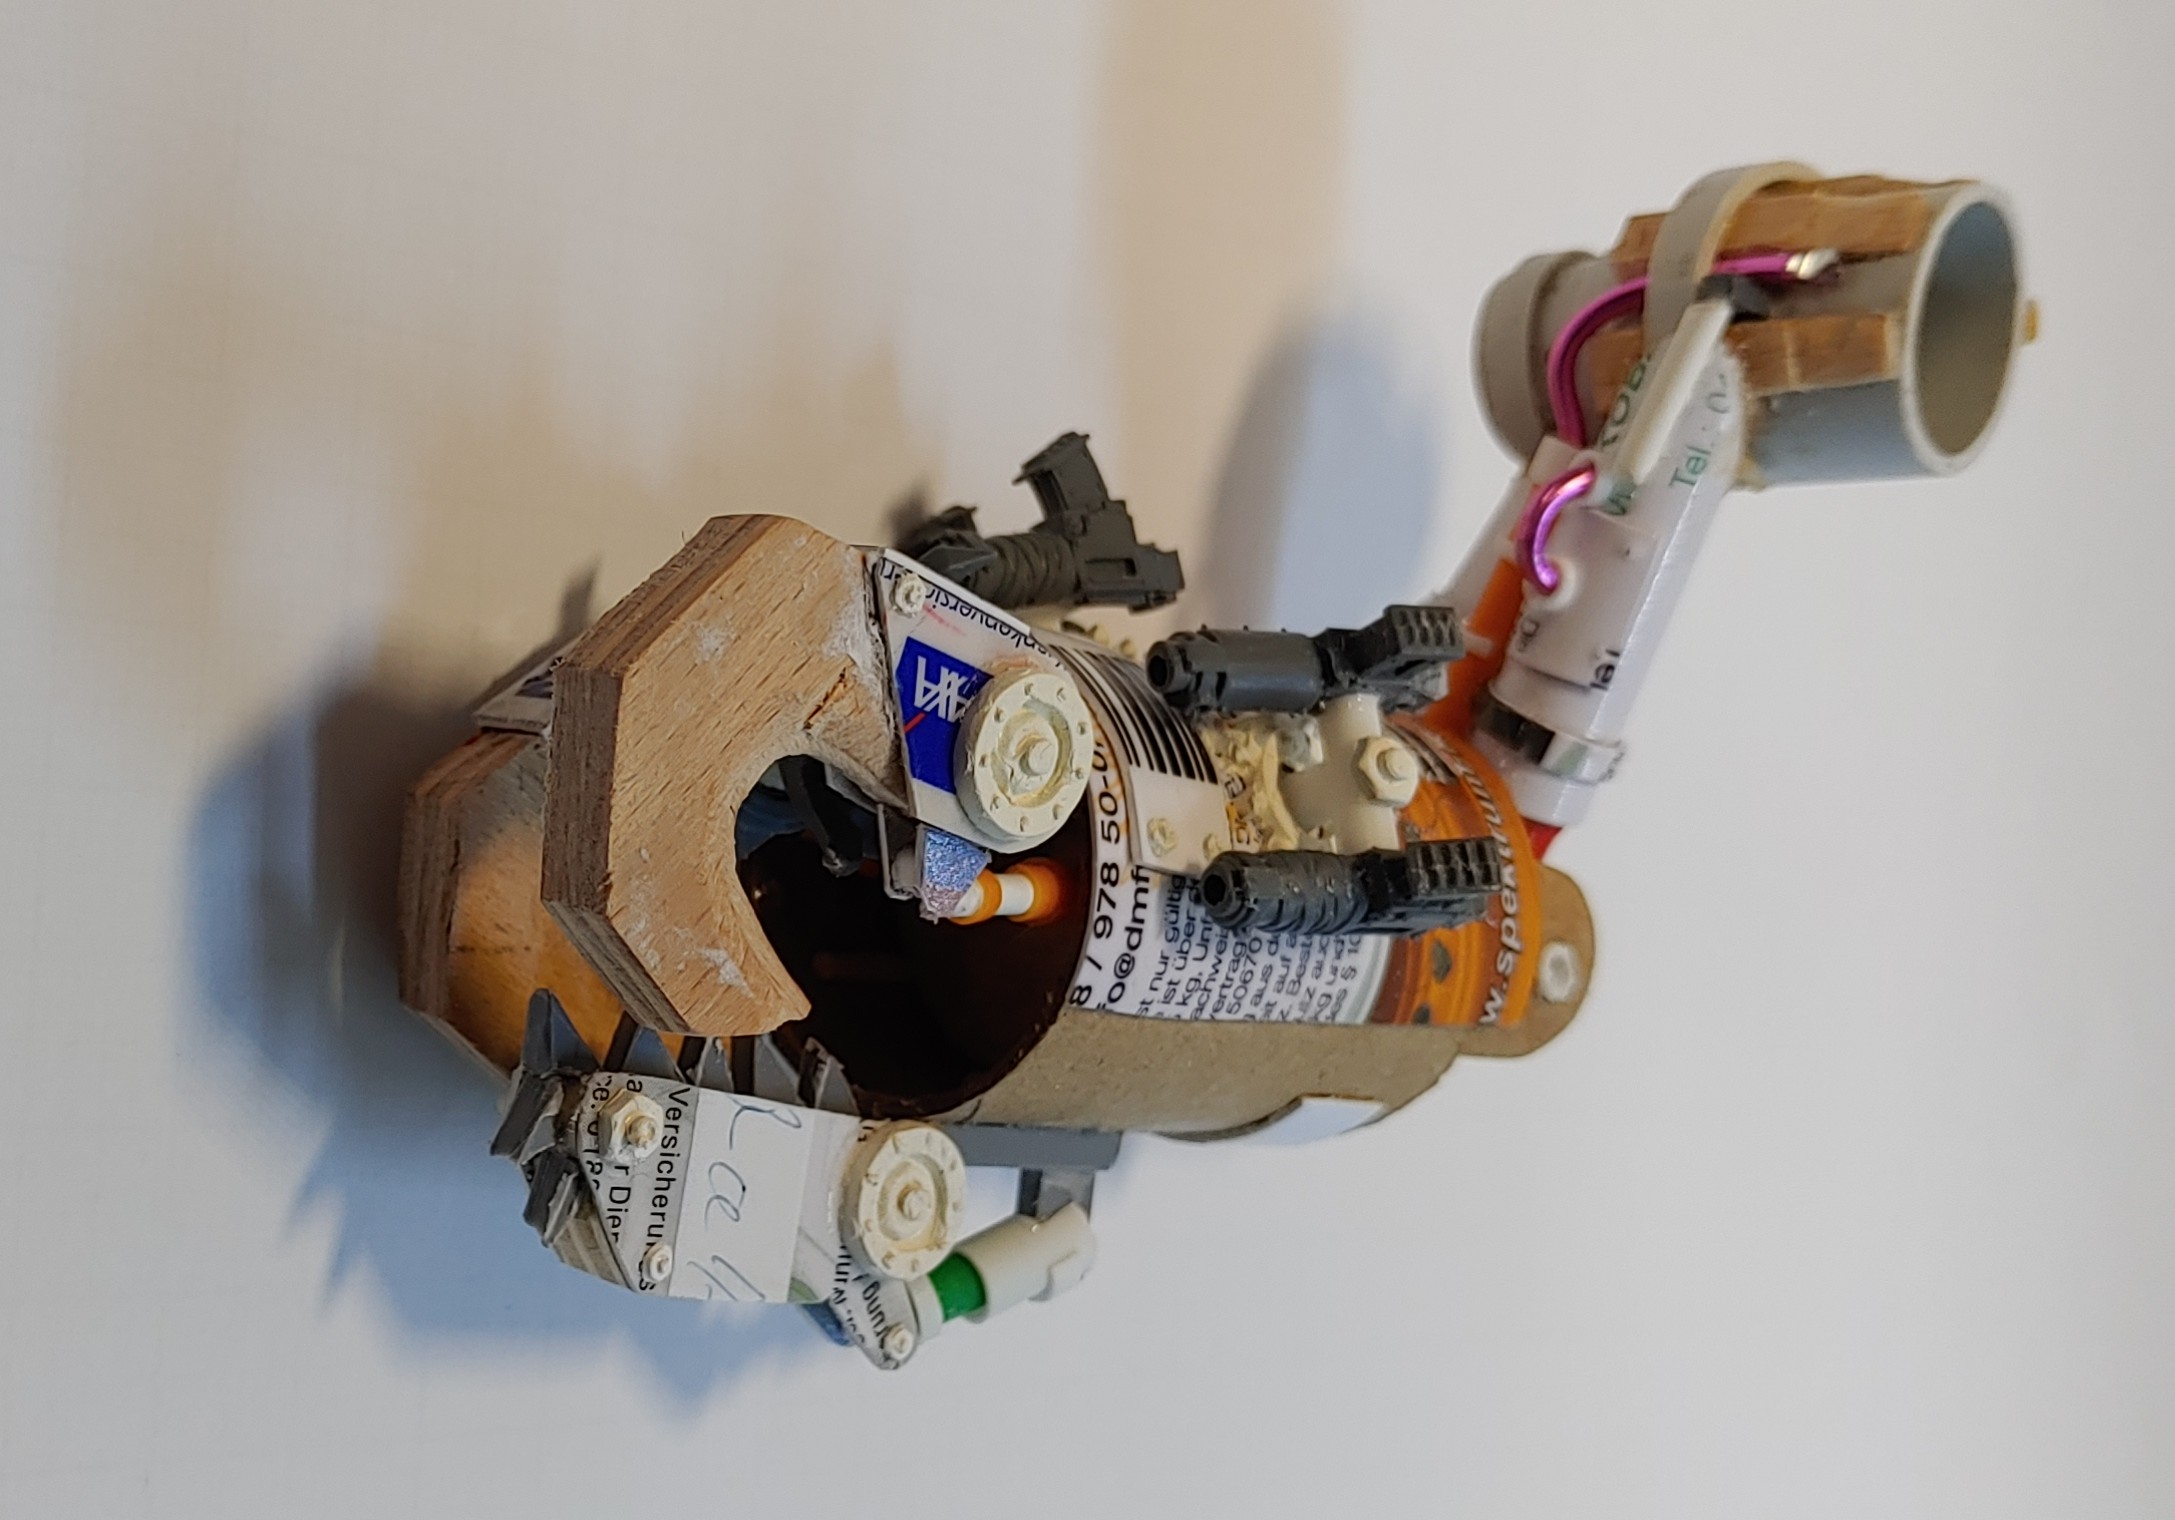
The claw arm basis is a thick cardboard tube I had laying around.
The plastic plates were heated and then bend around the tube before cutting them to size.
You can again see a lot of different tubes being used.
The claws themselves are wood, which didn't work out that well.
I thought in the beginning that basecoating and sanding will get rid of the wood grain, but it didn't.
You can still see the wood structure in the finished model further down.
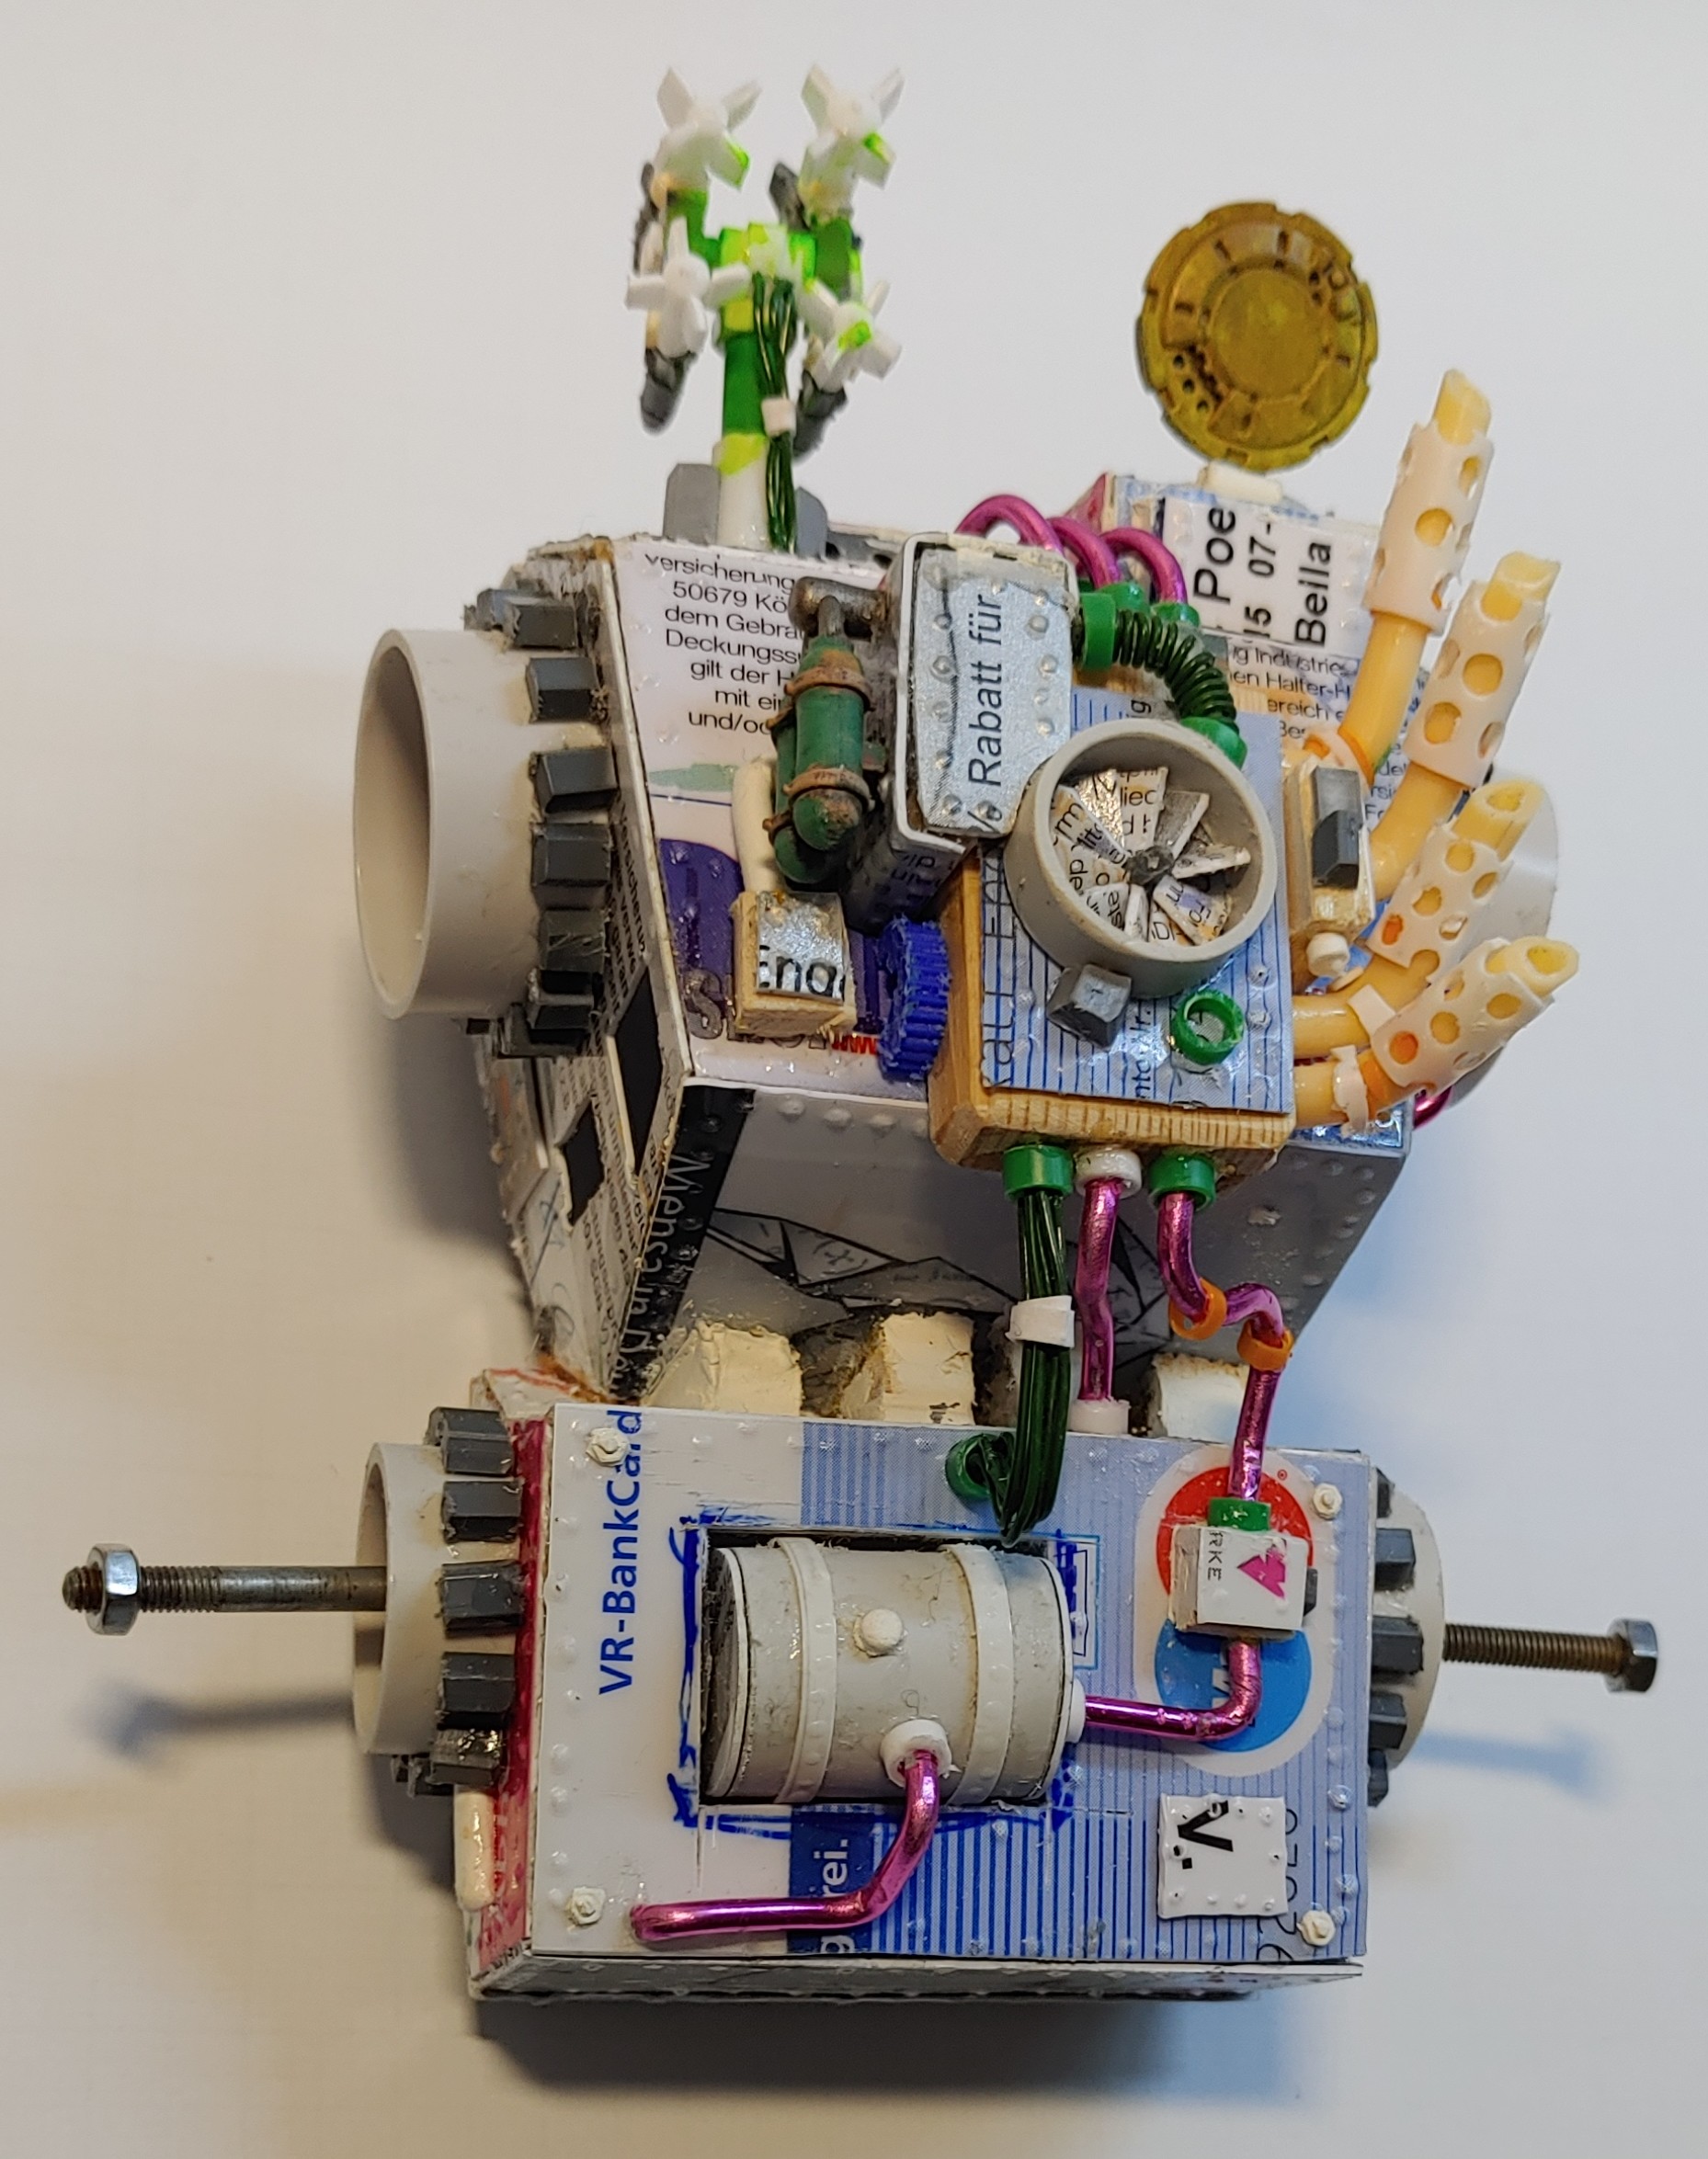
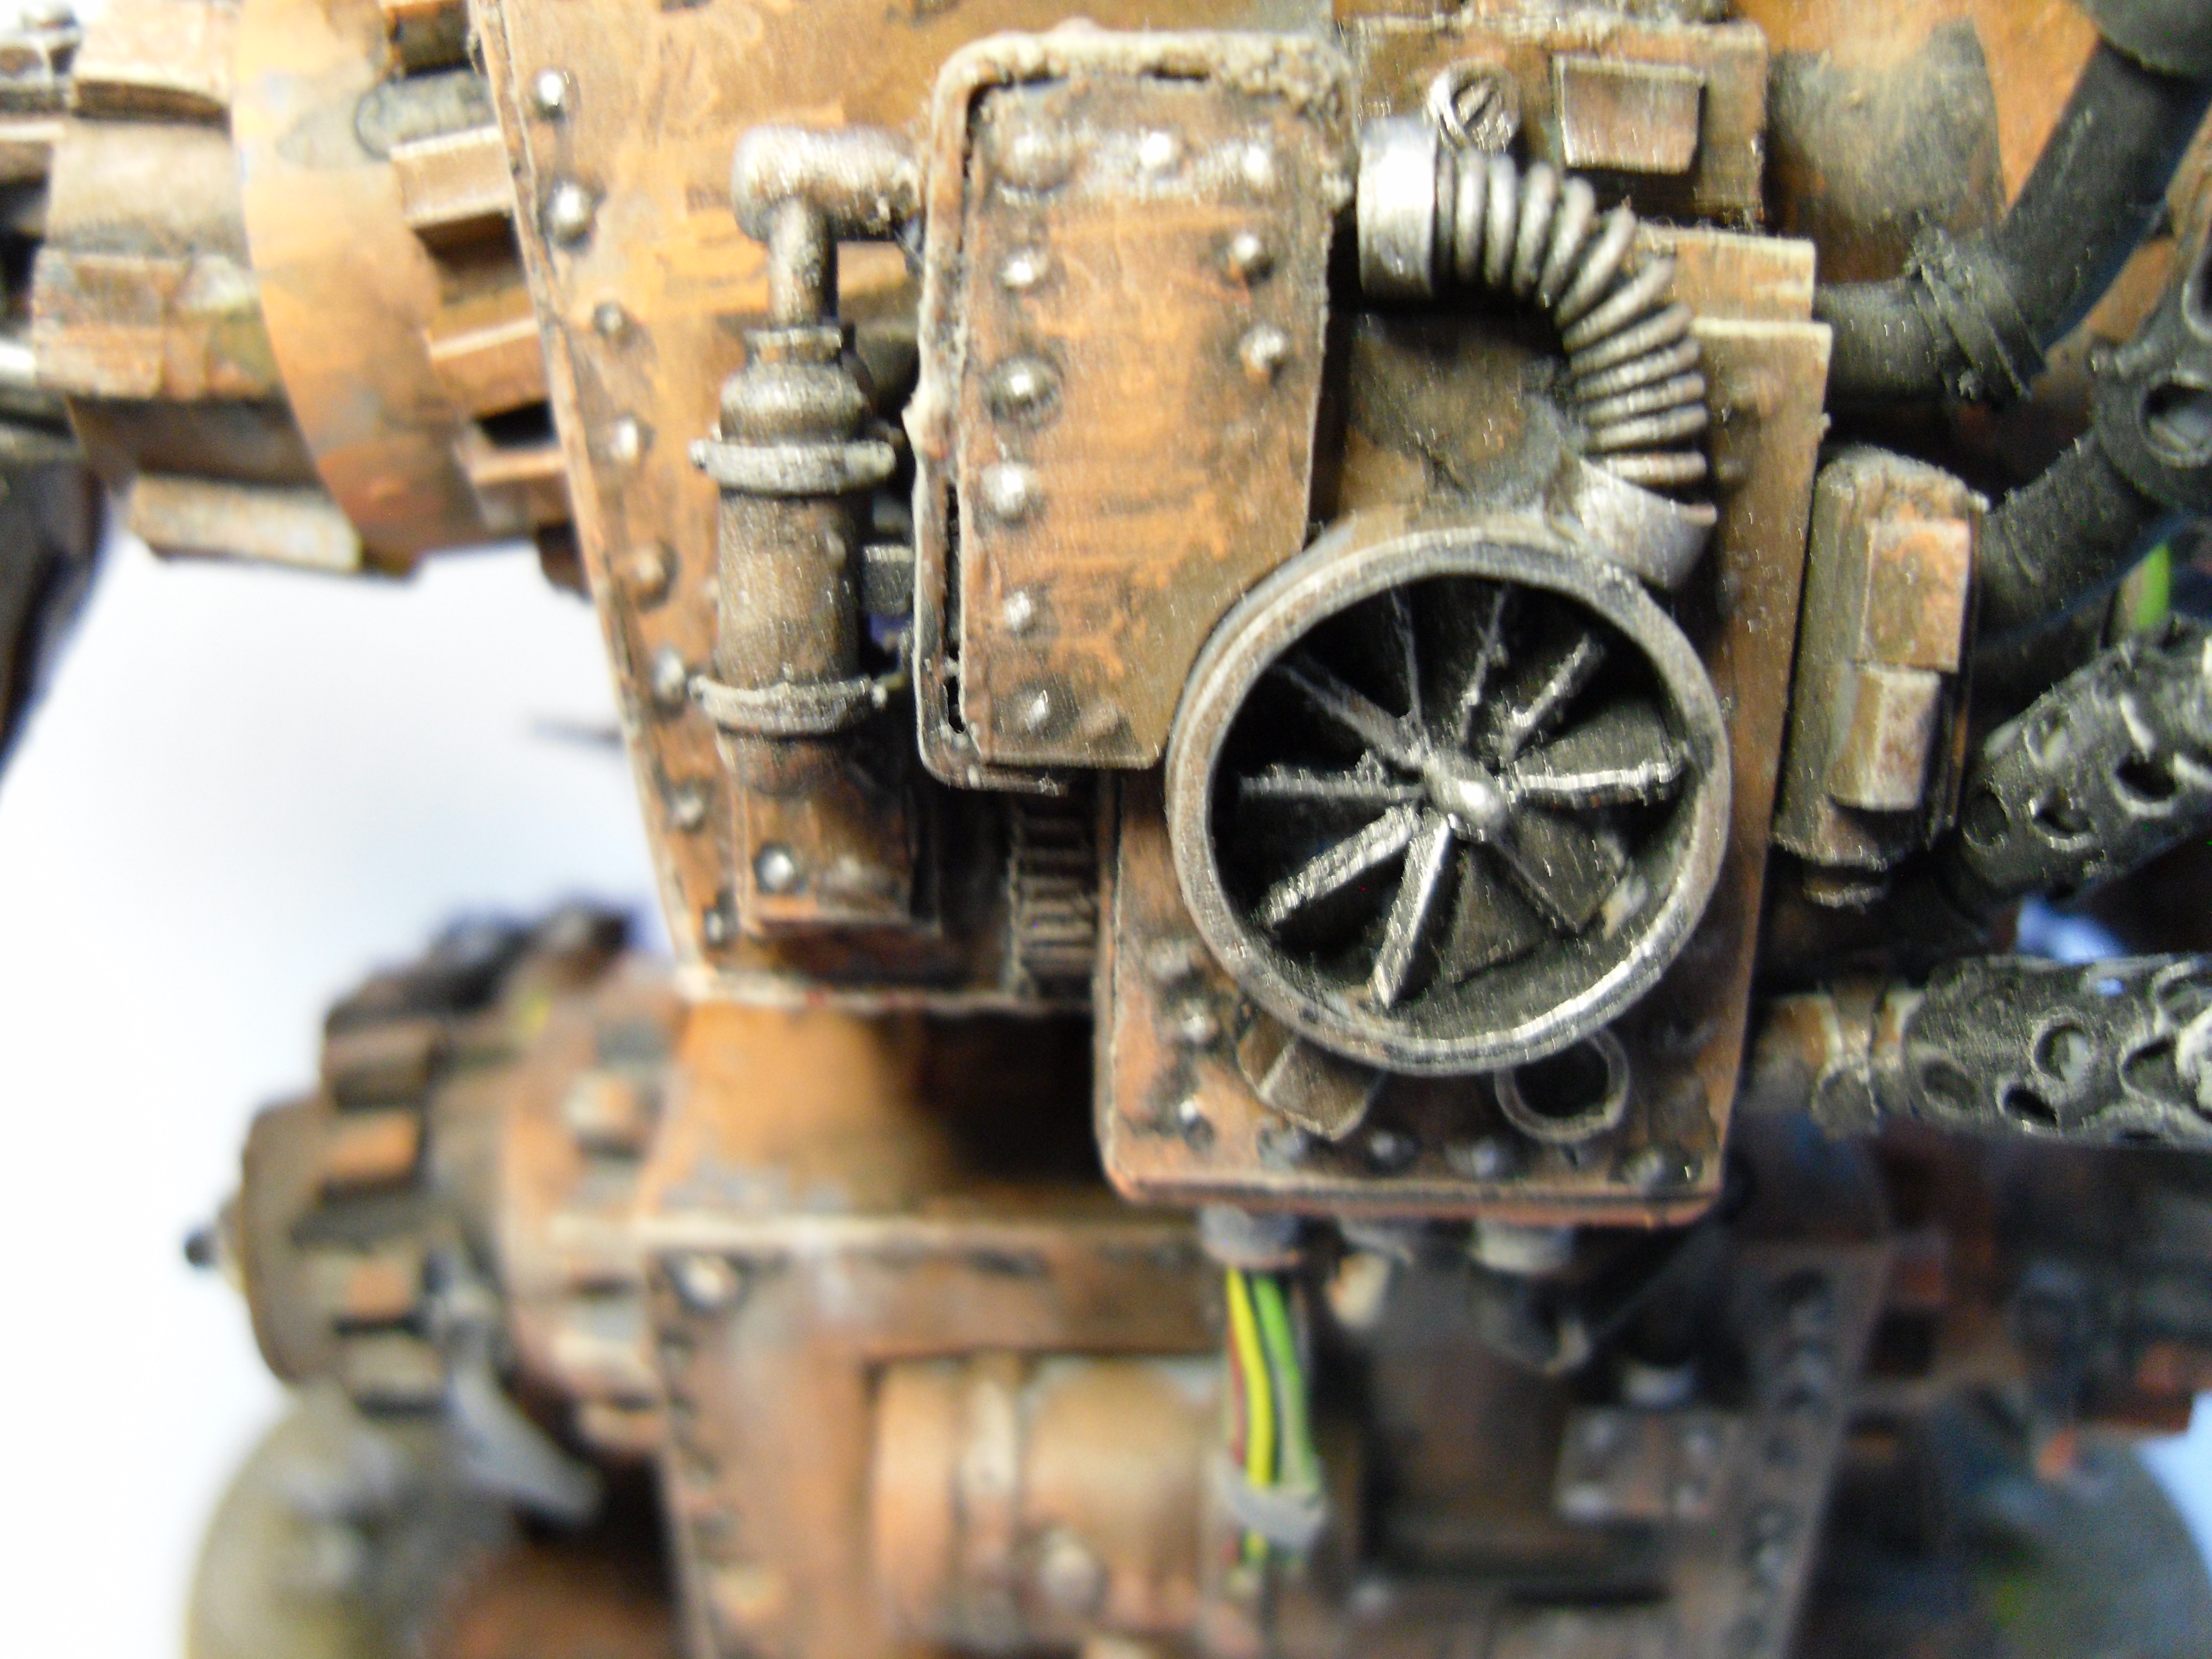
I wanted to spice the model up a little bit with some screw nuts and other parts.
So I started to copy some GW parts with a flexible mould rubber.
You heat that rubber in some hot water and can then make an imprint of a part.
I used a couple of orc wheels, some small nuts and for the very smallest nuts I copied an orc buggy armour plate.
Then I used Milliput for the actual parts and later on trimmed them to the right size.


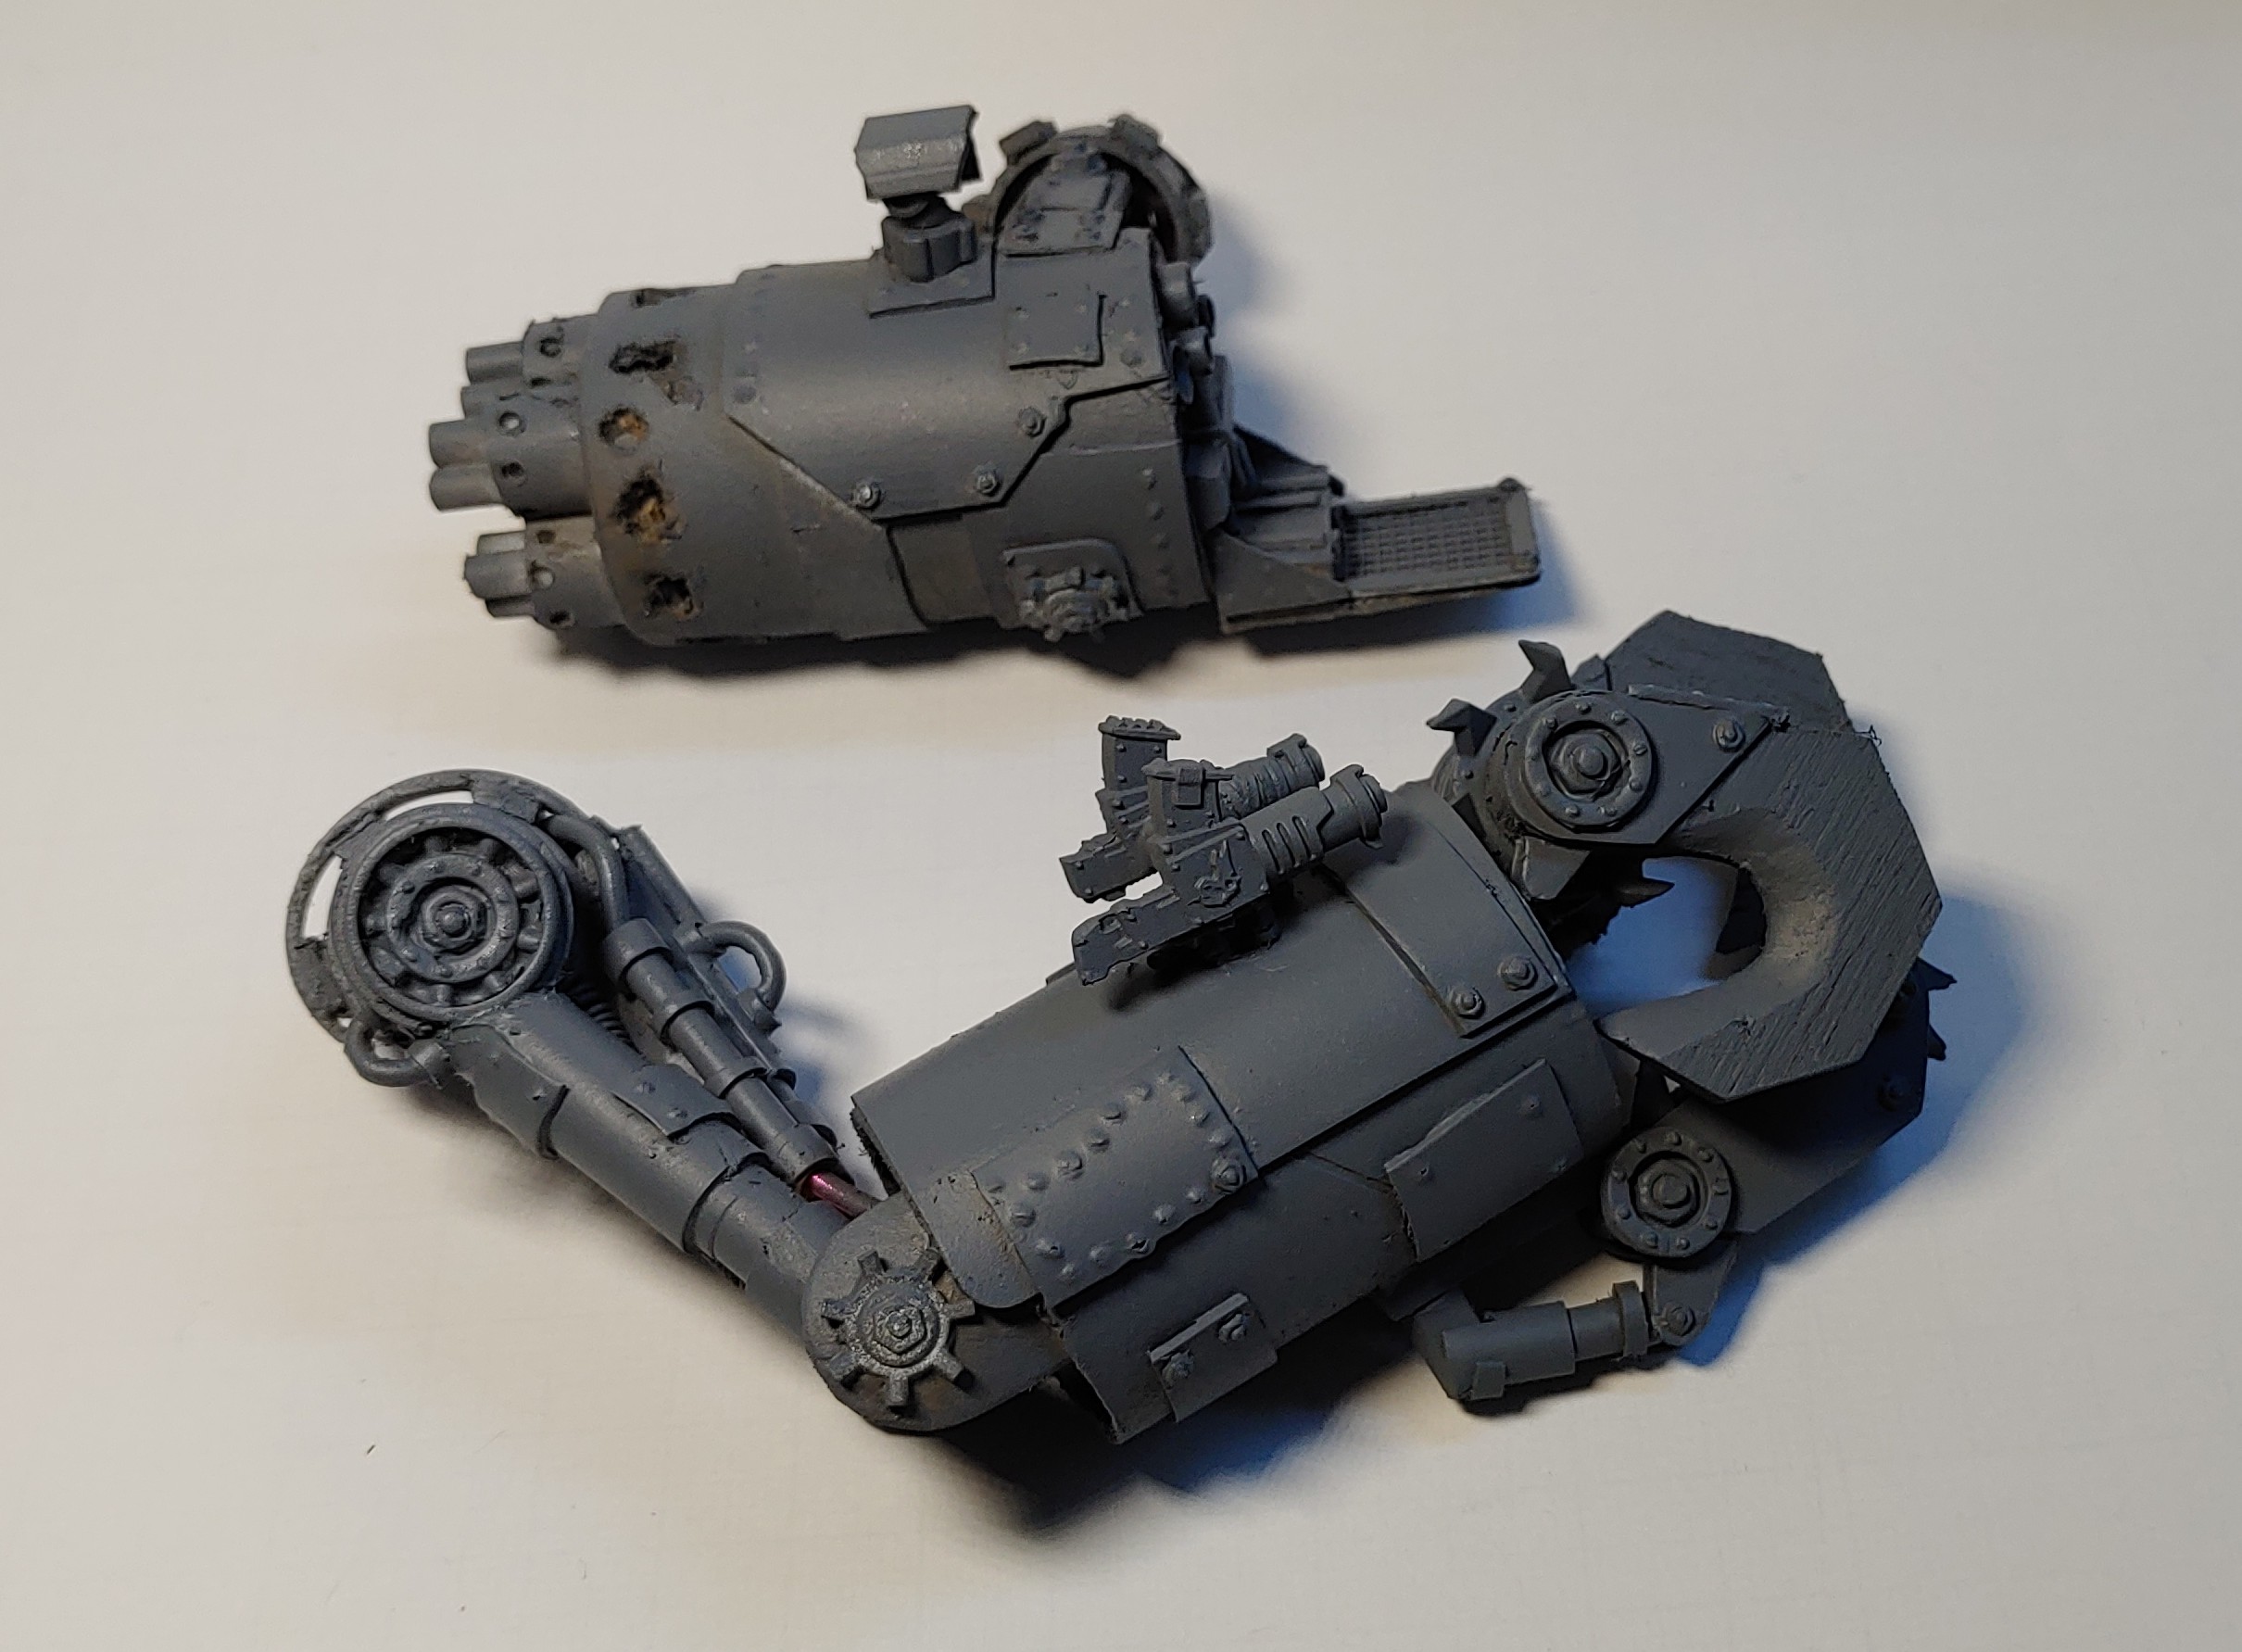
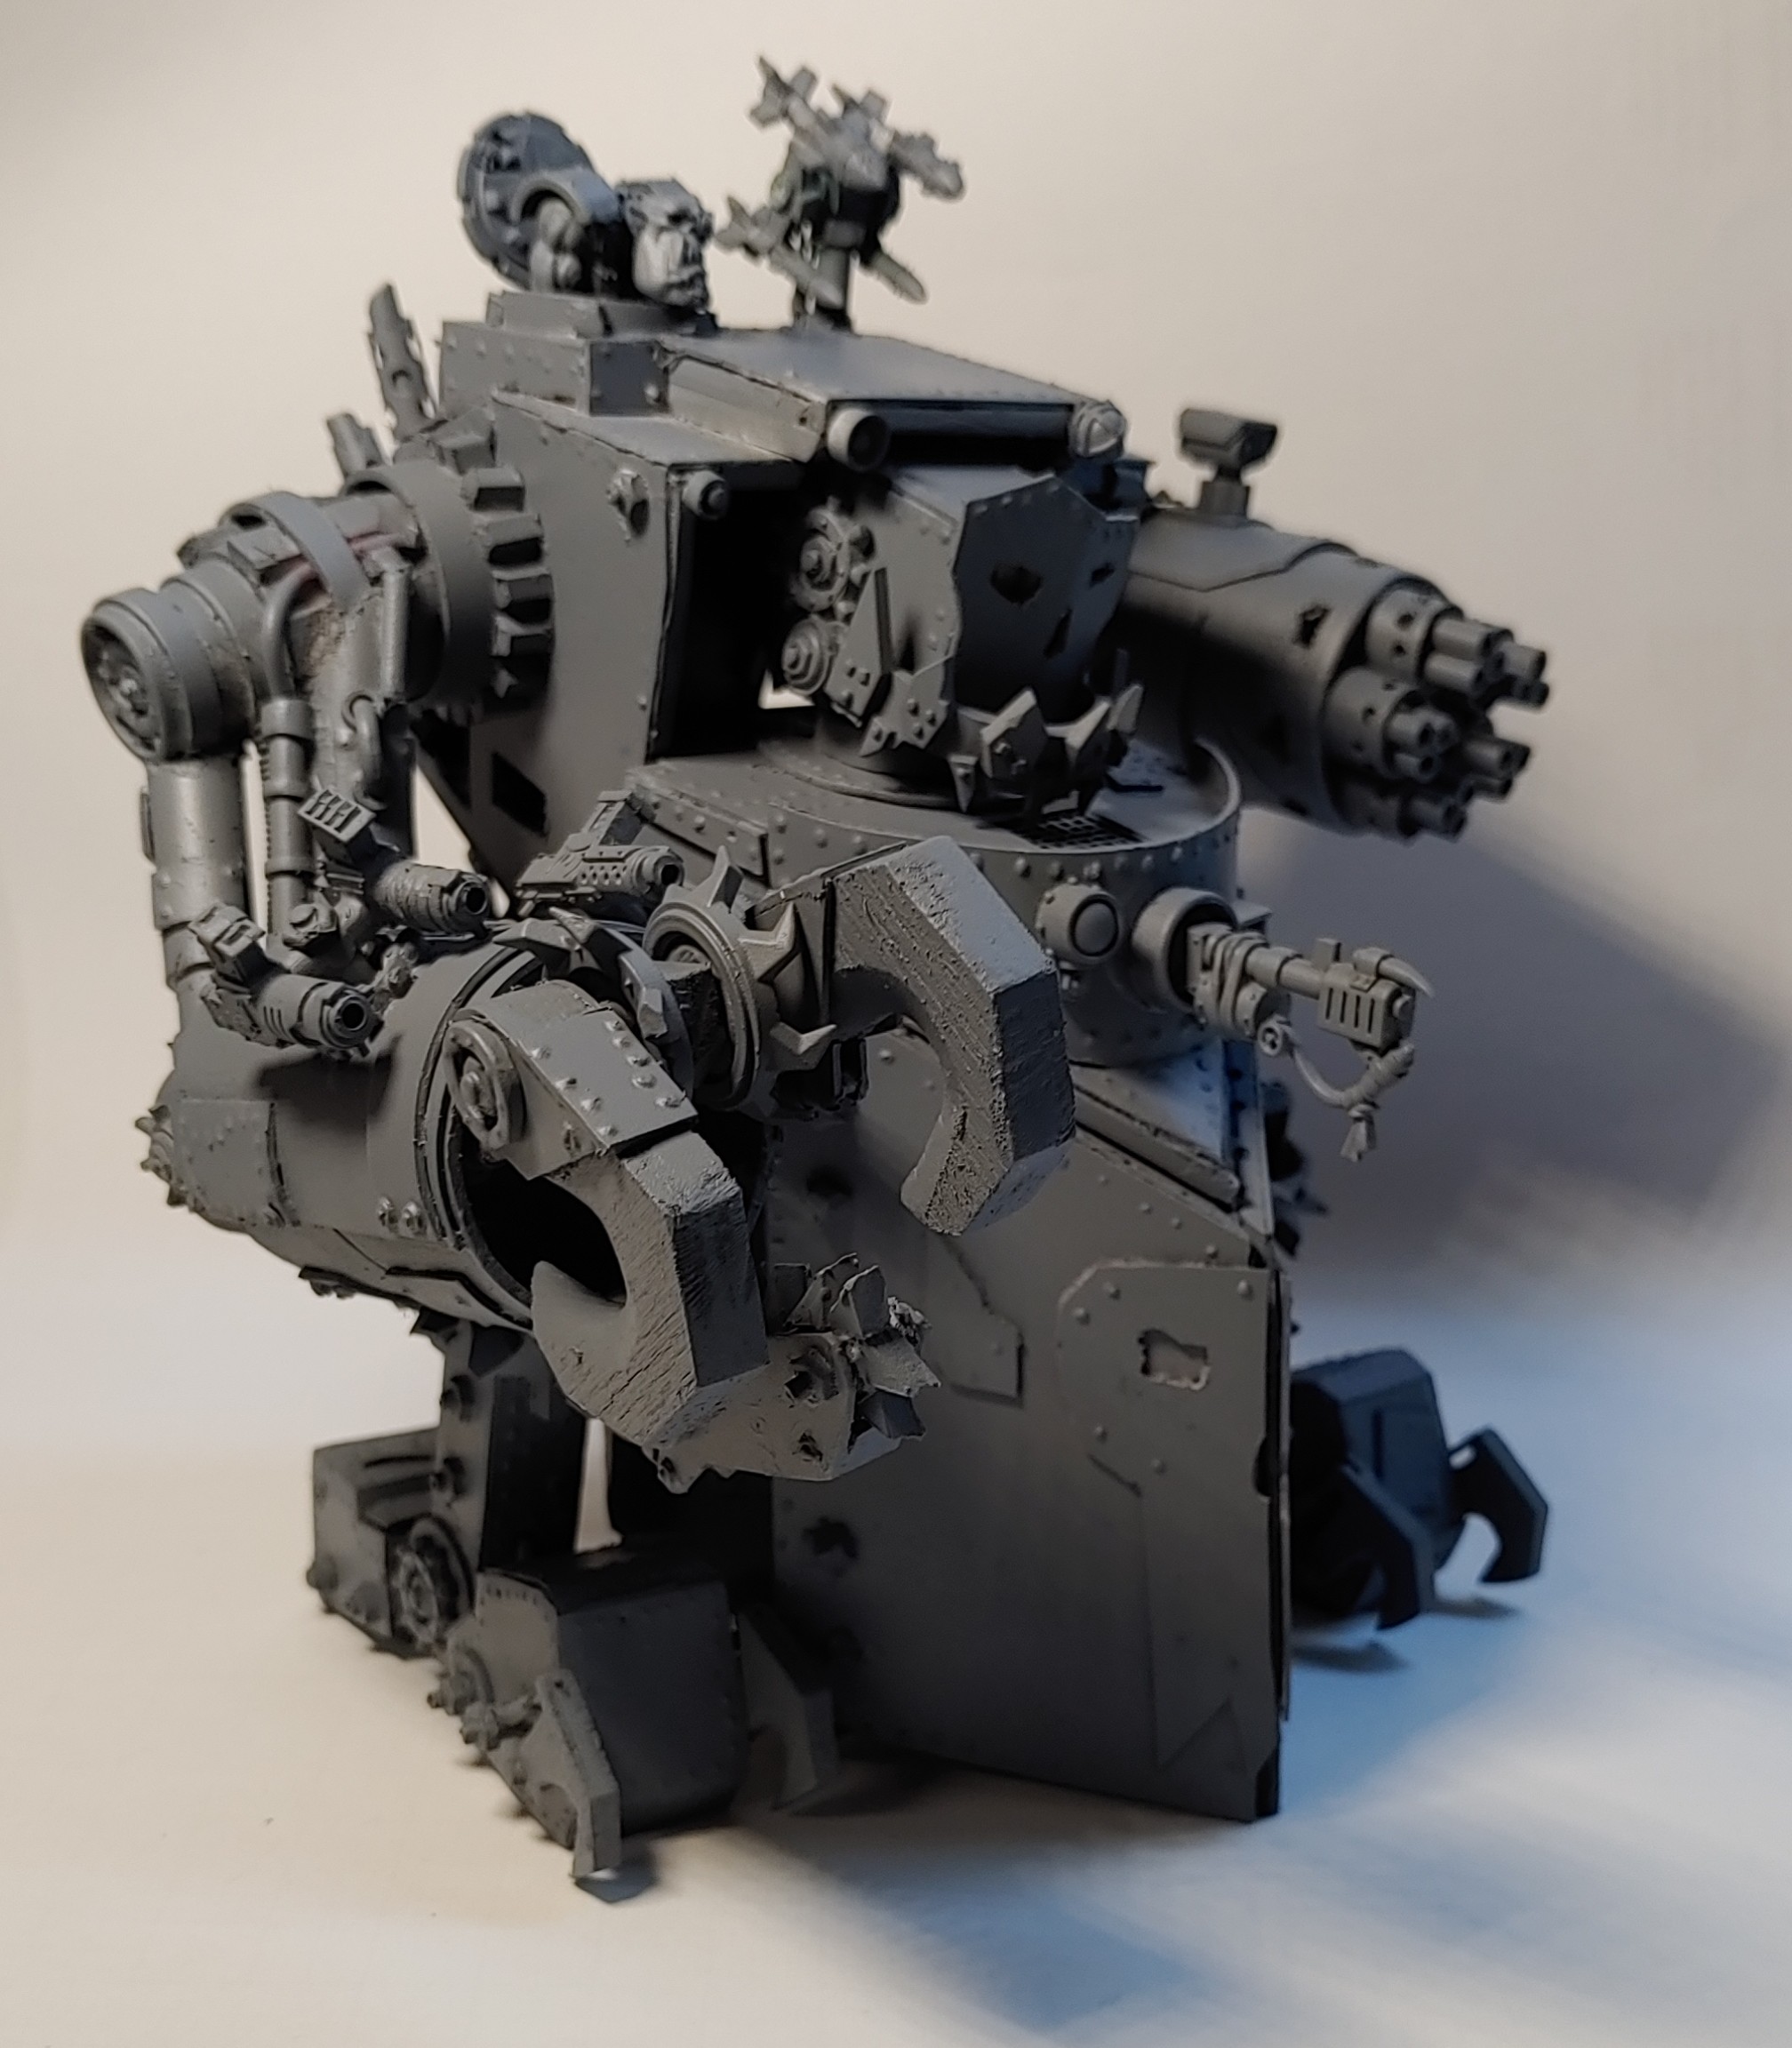
The gun was made out of a lot of different sized tubes.
The plates were heated with a heat gun and then bend around the cardboard tube.
For the gun sight on the top I rounded a plastic sprue part and glued it inside a fitting tube.
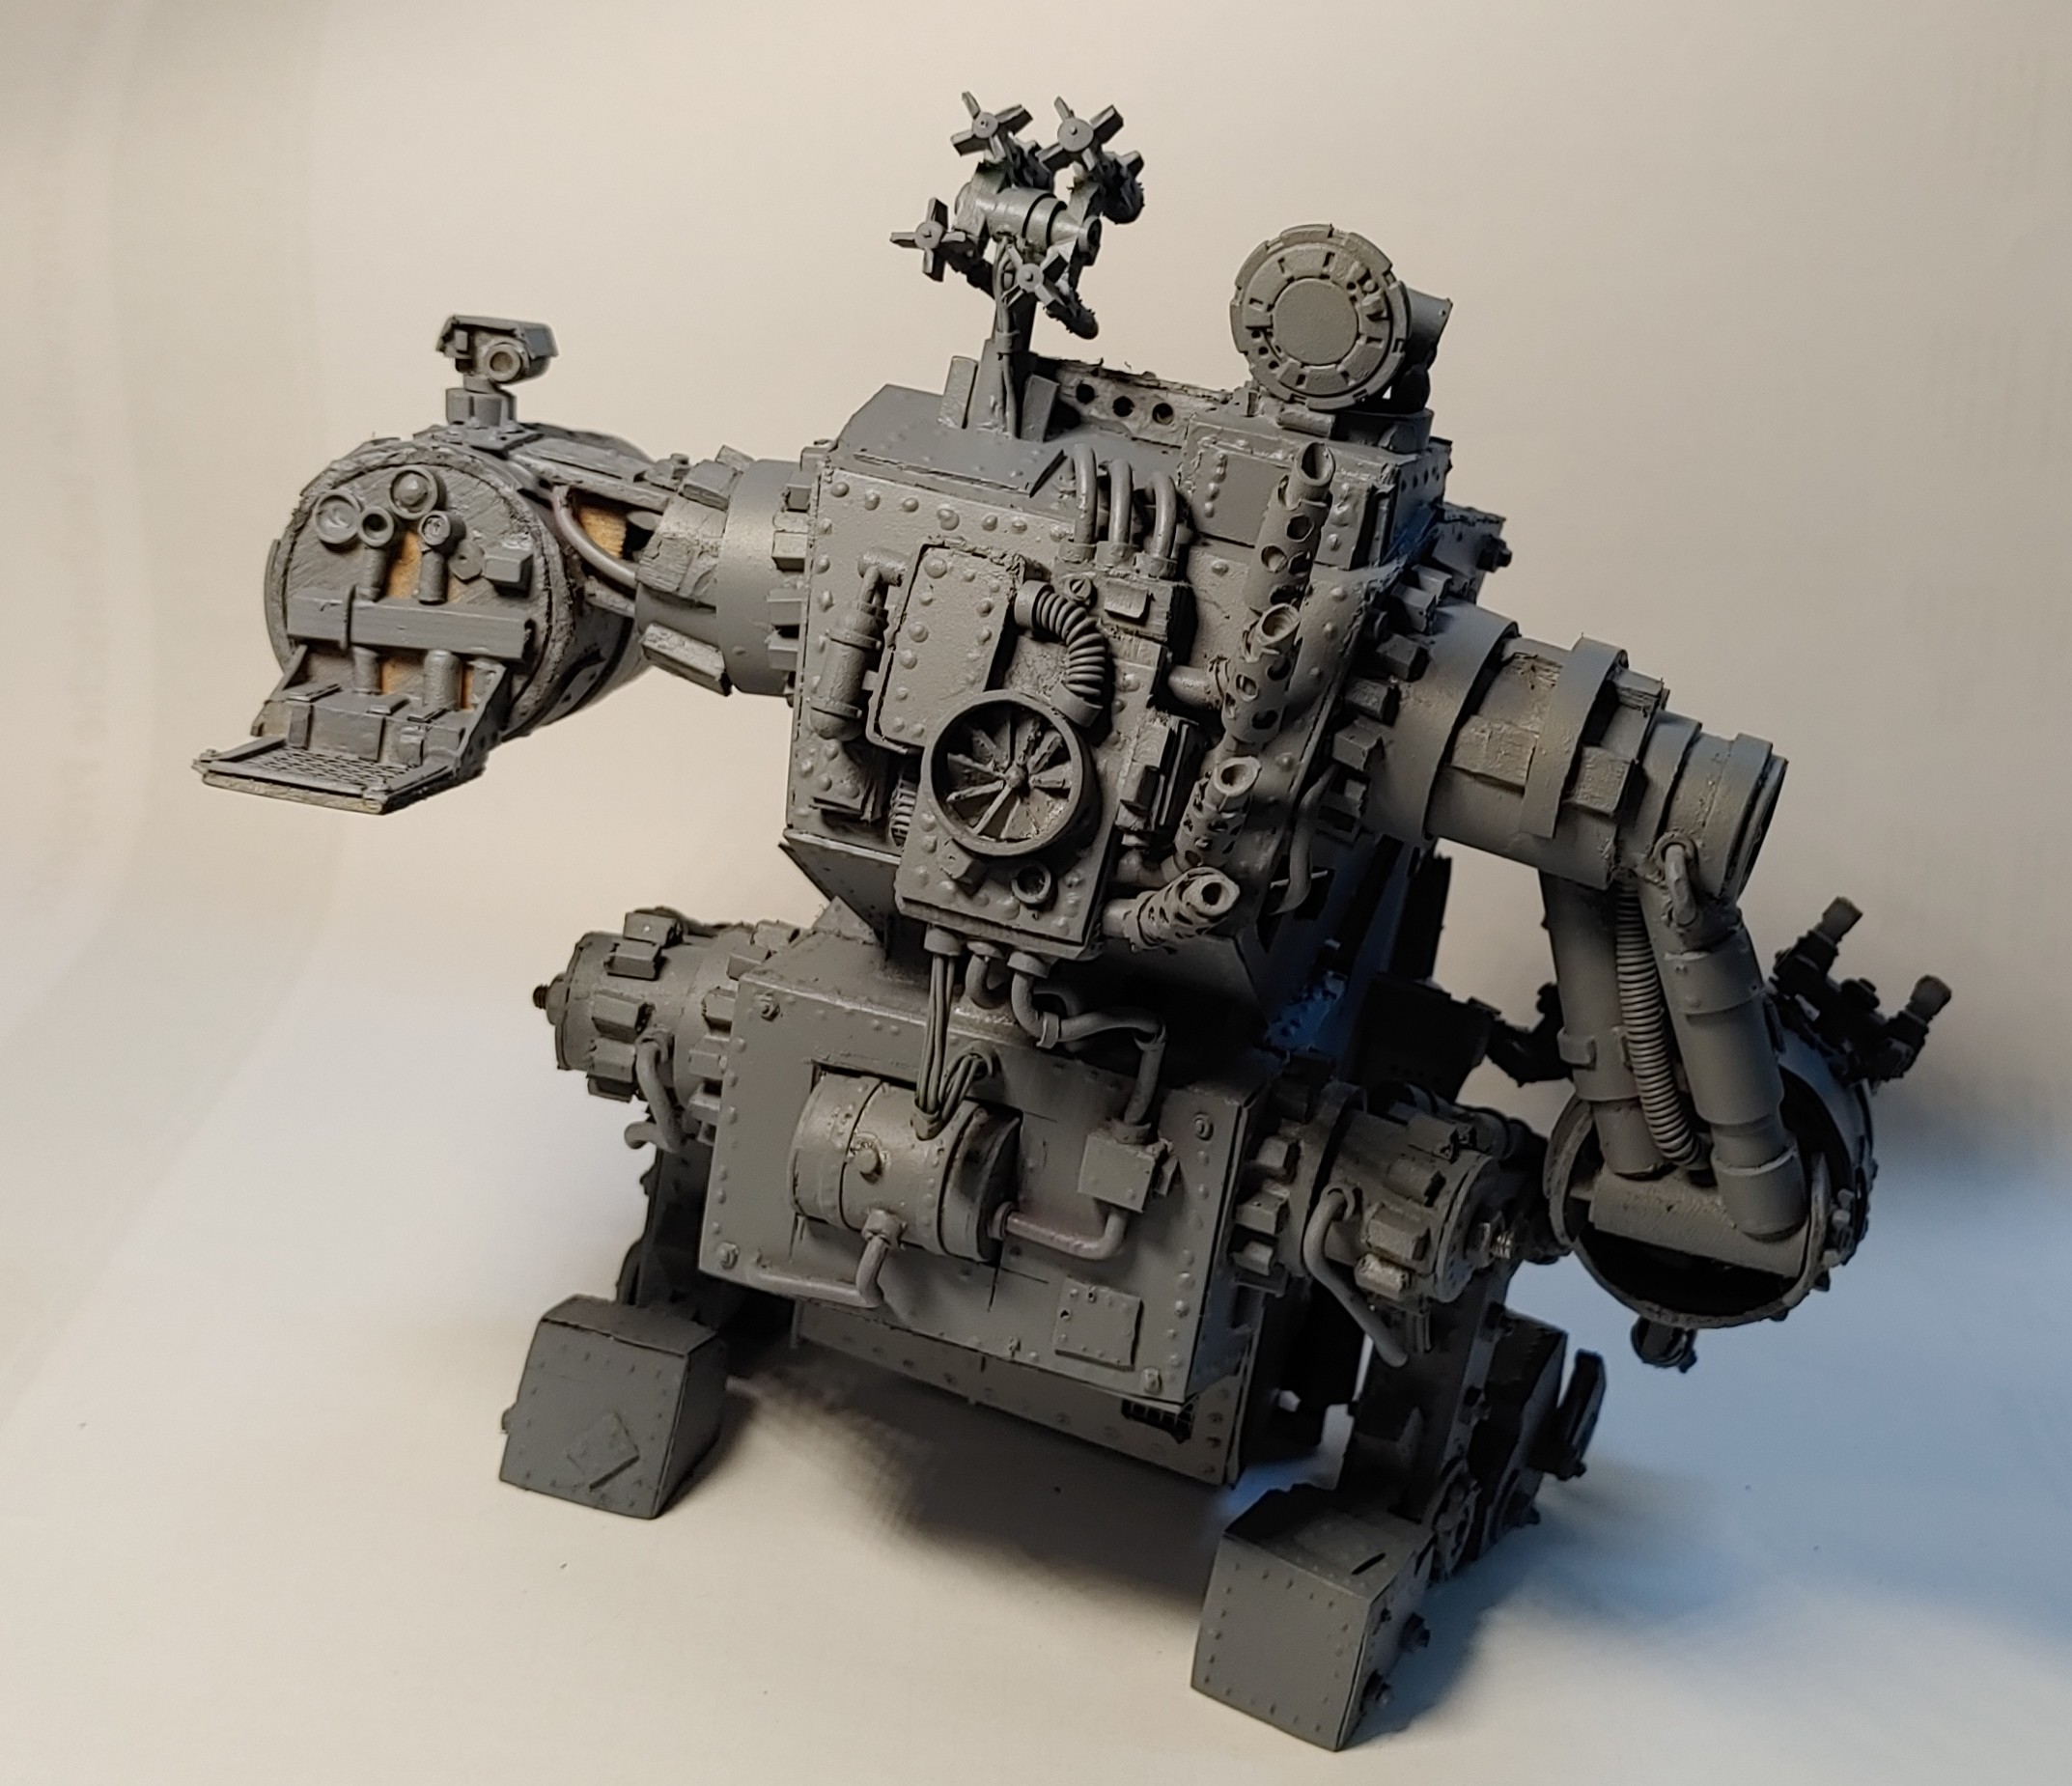
Base coat

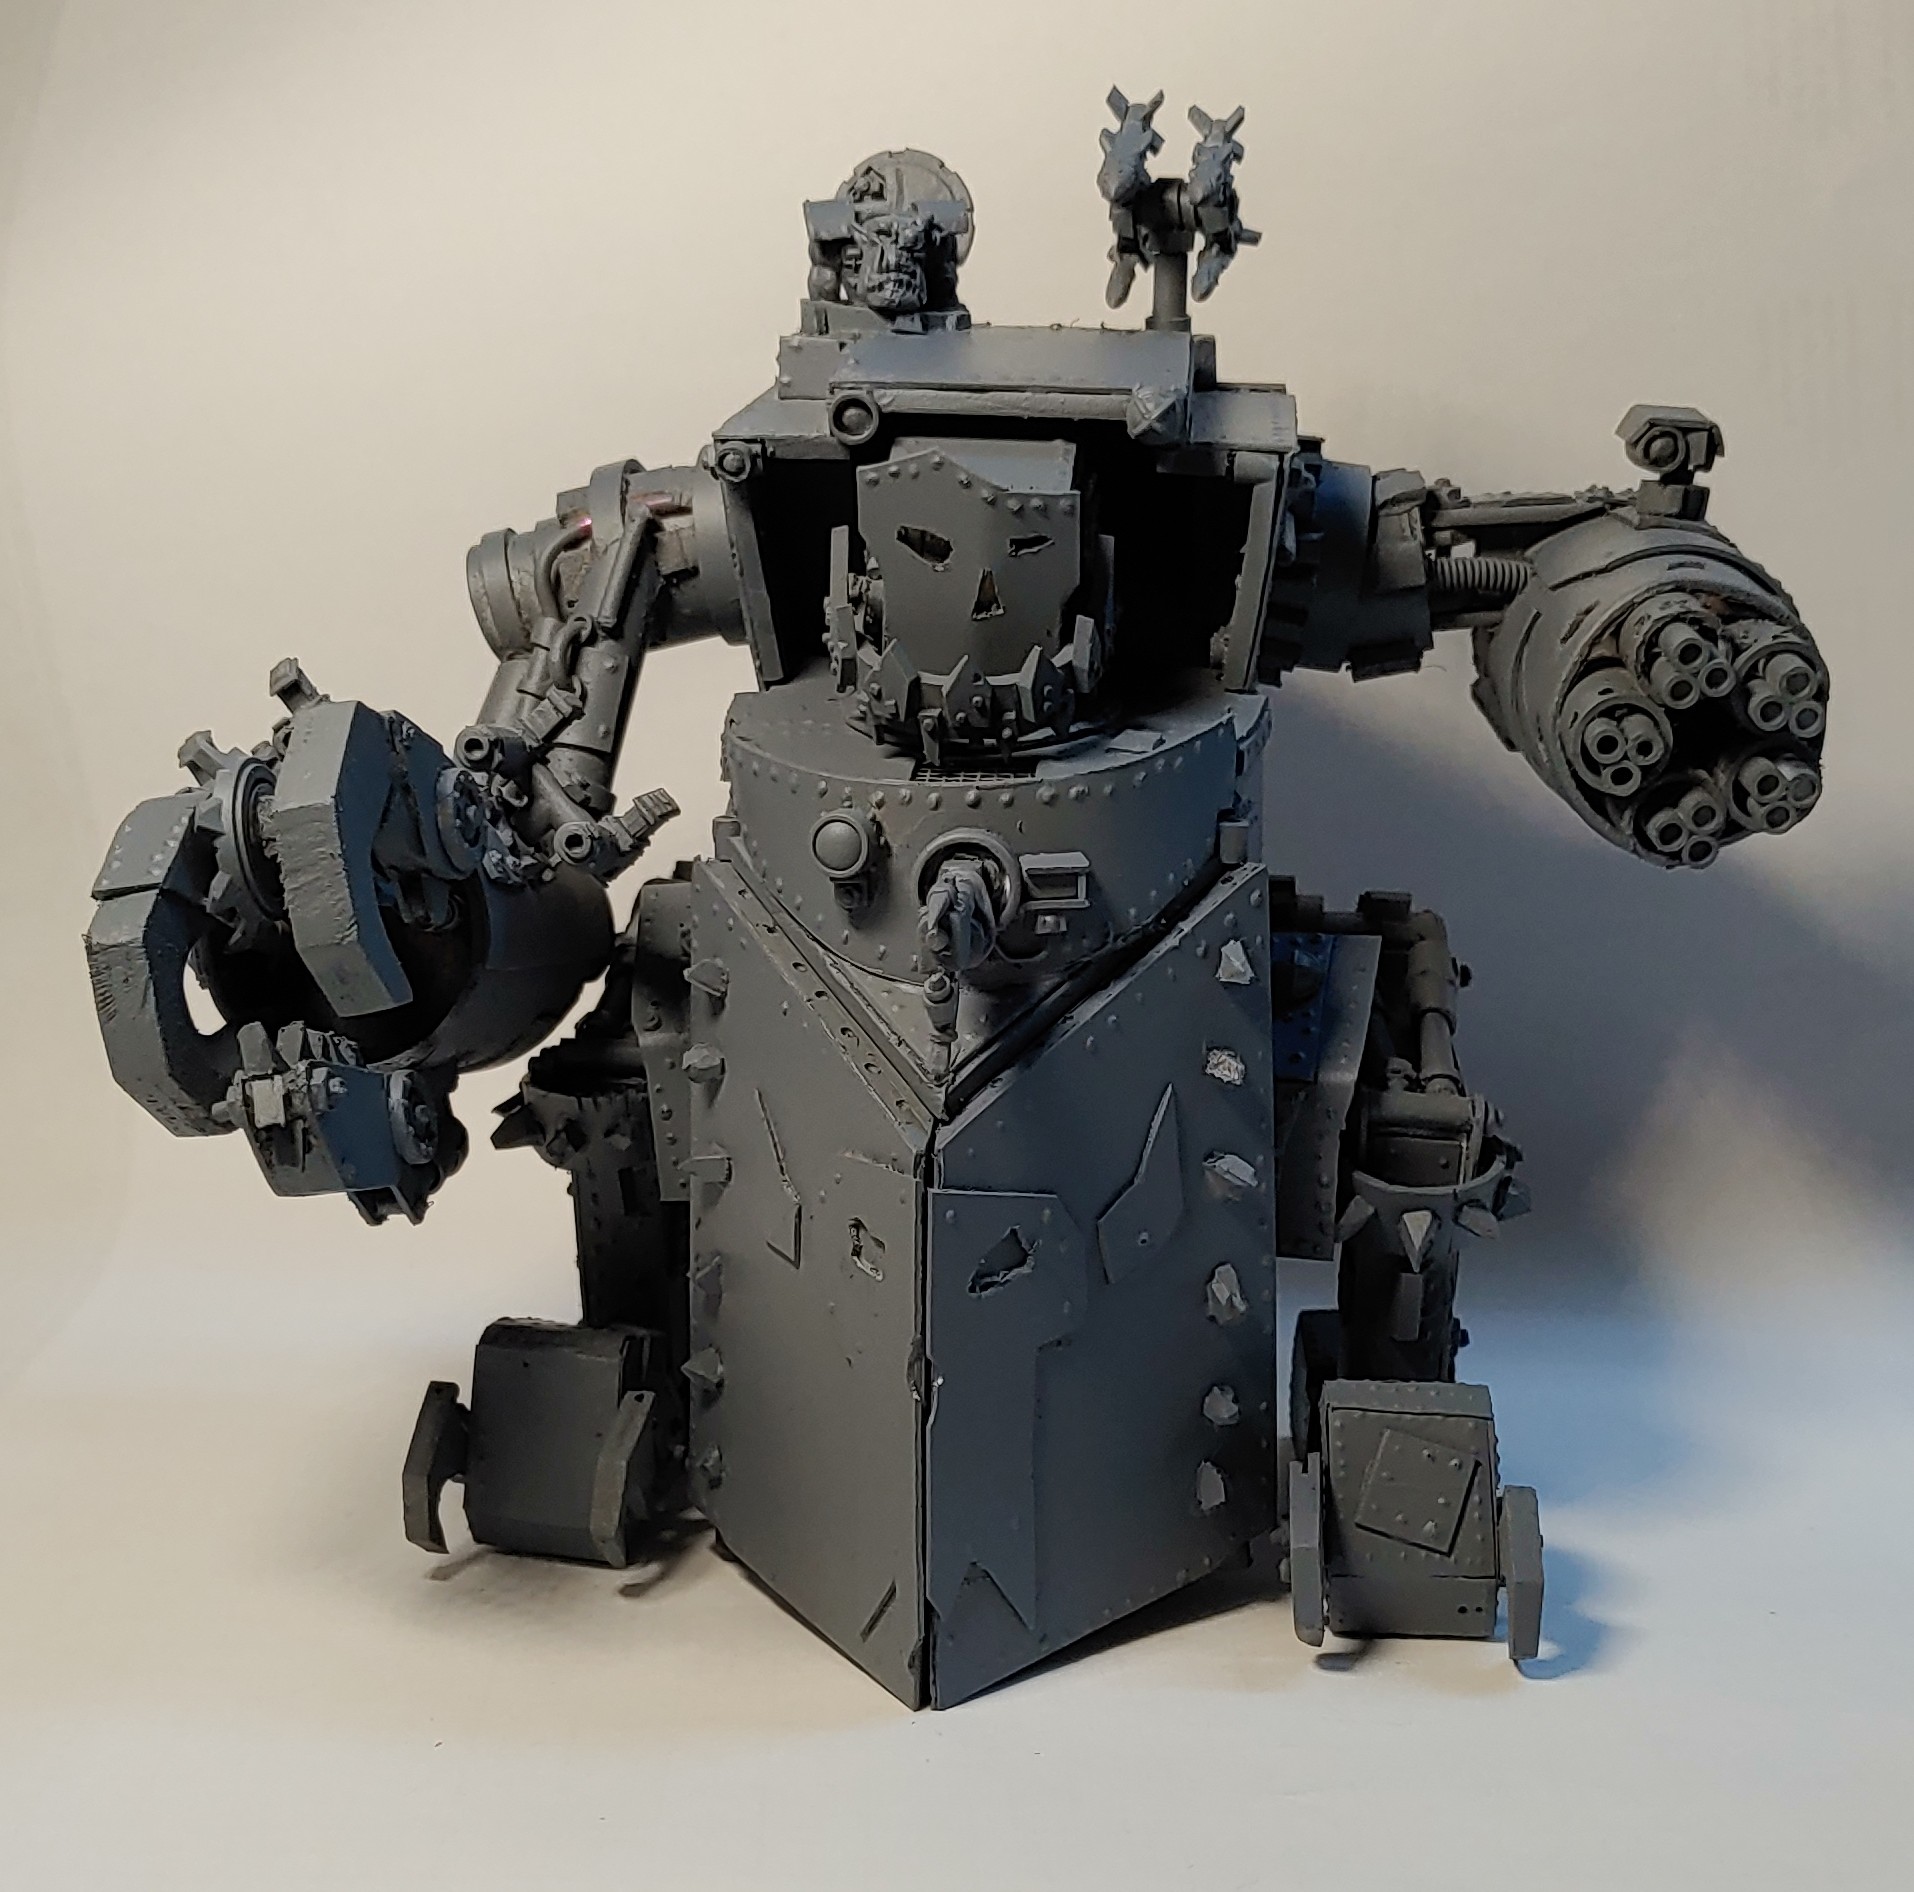
The base coat hides all the parts and pieces that I used in building the model. Suddenly it looks completely different and cool.

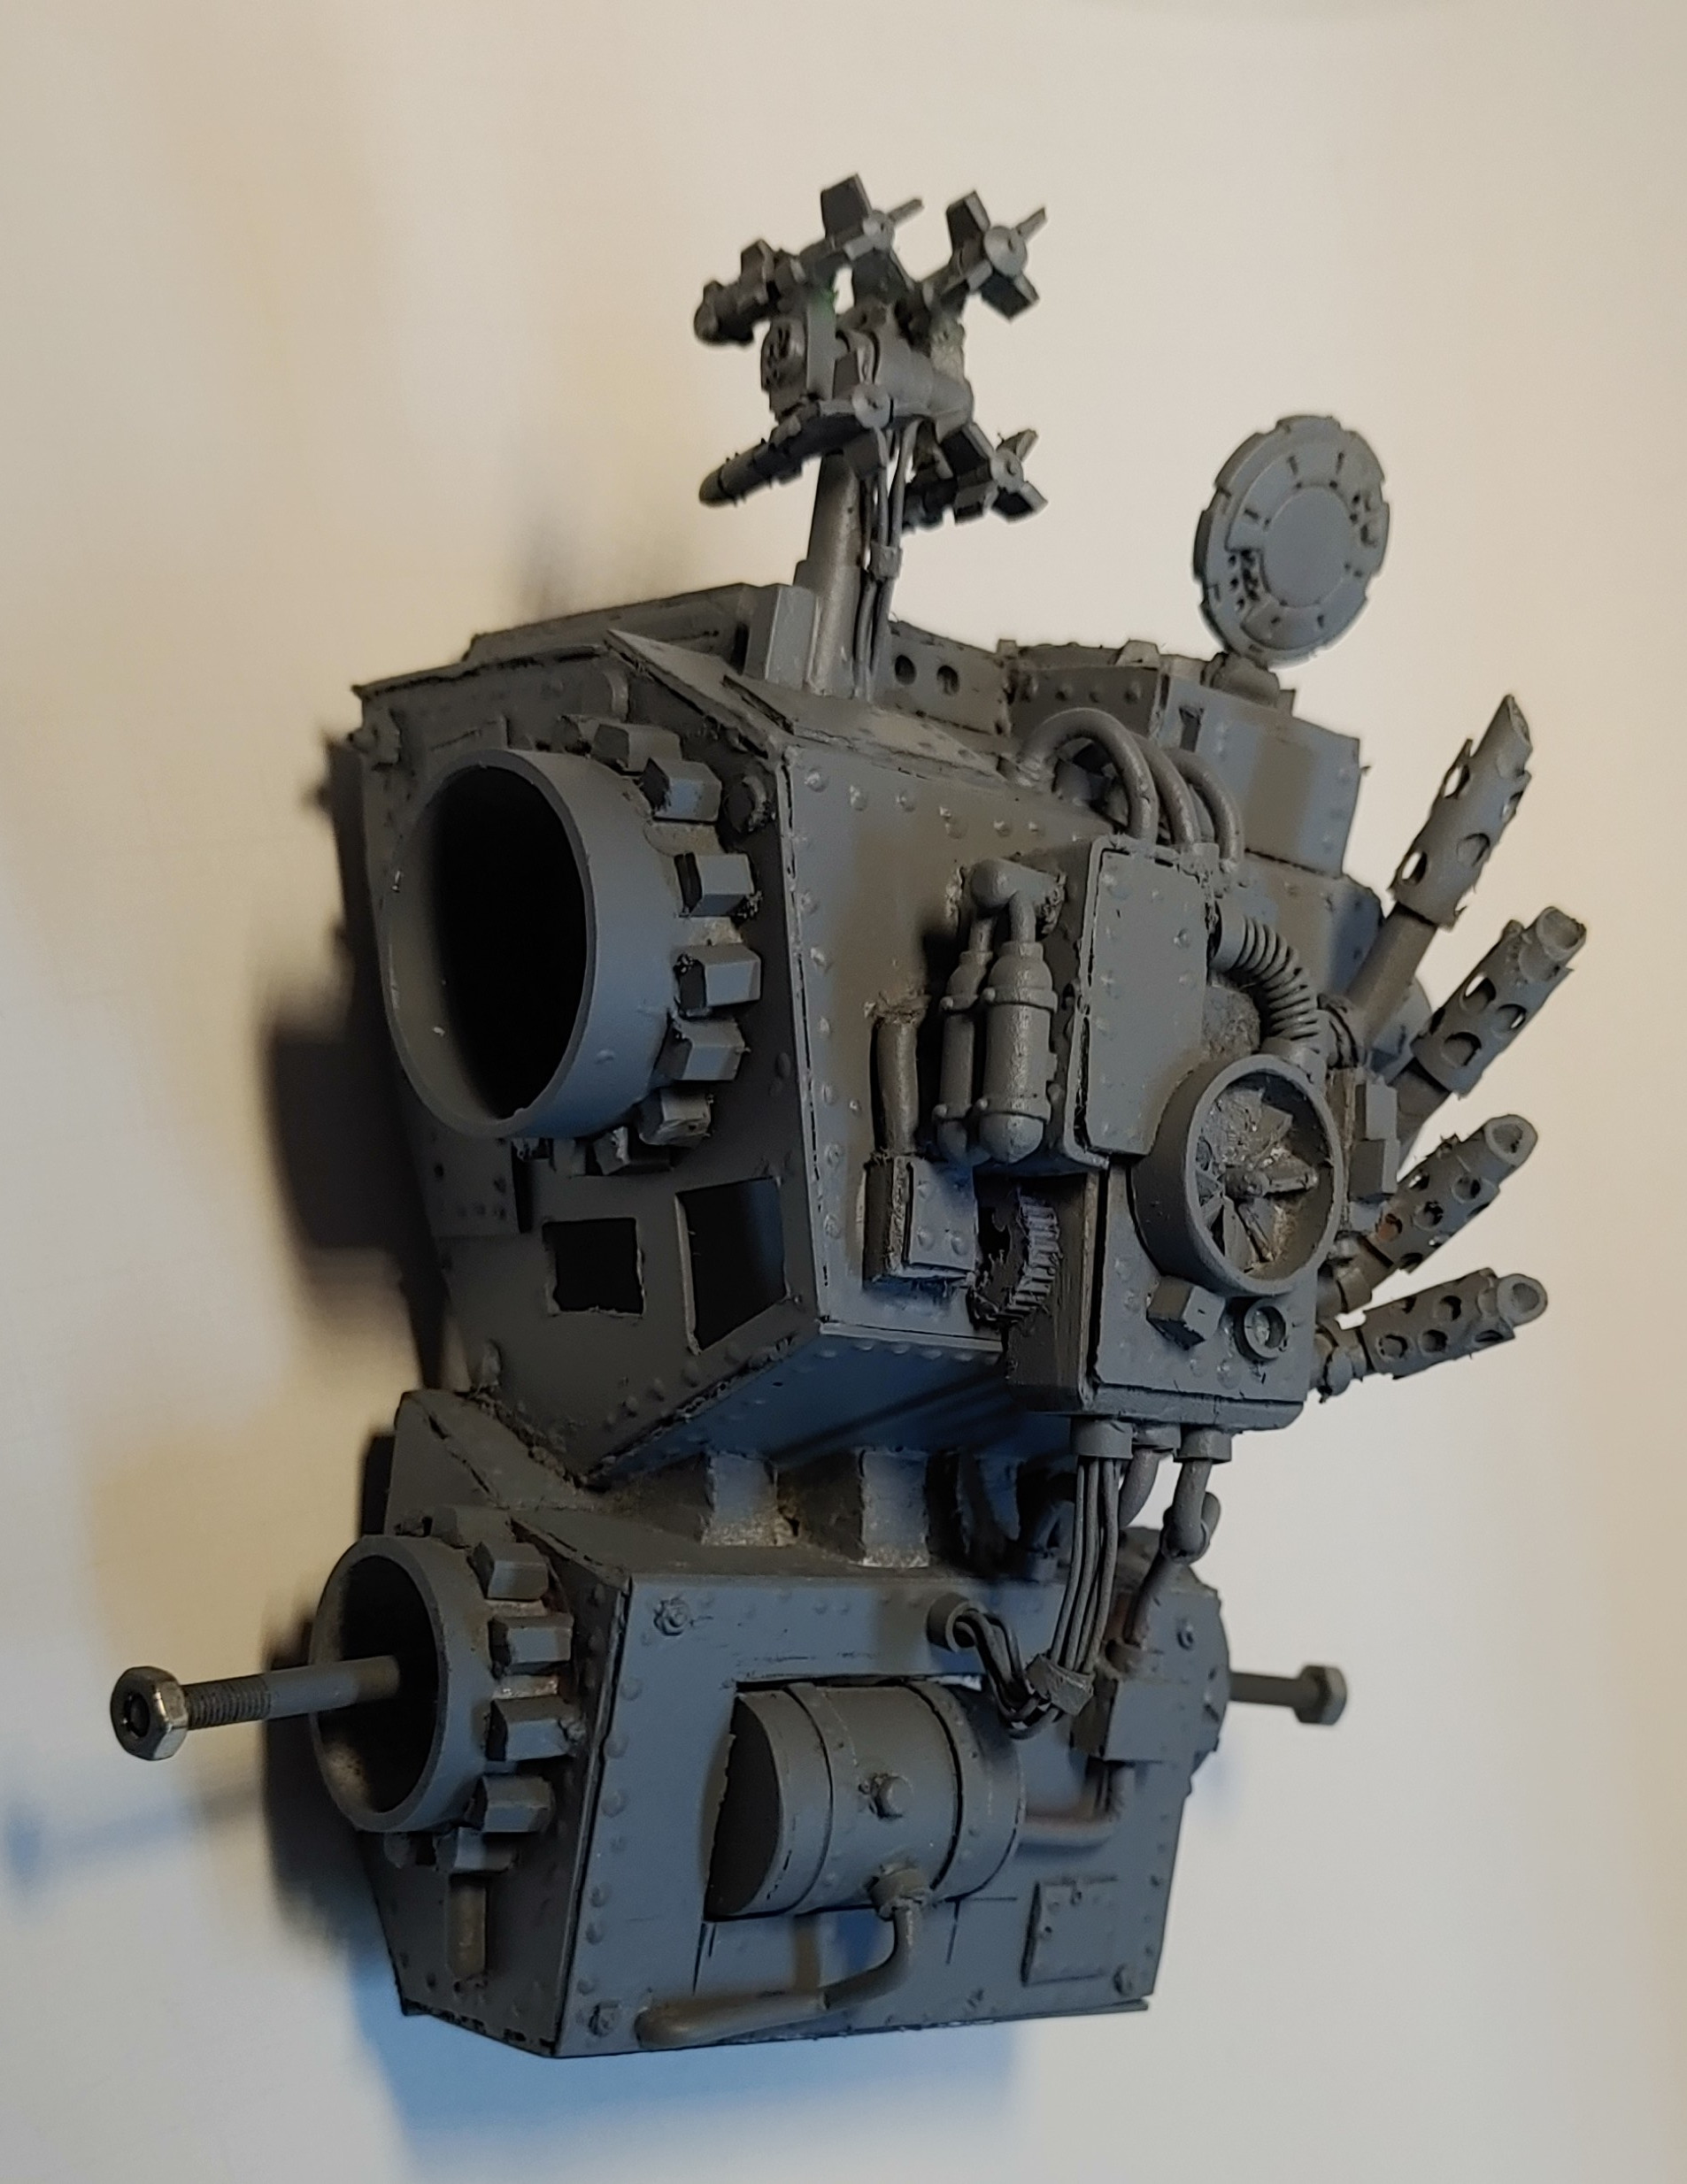
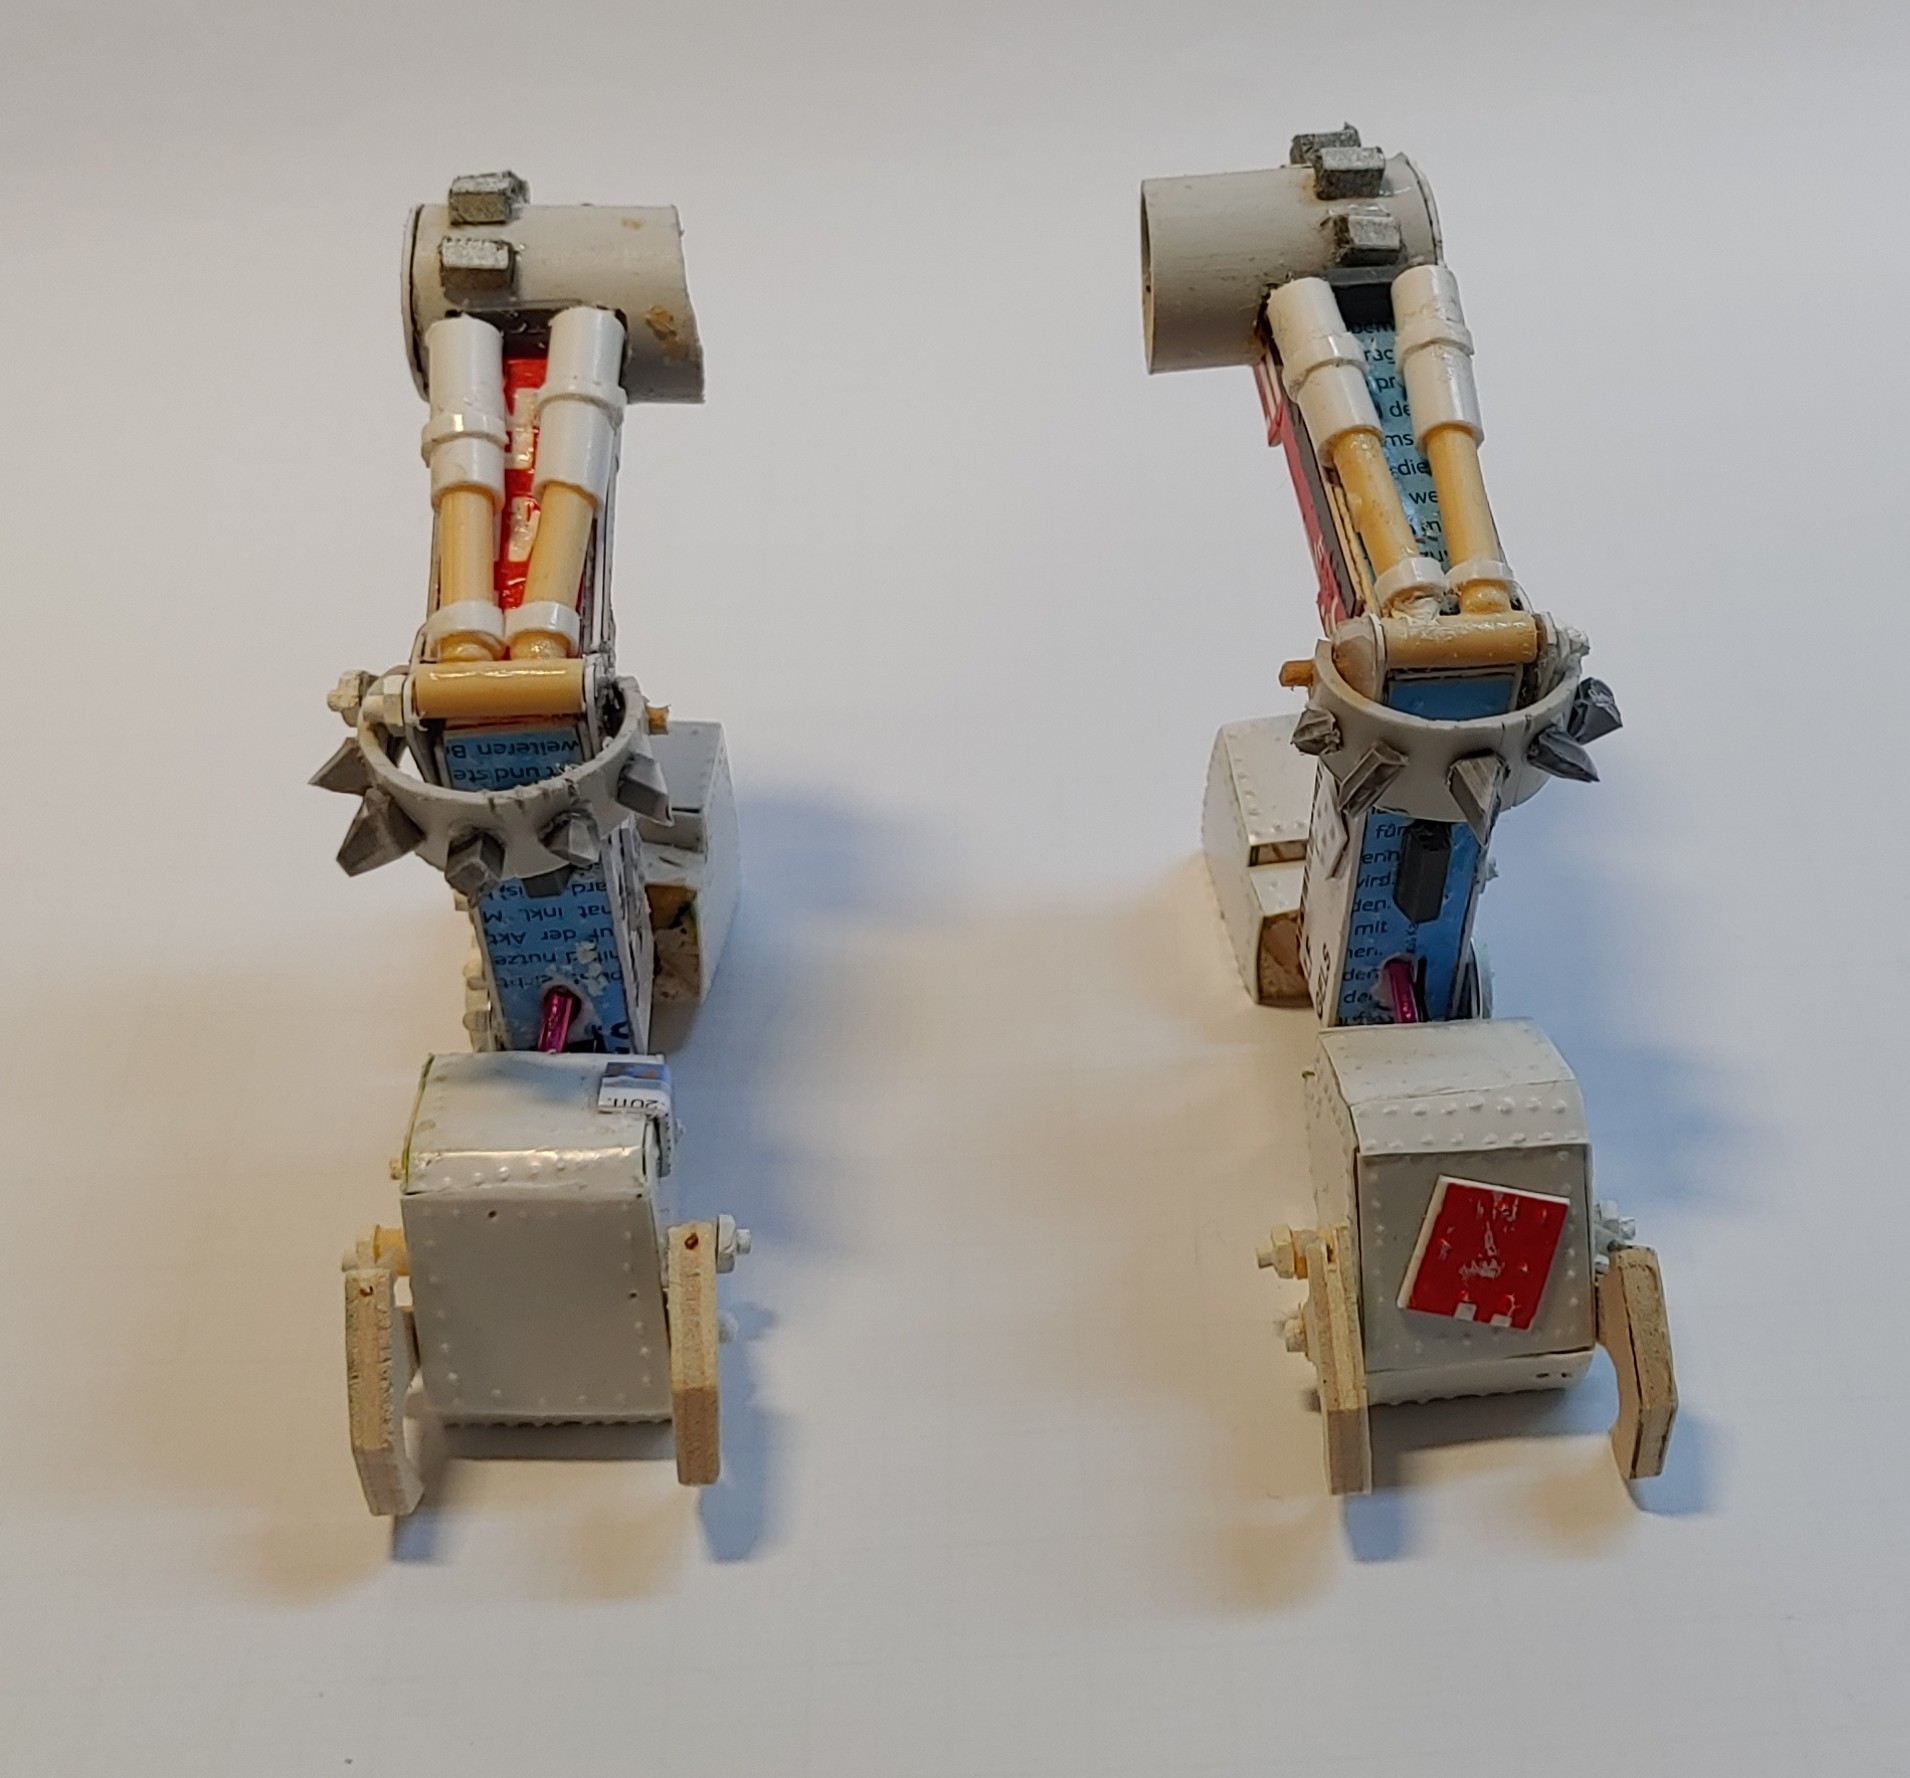
In the model I used a lot of pipes in different sizes.
The biggest ones are the ones from the arms.
These are cardboard pipes I had laying around.
I didn't want to use them because of the surface structure but they turned out all right, expecially after I used some plates to create some interesting surface features.
The smaller ones are from pvc pipes.
The ones that you use for laying cables.
I had two different sizes of those.
Next smaller are pieces of old ball pens.
They come in different sizes and with some interesting parts.
Next smaller size are lollypop sticks.
The Chupa Chup lollipops are plastic and hollow and I saved them when my kids throw them around the house.
For some time I was thinking about curved armour plates.
Like the ones on the arms.
It turns out that it's acutally pretty easy.
Use a heat gun to heat up your plasti-card and then bend it.
Let it cool down and don't burn your fingers.
A hair dryer might not be hot enough.
I have a heat gun but a candle flame might also do the trick.

Painting
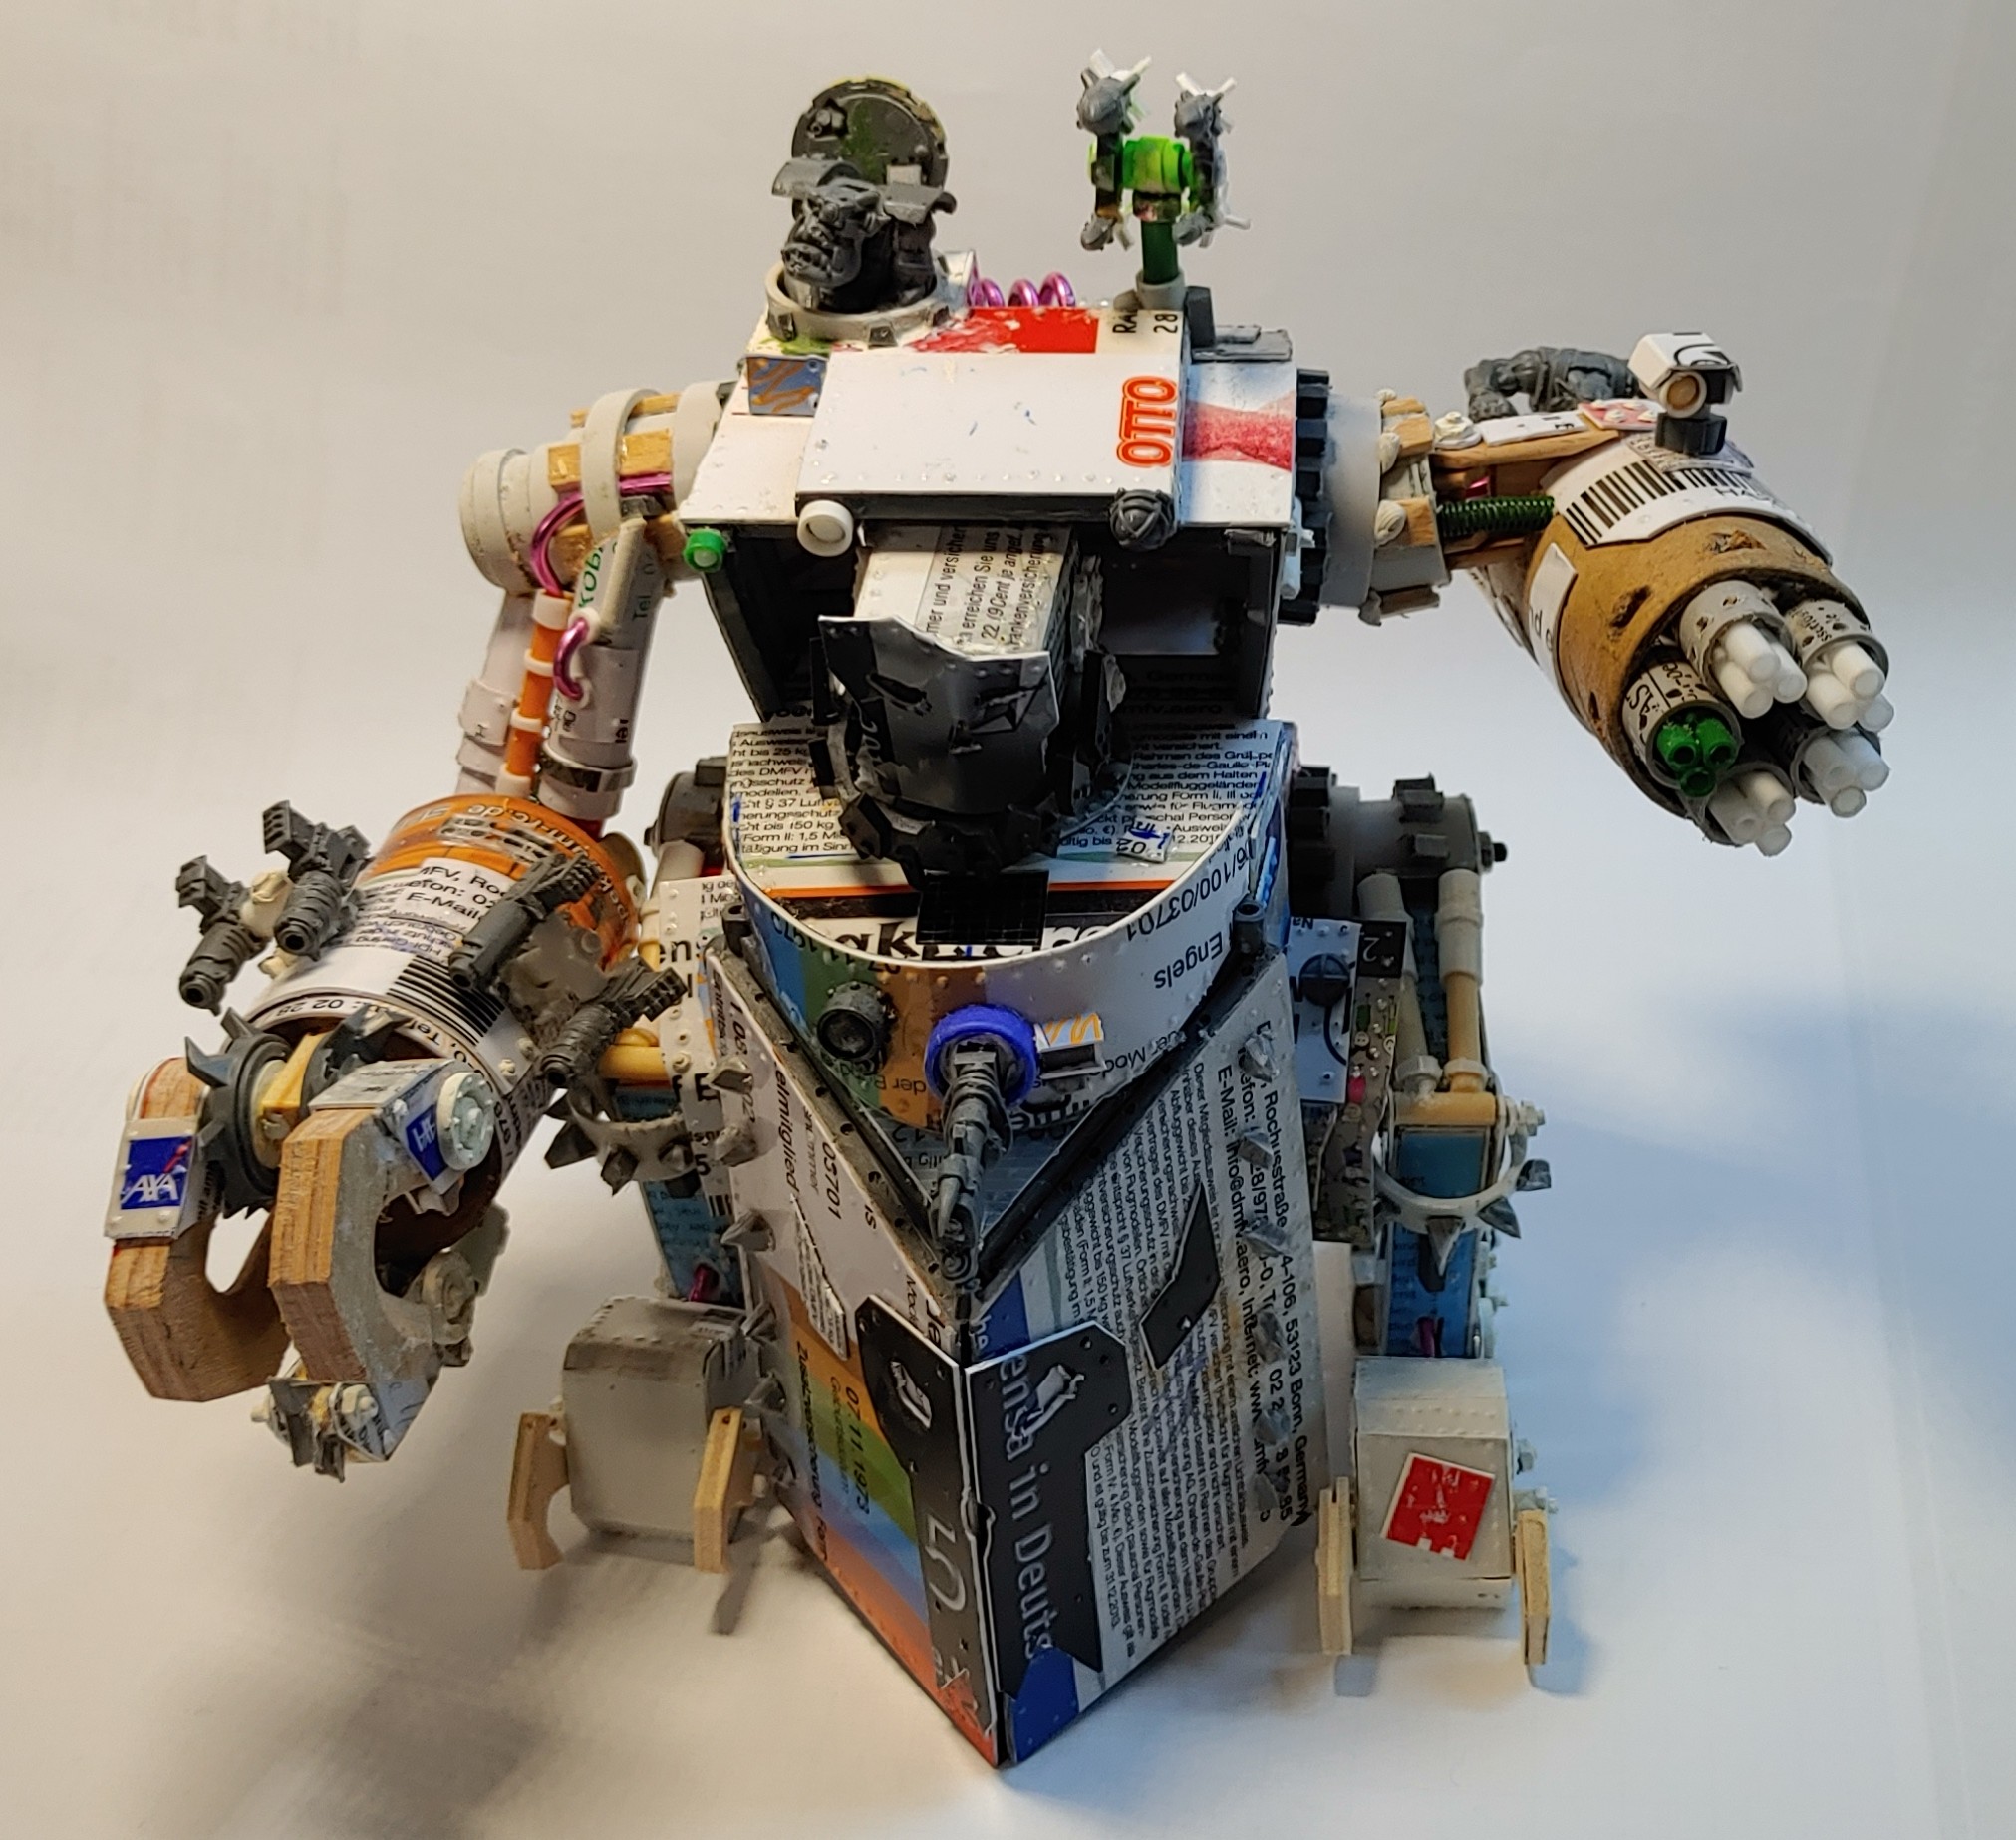
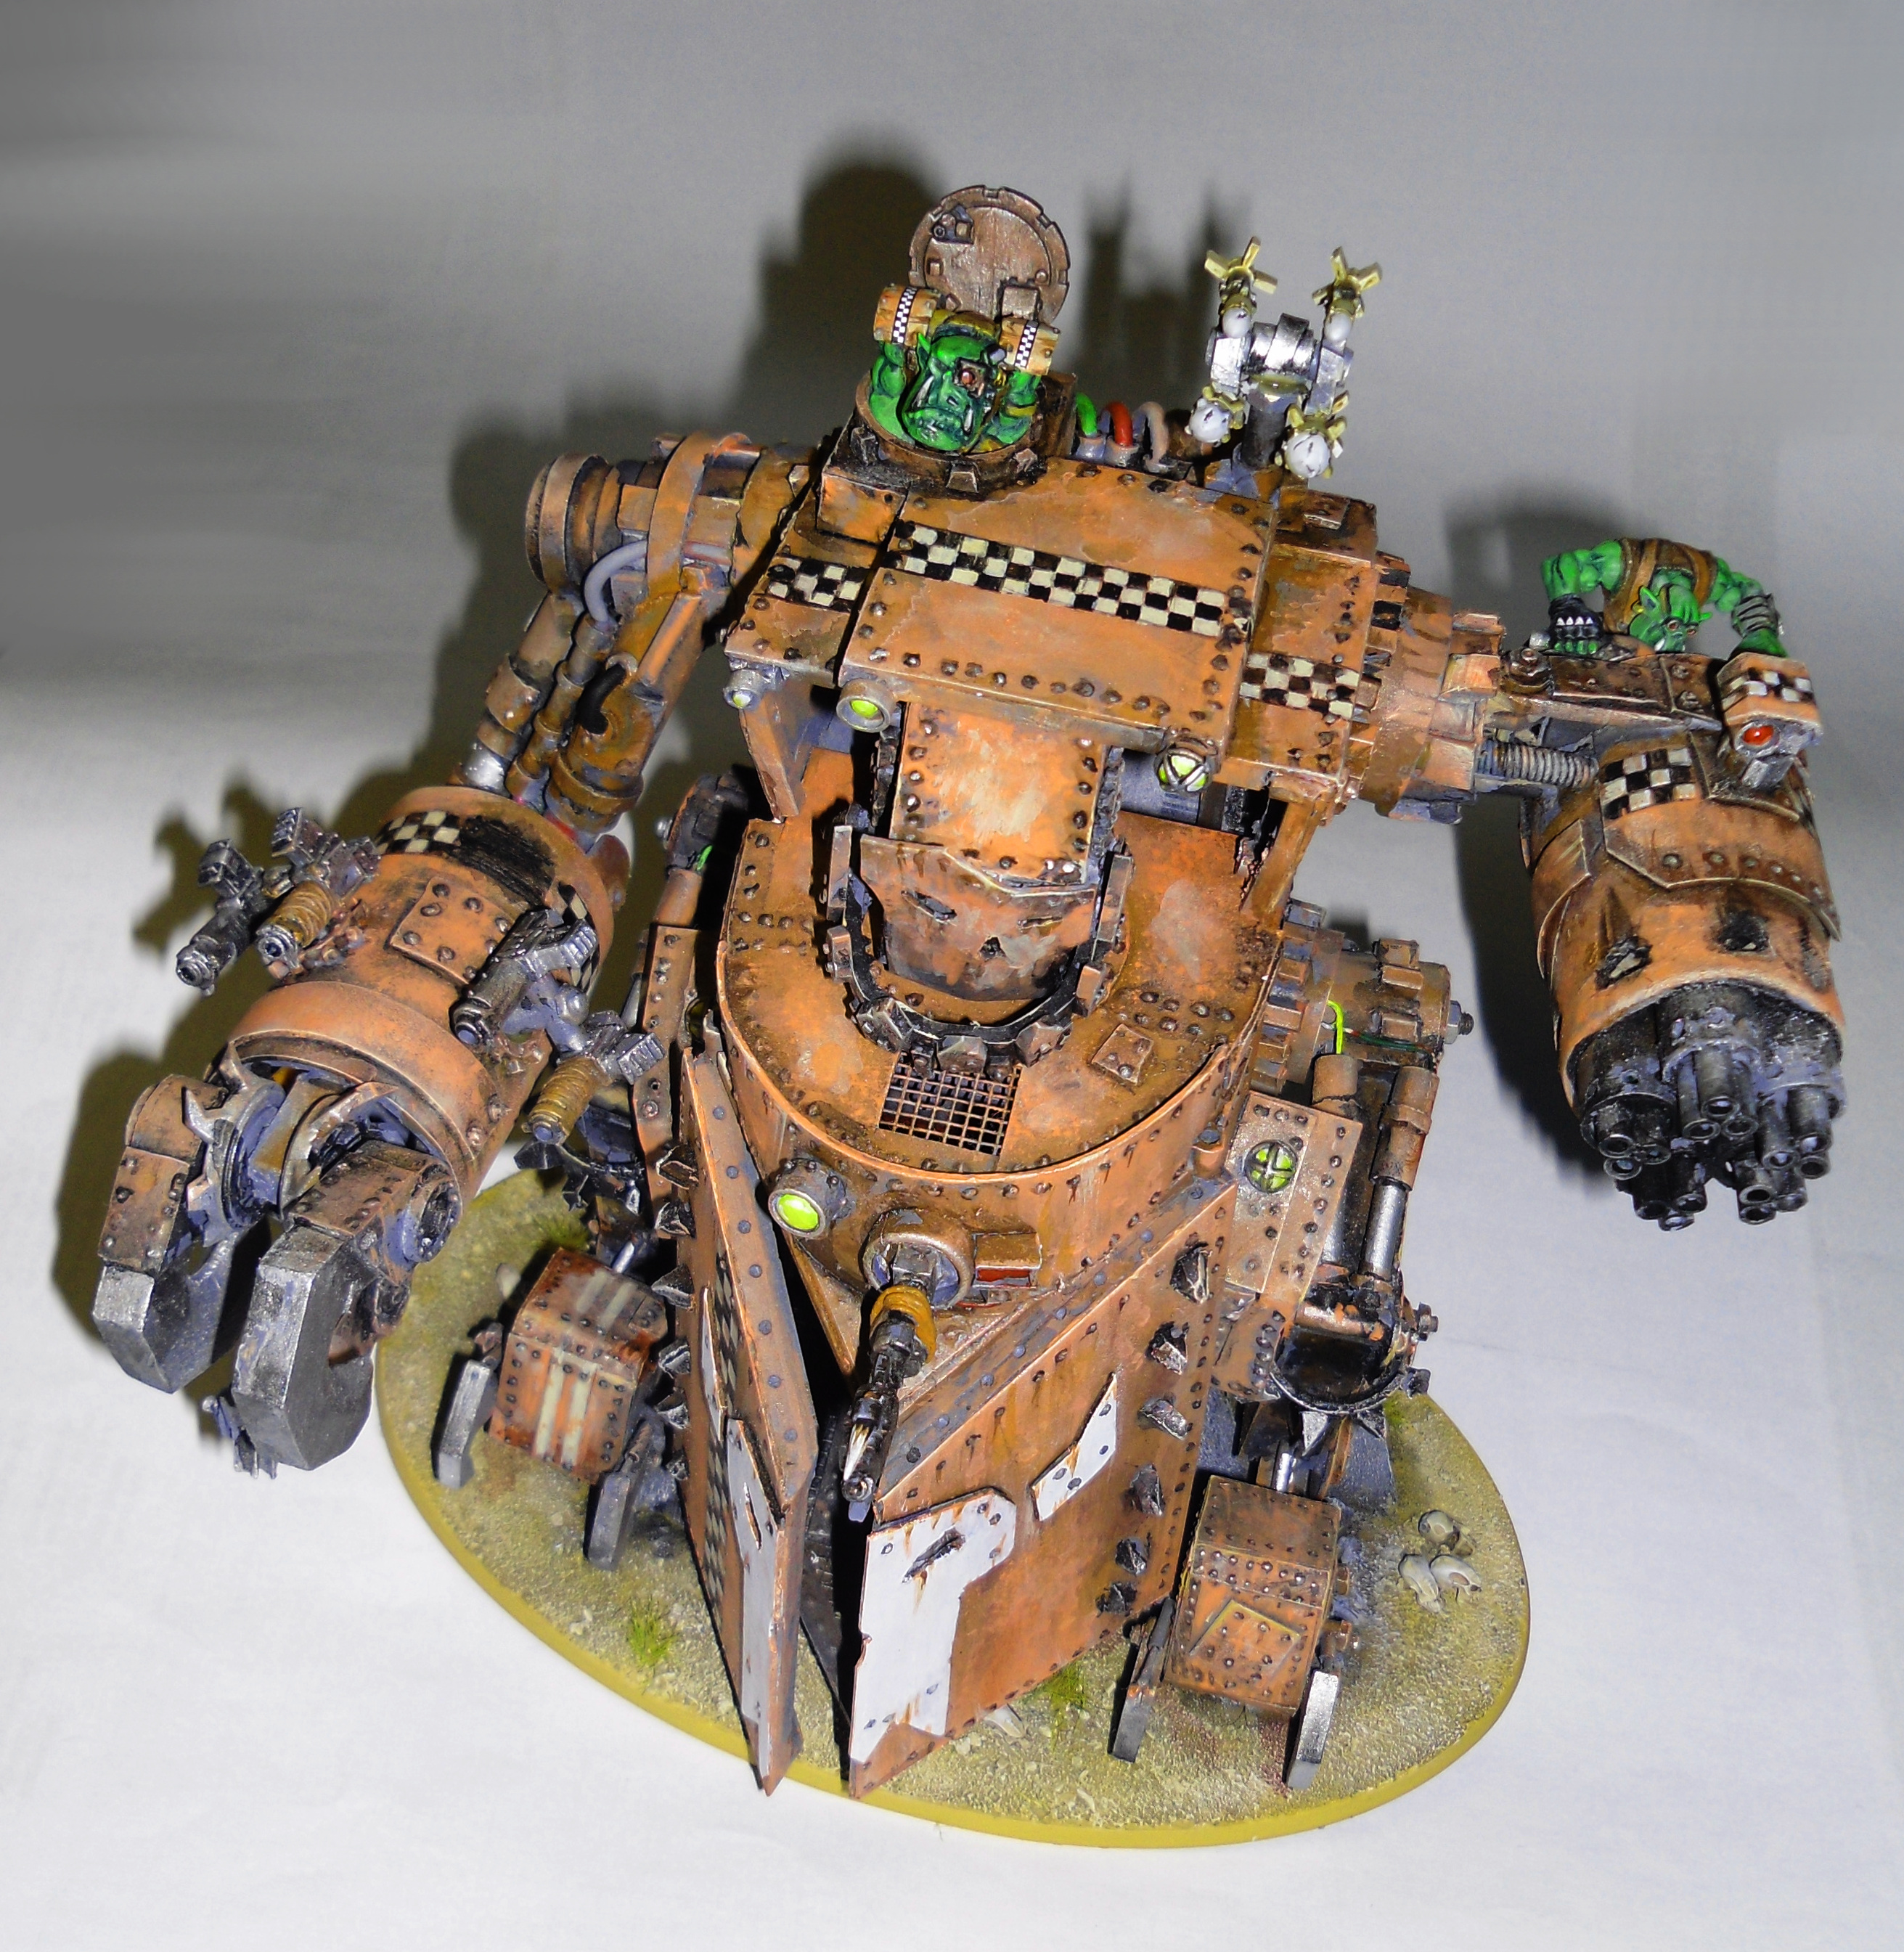
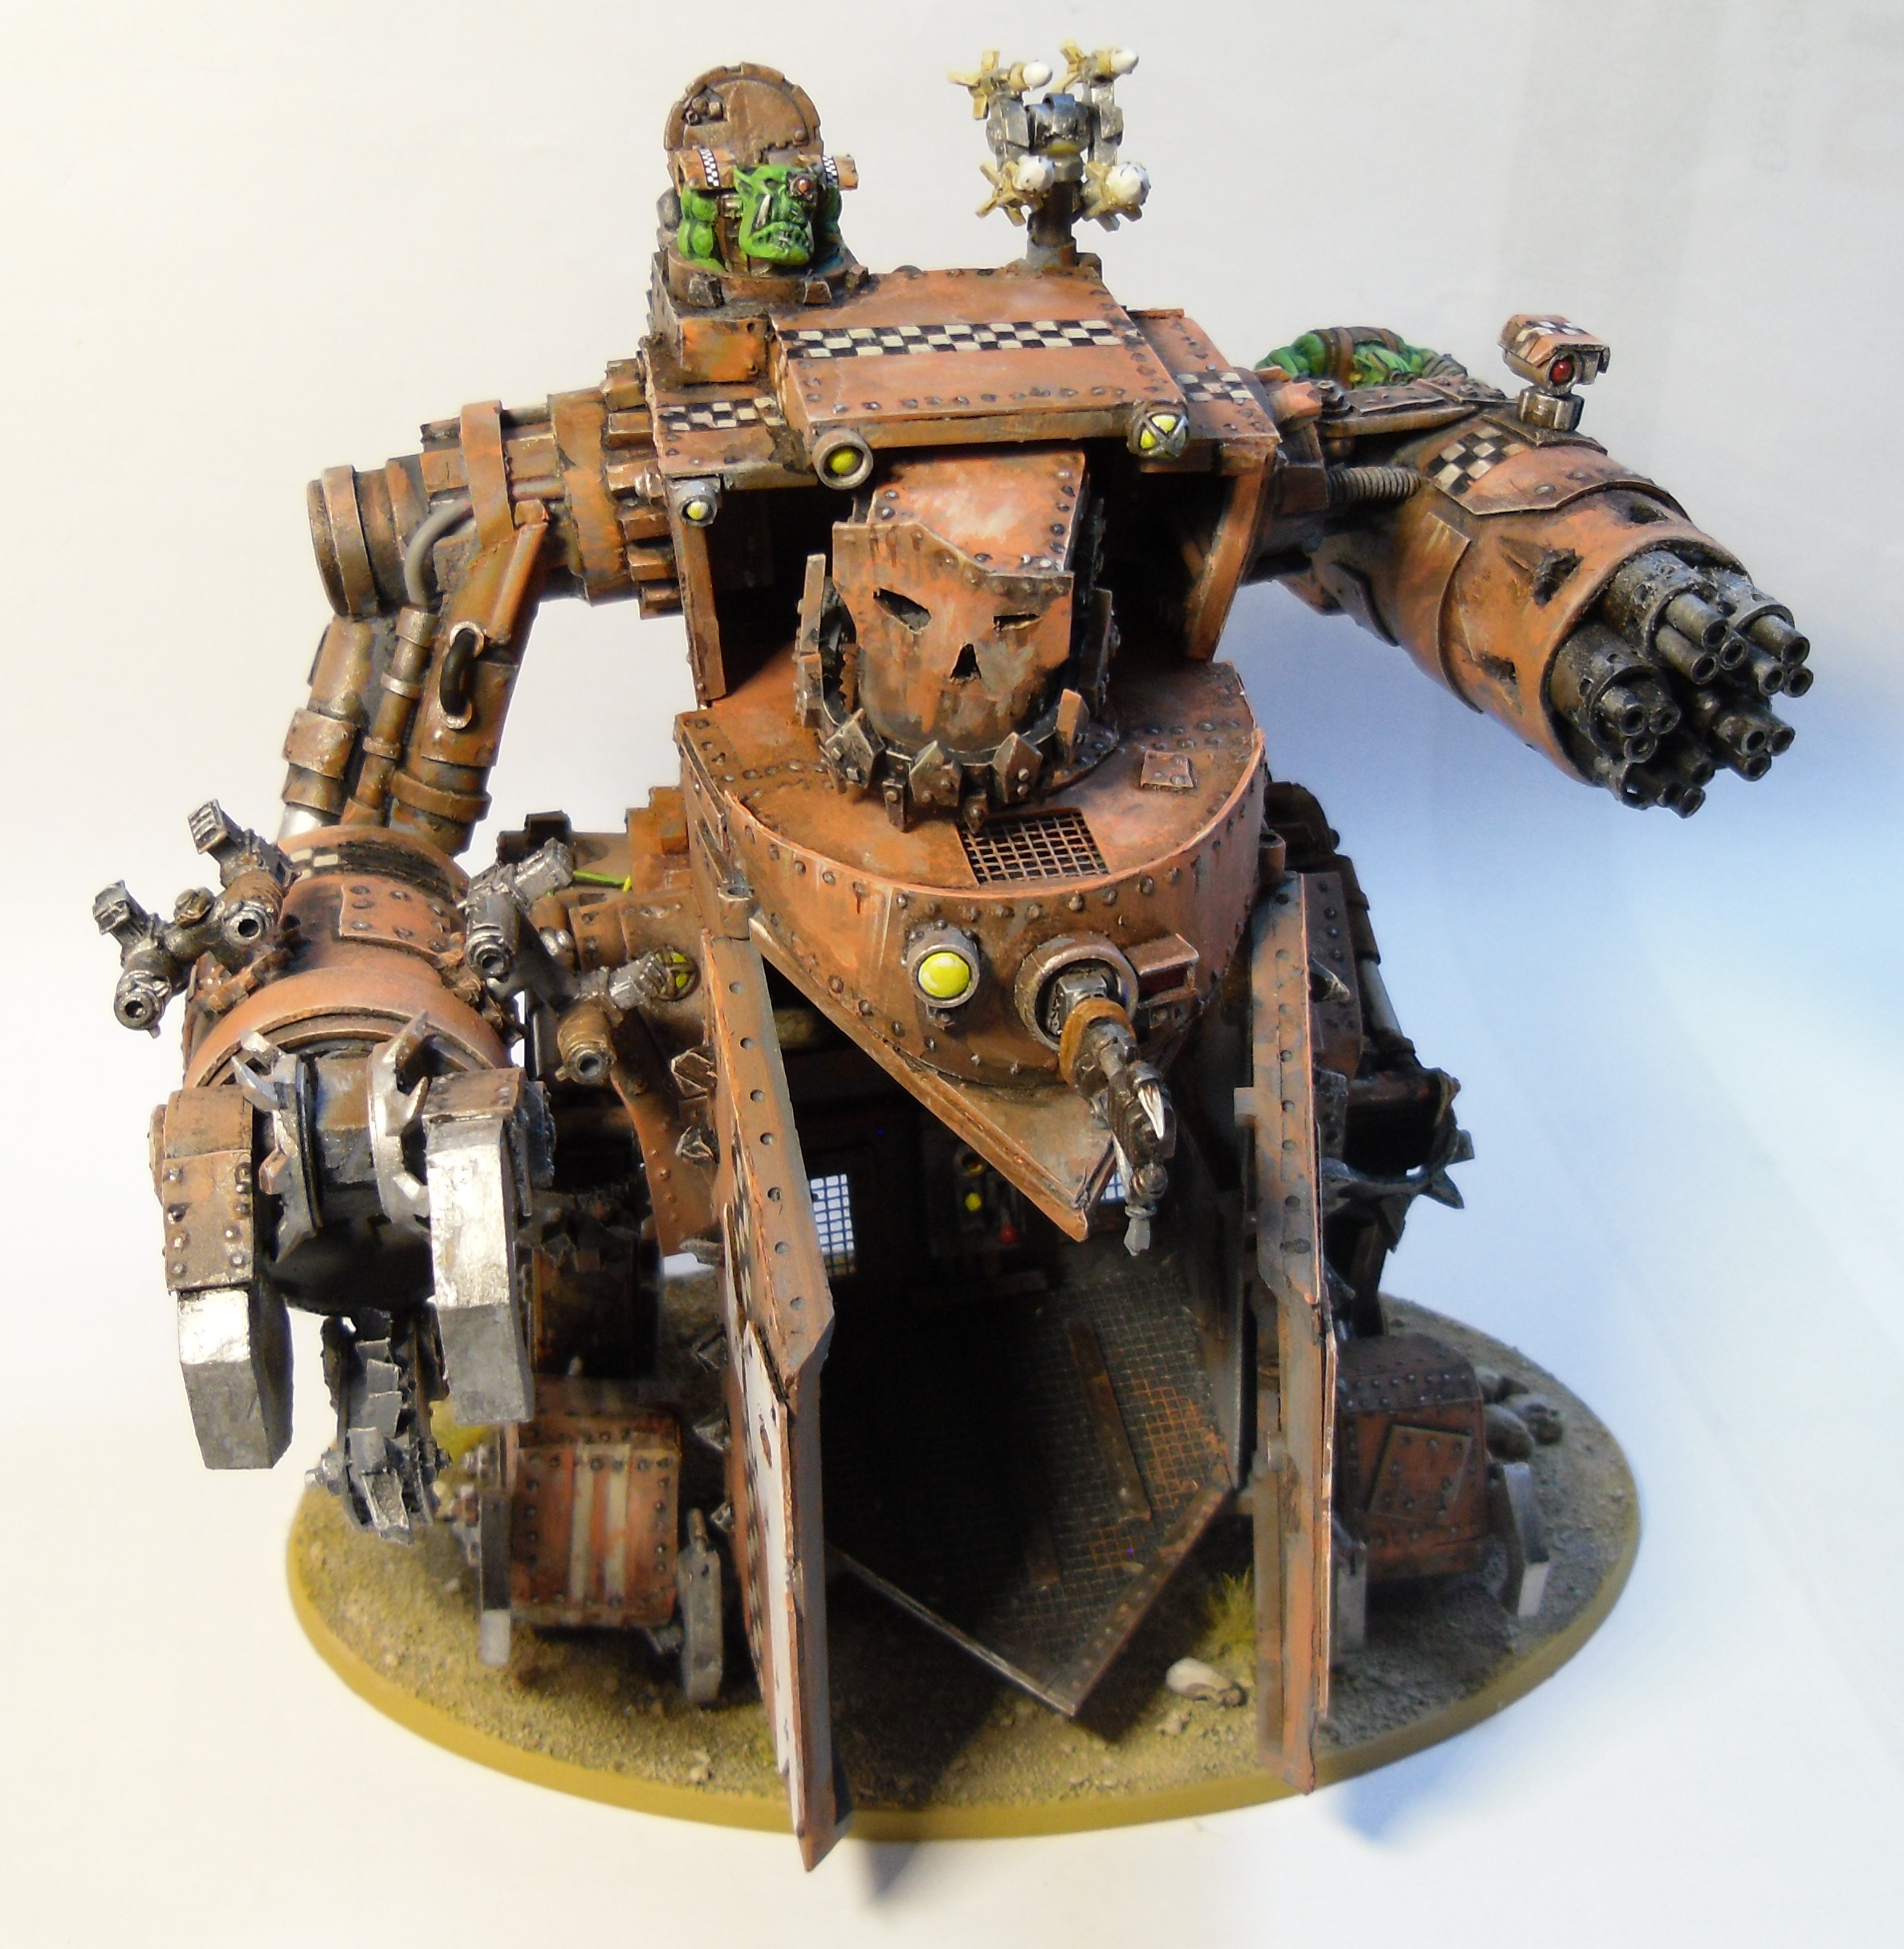
Finally some pictures of the painted model.
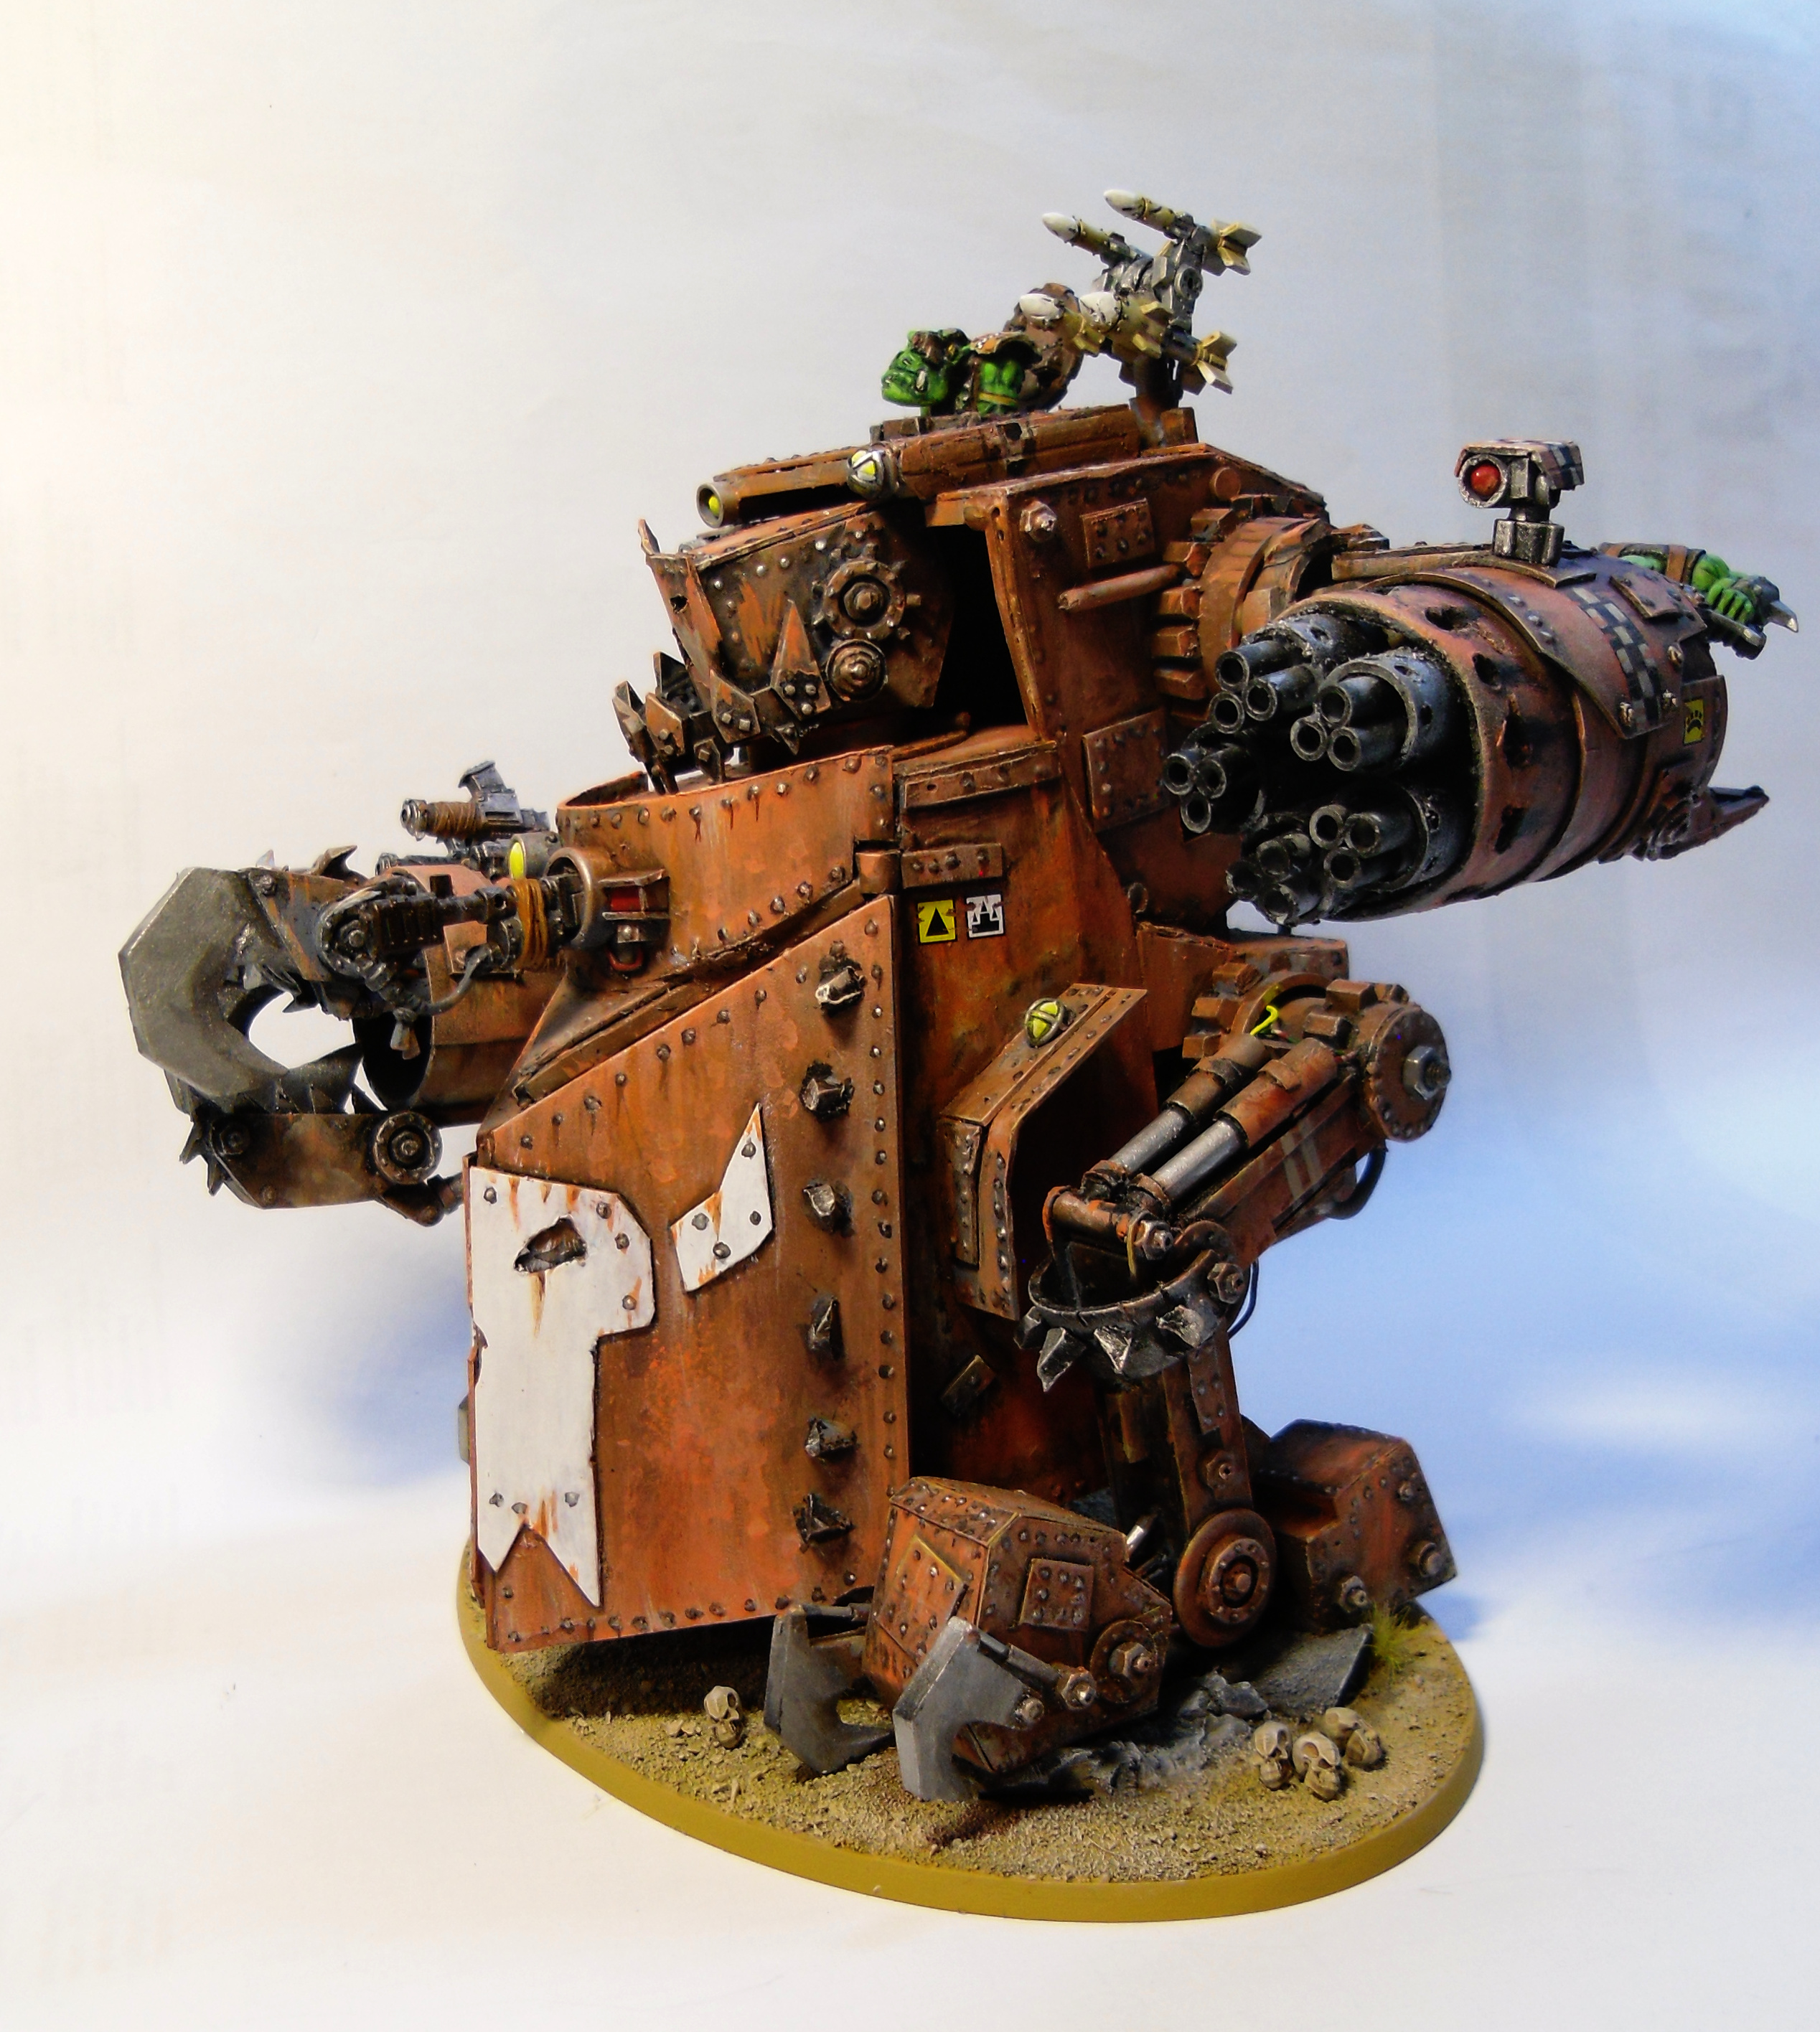
For a color scheme I was using the one from my 40k Orc army which is a kind of washed out bone color, desert style. However my previous models were getting more and more rusty, so this time it's kind of turned around. It's bone color over a very rusty base.
The base for the rust color is a dark red-brown, Vallejo hull red.
On top of that base color I painted streaks of watered down black and other brown tones.
Using foam I dabbed salomon orange all over the place.
Since I used this foam dabbing with dry paint you can actually see a structure when you zoom into the images.
If you want to have a smooth finish, don't do that!
I also used pools of watered down orange or bone color to get a water stains all over the place.
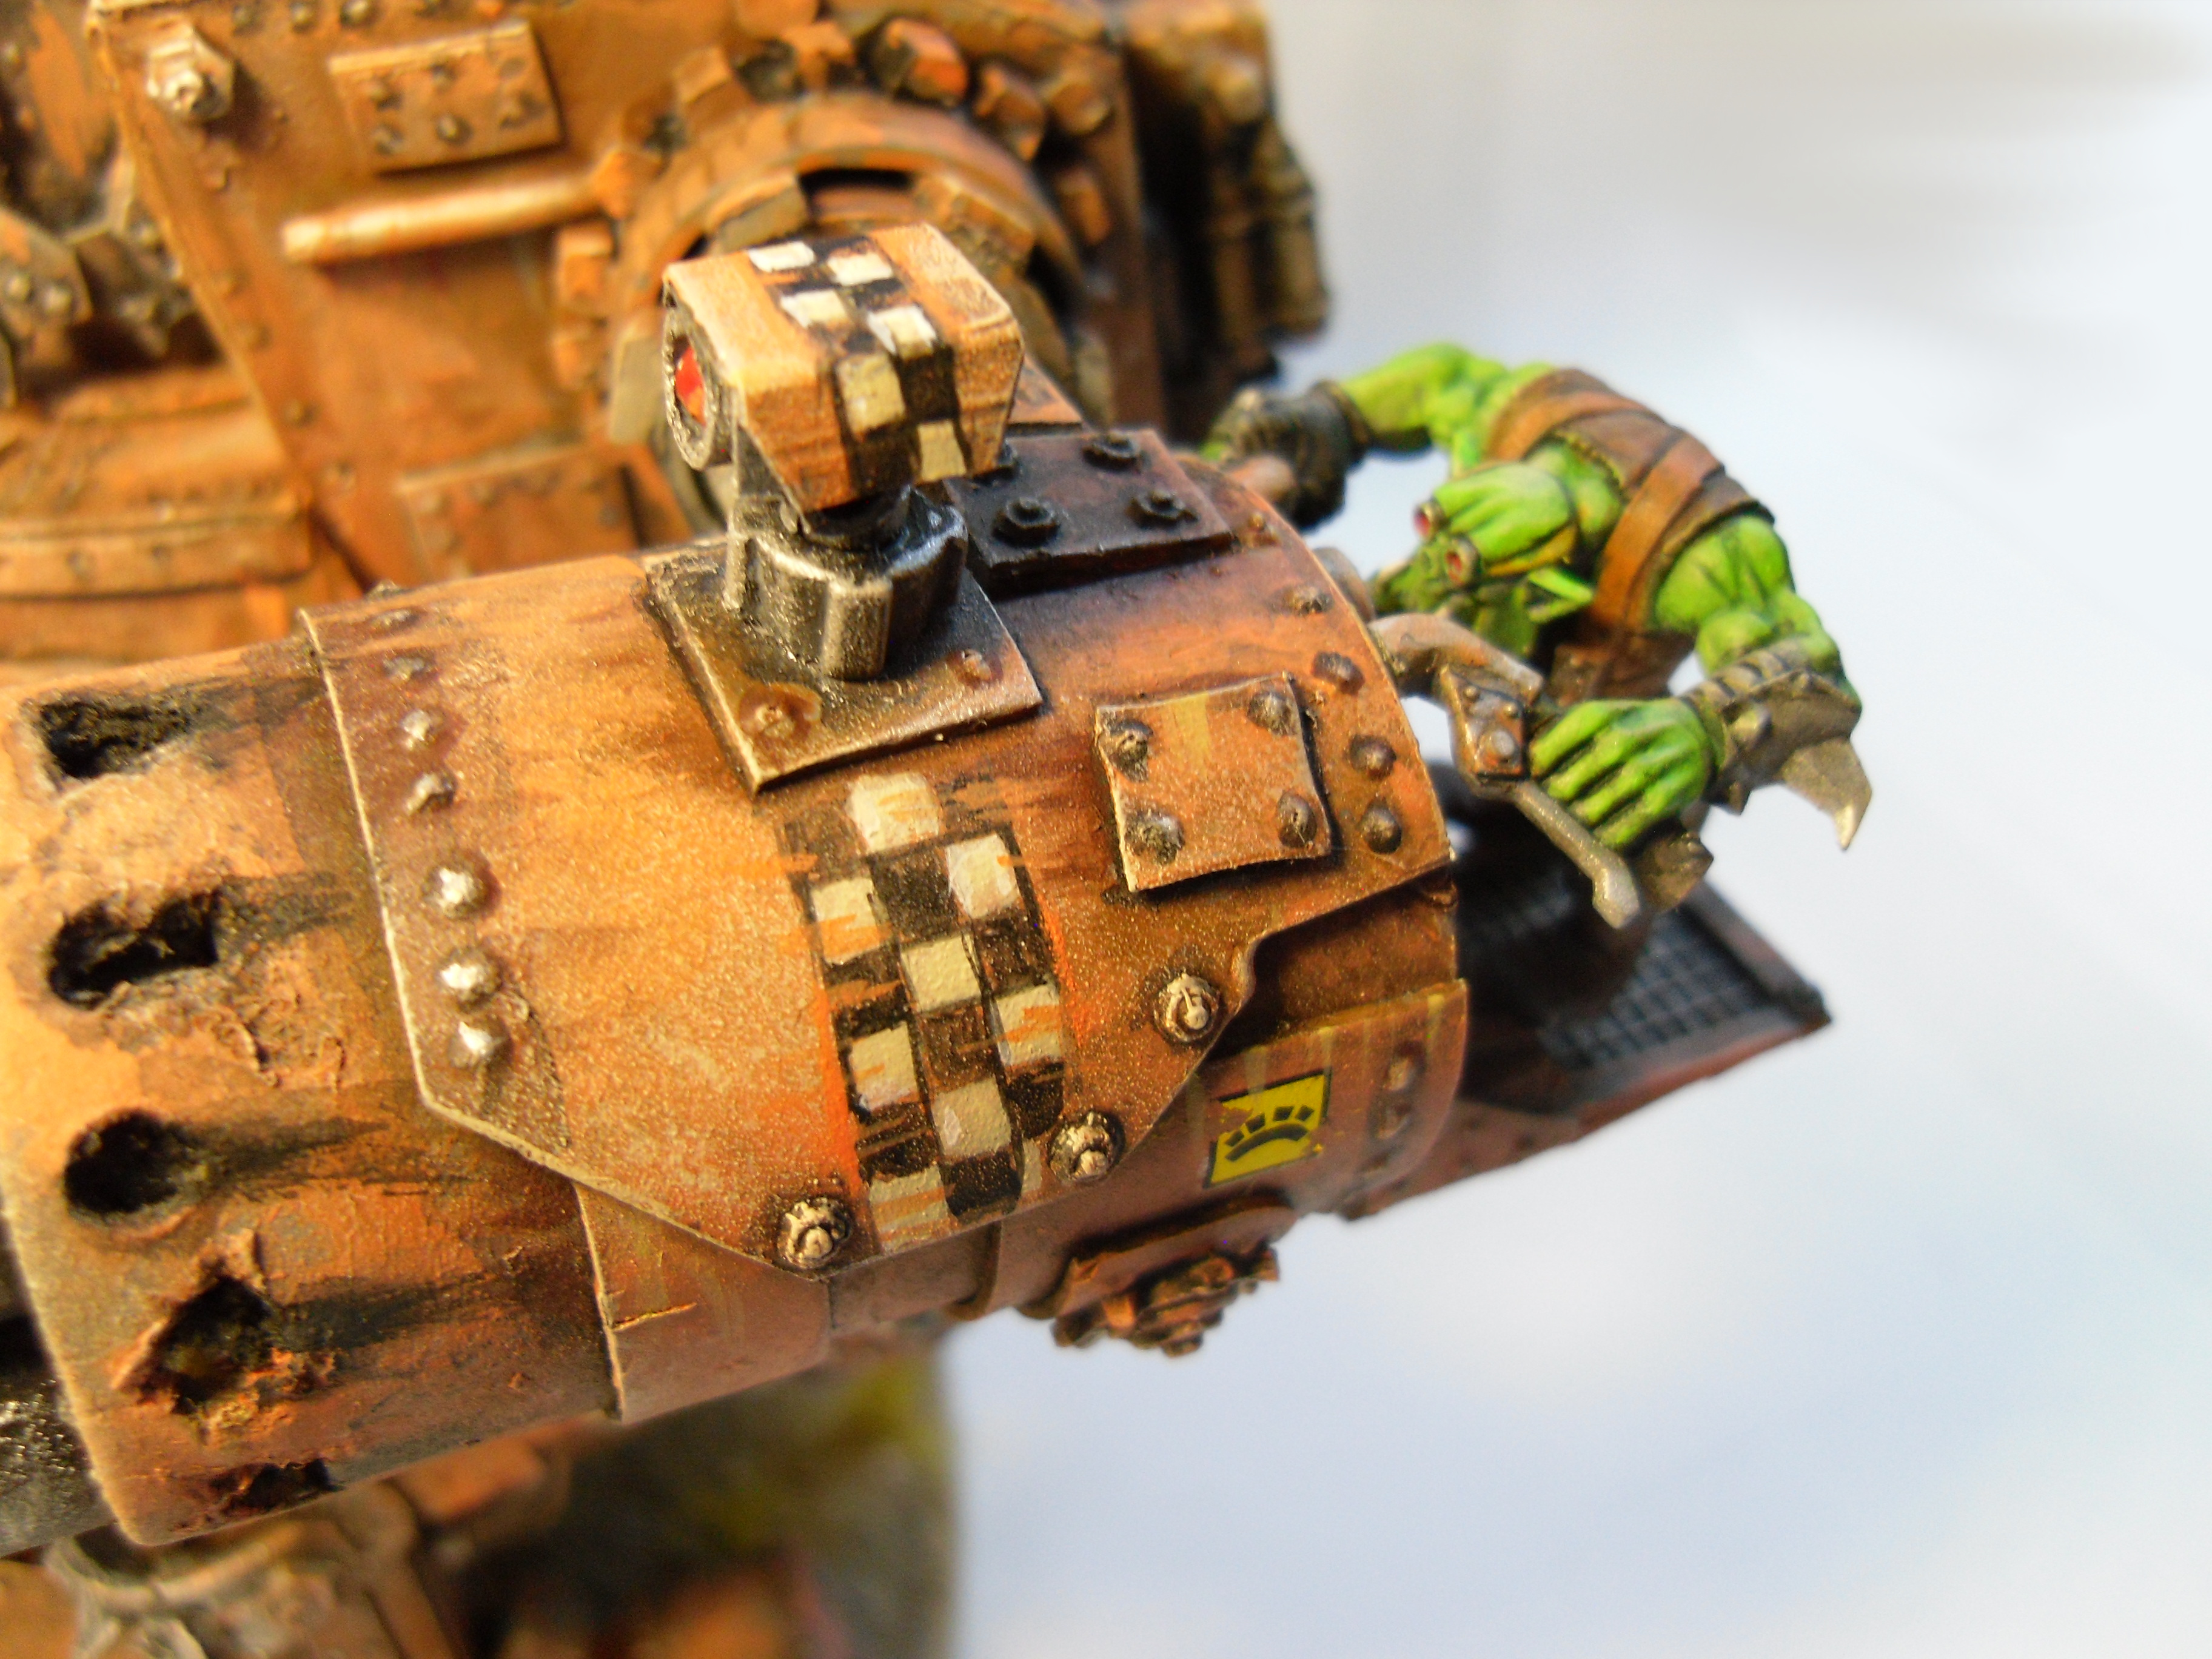
The gunner was another tricky issue. In the original the gunner is sitting but I didn't have any parts for a sitting Orc. What I did have though were some left over biker arms. So I did a standing gunner on a platform.
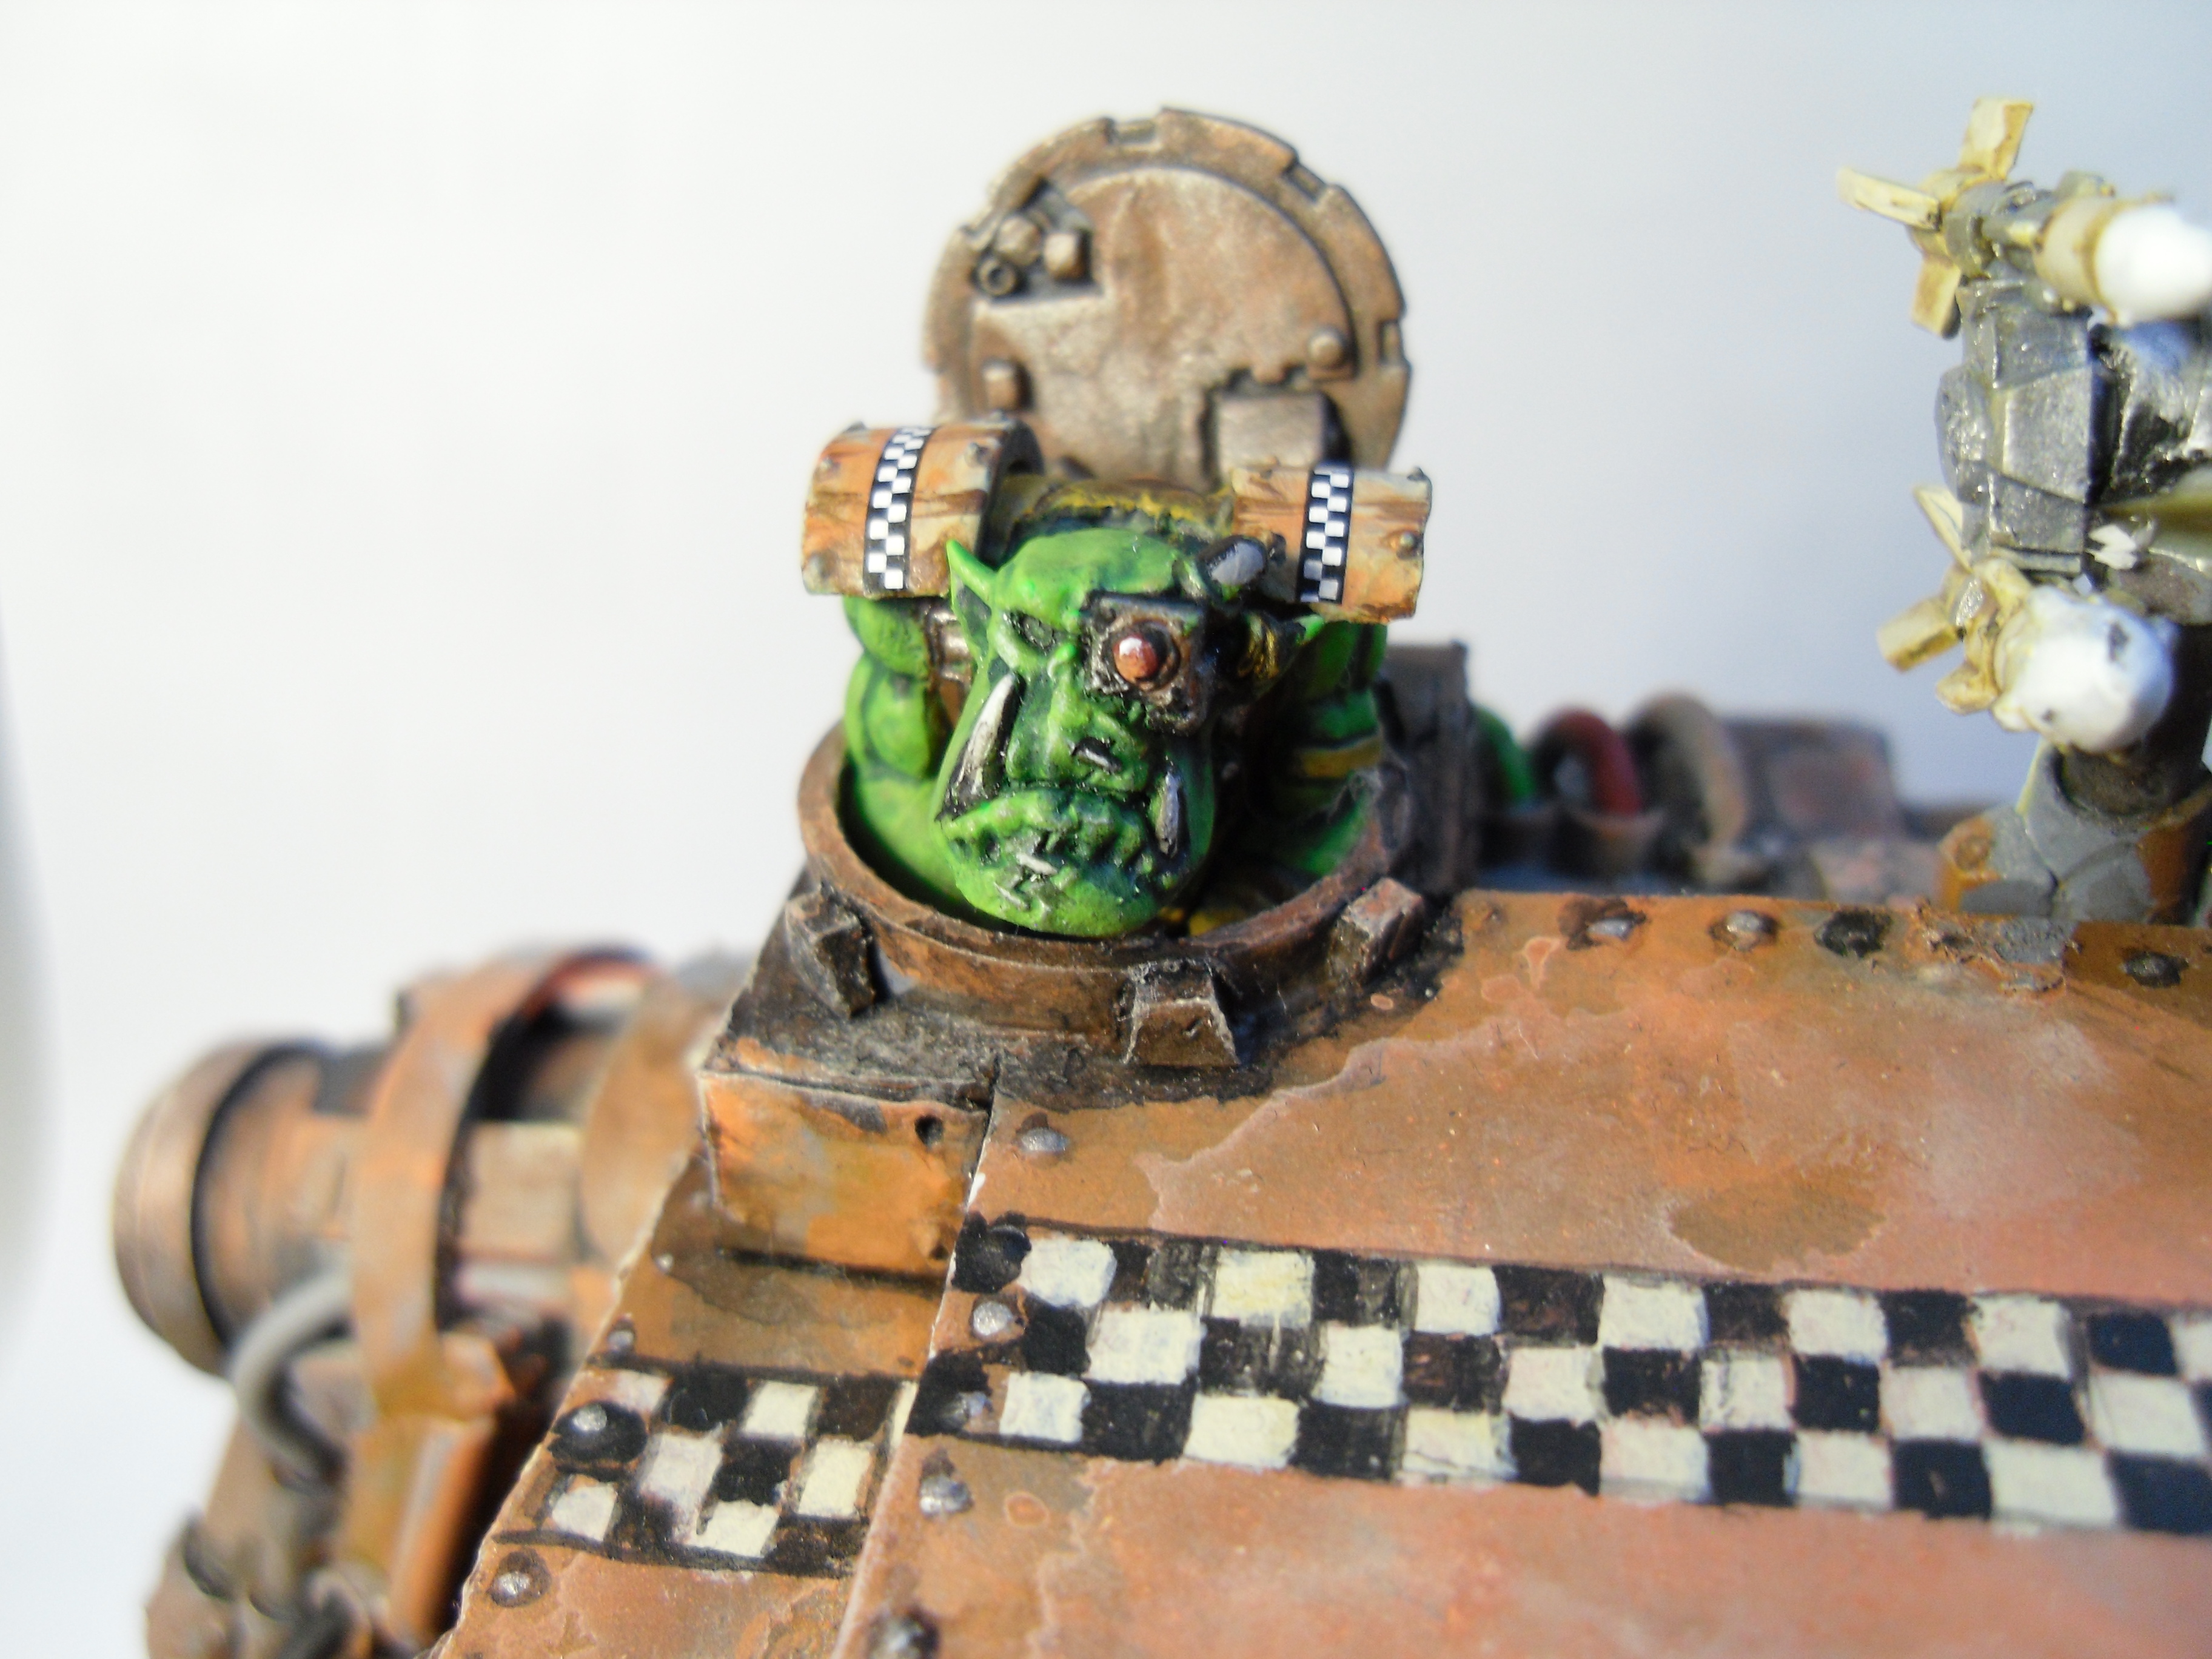
I did the base out of some clear plastic since I didn't have a spare original in the correct size.
The top is done with sand and a couple of pieces of balsa wood as rocks.
I also used some static grass and a couple of GW skulls.
All together it took me around one year with a lot of breaks from start to finish.
The total cost was zero since I only used materials I had laying around.
I didn't buy anything for this build.
That's recycling for you!
That's it. I hope you like it and it inspires you to do your own models.